
Want your real estate listings to sell faster and for more money? Quality photos are the key. Homes with professional photography sell 32% faster, bring in $3,000–$11,000 more, and receive 61% more online views. Here’s a quick summary of the top tips to improve your real estate photos:
- Shoot at the right time: Use golden hour lighting for soft, flattering results.
- Balance light: Combine natural and artificial light for even exposure.
- Use proper camera angles: Wide-angle lenses and level shots show spaces accurately.
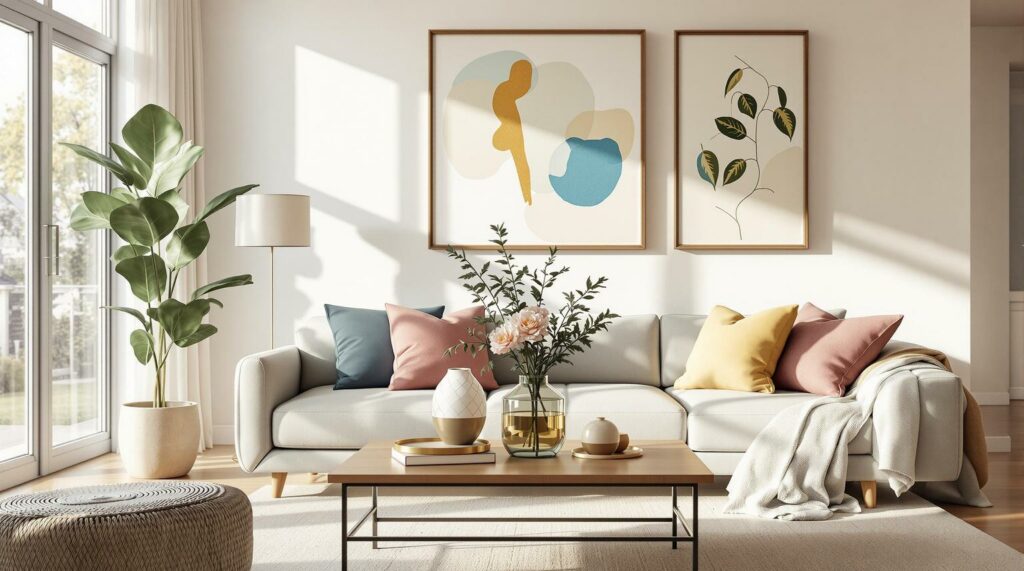
- Prepare the property: Declutter and consider virtual staging to make spaces look inviting.
- Invest in good gear: A full-frame camera, tripod, and lighting equipment are must-haves.
- Edit wisely: Enhance photos without altering the property’s true appearance.
- Hire professionals: Expert photographers can make your listings stand out.
Quick Fact: Listings with HDR and drone photography sell up to 68% faster.
These strategies ensure your photos highlight the property’s best features, attract more buyers, and lead to quicker sales. Let’s break down each tip in detail.
Real Estate Photography for Beginners
1. Pick the Best Time of Day to Shoot
Choosing the right time of day can make a huge difference in real estate photography. Proper lighting not only highlights a property’s best features but also makes the images more appealing to potential buyers.
Morning and Evening Light
Shooting during the golden hour – shortly after sunrise or just before sunset – provides soft, warm lighting that minimizes harsh shadows and enhances the property’s appearance.
| Property Direction | Best Shooting Time |
|---|---|
| North-facing | 10:00 AM – 2:00 PM |
| East-facing | Early morning |
| South-facing | Early morning or evening |
| West-facing | Late afternoon or evening |
Homes photographed during this time tend to perform better, with images receiving 61% more views compared to those taken at other times. Try to schedule your session within 30 minutes of sunrise or sunset to make the most of this natural light.
Knowing the sun’s path can also help you plan effectively.
Plan Around Sun Direction
The sun’s movement changes with the seasons, especially in the Northern Hemisphere, so it’s helpful to adjust your schedule accordingly:
- Winter: Sun rises in the southeast and sets in the southwest
- Summer: Sun rises in the northeast and sets in the northwest
- Equinoxes: Sun rises directly in the east and sets directly in the west
To avoid harsh shadows, position yourself so the sun lights the facade evenly. On overcast days, the diffused light can work to your advantage by reducing shadows and enhancing colors.
For properties with standout features like pools, outdoor spaces, or striking city views, twilight shoots – about 30 minutes after sunset – can create a dramatic and eye-catching effect.
2. Control Indoor and Outdoor Light
To capture photos that truly showcase a property, it’s essential to balance natural and artificial light. The goal is to create even lighting without harsh shadows or overly bright areas.
Let in Natural Light
Maximize daylight by opening window coverings and cleaning the glass. For rooms with multiple windows, adjust your approach based on window direction:
| Window Direction | Tips for Managing Light |
|---|---|
| North-facing | Add artificial light to reduce shadows |
| South-facing | Use sheer curtains to soften direct sunlight |
| East/West-facing | Schedule shots to avoid glare from the sun |
| Multiple windows | Balance light levels across all sources |
For rooms with bright windows, consider using HDR (High Dynamic Range) techniques. This involves taking multiple exposures and blending them during editing to ensure both interior and exterior details are captured.
Add House Lights
Once you’ve optimized natural light, enhance the space with carefully planned artificial lighting.
Professional photographer Kevin Vitali highlights the importance of blending light sources effectively:
"Ultimately what I am trying to do is match the scene the way you see it when you walk into the room. I have retained the view out the window, while giving the impression the main source of light is the window while being able to fill in and balance the rest of the scene."
Here are some tips for achieving balanced lighting:
- Use off-camera flashes to bounce light off ceilings for soft, even illumination.
- Match the color temperature of artificial lights with natural daylight by using gels on flash units.
- Add softboxes or diffusers to reduce harsh shadows in darker areas.
- Combine flash with ambient light, keeping about 25% of the ambient light for a natural look.
For tricky lighting situations, try using graduated ND filters. These help manage bright window light while keeping the interior properly exposed, saving time during editing.
3. Set Up the Right Camera Position
Getting the camera position right ensures you capture room dimensions naturally and with the proper perspective.
Use Wide-Angle Lenses Correctly
A wide-angle lens (16mm to 24mm) is great for capturing entire rooms in one shot, making spaces feel open and inviting. But be cautious – incorrect use can lead to distortion that misrepresents the property.
Here are some tips for better wide-angle shots:
- Position the camera 4–5 feet above the ground to maintain a natural perspective.
- Keep the camera level to avoid slanted vertical lines.
- Avoid placing key features near the edges of the frame, where distortion is more noticeable.
- Adjust the height depending on the room’s purpose (e.g., slightly higher for kitchens, slightly lower for dining rooms).
Rob Moroto from Calgary Photos sums it up perfectly:
"Shoot from the heart"
Apply the Rule of Thirds
Once your wide-angle shot is set, use the rule of thirds to create balanced and visually appealing compositions. This technique divides the frame into nine equal sections using horizontal and vertical grid lines, helping you highlight important property features.
Professional photographer Shawn Ingersoll explains:
"It’s not really a rule. It’s more of a guideline or best practice"
Photography instructor Khara Plicanic shares practical advice:
"Turn it on so you can see what you’re doing as you’re doing it. Eventually, you get a feel for it"
| Camera Position | Key Tips |
|---|---|
| Height | 4–5 feet from the floor |
| Vertical Lines | Keep them perfectly straight |
| Room Features | Align with grid intersections |
| Camera Angle | Point straight ahead; avoid tilting up or down |
| Distance | Position halfway between floor and ceiling |
For the best results, activate your camera’s grid display and align key room elements along the grid lines or their intersections. This works especially well for photographing features like kitchen islands, living room focal points, window views, architectural details, and built-in storage.
sbb-itb-82c5f45
4. Prepare the Property
Staging a home can make a big difference, with staged properties selling for 5%–23% above the list price and achieving an 85% success rate.
Declutter
Clearing out clutter helps highlight the home’s best features. As Sarah Carroll puts it:
"Buyers need to see that most of your stuff is gone… what you want to do is get them to spend more time picturing their stuff and life there."
Here’s a quick guide to what should stay and what should go:
| Area | Remove | Retain |
|---|---|---|
| Kitchen | Small appliances, magnets, dishes | Built-in appliances, one decorative item |
| Bathrooms | Personal hygiene items, towels | Clean shower curtain, fresh hand towel |
| Living Areas | Family photos, magazines, toys | Essential furniture, minimal decor |
| Bedrooms | Personal items, excess pillows | Basic bedding, two pillows per side |
| Outdoor | Garden tools, toys, vehicles | Clean patio furniture, maintained plants |
Once you’ve removed distractions, you can take it a step further by digitally enhancing the empty spaces.
Virtual Staging
Virtual staging is a cost-effective way to make your property stand out. It increases buyer interest by 37%, boosts perceived value by up to 18%, and generates 72% more online views. Plus, it’s much cheaper than traditional staging, costing $20–$30 per image compared to $800–$1,200 per room.
As one expert explains:
"Some people walk in an empty house and that’s all they see – an empty house – and they can’t picture what it would look like staged, so this helps a lot."
Focus on staging key areas like:
- Living Room
- Master Bedroom
- Dining Room
- Kitchen
Virtual staging not only makes your property more appealing but also speeds up the sales process by 29%.
5. Use Good Camera Gear
Having the right gear can make a huge difference in real estate photography. Homes with professional photos tend to sell for $3,400 to $11,200 above their list prices and get 61% more online views.
Select a Camera
Once you’ve nailed down lighting and setup, it’s time to focus on your camera. Most real estate photographers rely on either mirrorless cameras (63%) or DSLRs (36%). When choosing a camera, keep these features in mind:
| Feature | What to Look For | Example Models |
|---|---|---|
| Resolution | At least 24MP | Sony A7R IV (61MP), Nikon Z7 II (45.7MP) |
| Sensor Type | Full-frame for better quality | Canon EOS R5, Sony A7 series |
| Video | 4K capability | Canon EOS R6 Mark II, Nikon Z6 II |
| Stabilization | In-body or lens-based | Nikon Z6 II (IBIS), Canon Rebel SL3 (optical) |
High resolution is especially important for creating sharp images that look great both online and in print.
Add Basic Equipment
A good camera is just the start. To get the best results, you’ll also need some key accessories to improve your shots.
Here’s a quick list of must-have gear:
| Equipment | Why You Need It | Recommended Options | Price Range |
|---|---|---|---|
| Tripod | Keeps shots steady, great for HDR | Manfrotto MT190XPRO4 | $279 |
| Wide Lens | Covers entire rooms | Canon EF 16-35mm f/2.8L III | $2,199 |
| Lighting | Fills in shadows | Yongnuo YN560 IV Speedlites | $85 each |
| Triggers | Controls remote flashes | Yongnuo YN560-TX II | $45 |
For interior shots, aim to use at least two speedlites paired with remote triggers. Properly positioning your lights can make a big difference, especially in spaces with limited natural light.
When choosing a tripod, consider models with a geared head ($249) or a grip ball head ($219). Aluminum tripods are often more durable than their lighter carbon fiber counterparts, making them a solid choice for real estate photography.
6. Edit Photos Properly
Good photo editing not only improves a listing’s visual appeal but also helps buyers feel confident about what they’re seeing. Just like proper lighting and staging, careful editing ensures the property looks its best without misleading potential buyers. The goal? Highlight the home’s natural features while keeping everything accurate.
Fix Light and Color
Start with basic adjustments to make lighting and colors look natural:
| Adjustment | Purpose | Best Practice |
|---|---|---|
| White Balance | Adjust color temperature | Match the room’s actual lighting |
| Exposure | Correct brightness levels | Balance shadows and highlights evenly |
| Contrast | Add depth to the image | Use lightly to enhance key details |
| Luminosity | Even out lighting across rooms | Keep exposure consistent throughout |
| Color Balance | Show true colors | Match paint and material colors exactly |
AI tools like Fotor can help you make these changes quickly while keeping the results natural. If you’re editing multiple listings, try using presets that mimic natural light or film for a consistent look across your photos.
Once you’ve adjusted the basics, double-check that the edits reflect how the property looks in real life.
Keep Edits Realistic
"You don’t want to change a house so much that it has a negative impact when a buyer comes to see the property." – Daniel Rothamel, ABR, Buyer’s Agent and Manager with Strong Team, REALTORS®
To maintain credibility, stick to these professional editing guidelines:
| Acceptable Edits | Unacceptable Edits |
|---|---|
| Fixing exposure issues | Changing wall colors |
| Removing temporary clutter | Altering structural features |
| Balancing natural colors | Over-saturating colors |
| Straightening vertical lines | Warping room dimensions |
| Mild sky enhancements | Adding fake elements |
If you’re using professional editing services like PhotoUp or Pixlmob, make sure to provide clear instructions about keeping the edits realistic. Focus on enhancing natural lighting and details without dramatic changes. This way, you’ll build trust with buyers and avoid any risk of misrepresentation.
7. Hire Photo Professionals
Taking property photos yourself often doesn’t do justice to its best features. Professional photographers, with their skills and specialized equipment, can make a property stand out and help it sell faster.
Once you’ve refined your shooting and editing techniques, teaming up with photography experts can give your listings an extra edge.
HomeJab: On-Demand Real Estate Photography Services
HomeJab connects real estate agents with experienced local photographers specializing in property photography. They offer a variety of services, including:
| Service Type | Features | Typical Cost |
|---|---|---|
| Standard HDR Photos | 15–50 high-quality photos | $175–$379 |
| Video Tours | Walkthrough videos with photos | $275–$549 |
| 3D Virtual Tours | Interactive property walkthroughs | $315–$869 |
| Virtual Staging | Digital furniture placement | $50 per photo |
With a 4.8/5 rating from 859 reviews, HomeJab ensures quick delivery, typically within 24–48 hours. Real estate agent BWE Investment Sales shared their experience:
"This was my first time using HomeJab and I was extremely impressed. The website was easy to schedule a photoshoot, the response was quick and the photos were delivered within 48 hours. The finished photos were OUTSTANDING! I was a little nervous of what we would get with me not being at the site, but I couldn’t have been happier. Also, the prices were very reasonable. Can’t wait to use them again in other projects."
In addition to traditional photography, many services now include aerial shots to give listings a fresh perspective.
Add Drone Photos and Videos
Aerial photography can take your listing to the next level, especially for larger properties, waterfront homes, or those with unique outdoor features. Drone services provide a comprehensive view of the property and its surroundings. HomeJab offers drone packages priced between $249–$499, which include:
- 10–15 high-resolution aerial photos
- Property overview videos
- FAA-certified drone operators
- Fast turnaround times
Customer Liz Zeng praised the quality of their drone services:
"The photos turned out absolutely fantastic – crisp, professional, and beautifully lit. The quality exceeded expectations, and the attention to detail was evident in every shot. The company was incredibly responsive and easy to work with, making scheduling and rescheduling a breeze. I highly recommend their services and would gladly book with them again!"
When working with professional photographers, be specific about the features you want to highlight. Many companies offer bundled packages combining standard photography, aerial shots, and virtual tours, giving buyers a complete picture of the property.
Conclusion: Better Photos Sell Properties Faster
Professional real estate photography plays a key role in boosting sales. HDR photos, for instance, generate 118% more views and lead to properties selling 50% faster. These numbers show just how much good photography can enhance a listing’s performance.
The return on investment (ROI) for professional photography is hard to ignore. With an average session costing $247, real estate professionals enjoy an average ROI of 826%:
| Impact Area | Statistical Benefit |
|---|---|
| Time on Market | 32 fewer days with 20+ photos |
| Sale Price | 9% higher on average |
| Online Engagement | 61% more listing views |
| Client Satisfaction | 43% higher satisfaction with realtor |
These stats highlight how photography influences every step of the sales process. Since 85% of buyers form their first impressions from listing photos and spend 60% of their time looking at them, the importance of high-quality imagery is undeniable.
With visuals influencing 90% of purchasing decisions, investing in professional photography isn’t just a good idea – it’s a smart sales strategy.


