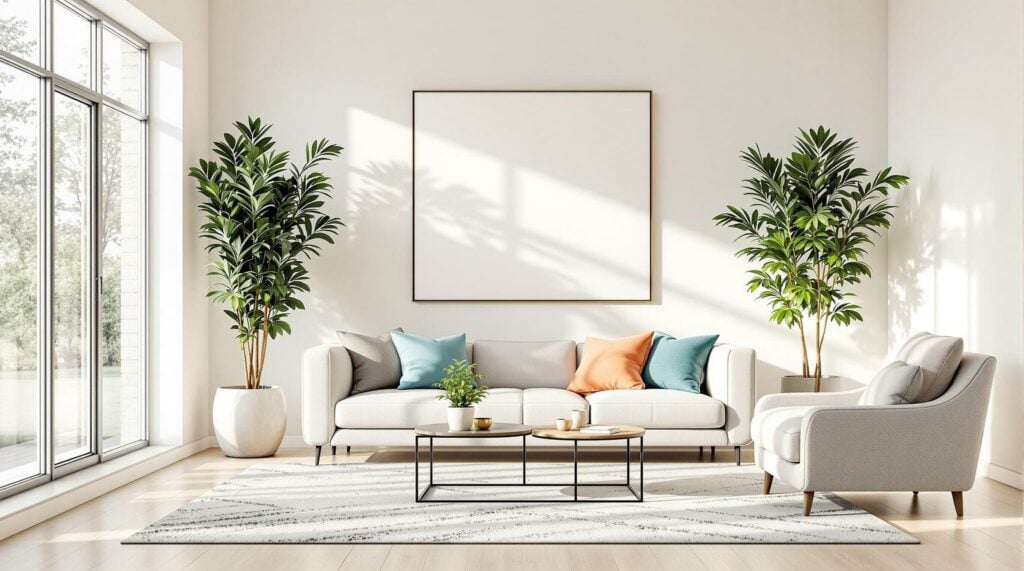
Poor real estate photography can cost you time, money, and potential buyers. Here’s how to avoid the most common mistakes and create listing photos that sell homes faster and for more money.
Key Mistakes to Avoid:
- Bad Lighting: Use natural light, avoid harsh shadows, and fix color inconsistencies.
- Cluttered Rooms: Clean, declutter, and depersonalize every space.
- Poor Composition: Keep lines straight, shoot at chest height, and use the Rule of Thirds.
- Wrong Equipment: Use a wide-angle lens, tripod, and proper camera settings.
- Skipping Editing: Correct white balance, fix distortions, and avoid over-editing.
- Inconsistent Quality: Maintain uniform lighting, color, and resolution across all photos.
- Weak Exterior Shots: Shoot during golden hour, stage the yard, and consider drone shots.
- Missing Key Features: Highlight upgrades, storage, and unique property details.
Why It Matters:
- Listings with professional photos sell 32% faster and for up to 47% higher prices per square foot.
- 90% of buyers decide to visit a property based on photos alone.
Avoiding these mistakes can make your listings stand out, attract more buyers, and increase sale prices. Let’s dive into each mistake and how to fix it.
Top Ten Real Estate Photo Mistakes
1. Bad Lighting Techniques
Lighting can make or break real estate photos. Even the most stunning properties can appear unappealing with poor lighting. Since most homebuyers start their search online, getting the lighting right is crucial to create photos that grab attention.
Here are some common lighting issues and how to address them:
Mixed Light Sources
Combining natural light with indoor fixtures often leads to inconsistent color tones. This mismatch can make a room look unnatural or uninviting. To fix this, stick to one type of lighting. Either rely entirely on natural light by turning off indoor fixtures or adjust artificial lighting to match daylight tones.
Harsh Shadows and Contrast
Strong sunlight creates sharp shadows and high contrast, which can make spaces feel smaller. To avoid this, schedule exterior shots during the "golden hour" (about 20 minutes before and after sunset). For interiors, aim for softer natural light, typically mid-morning or mid-afternoon.
The table below highlights how different lighting types affect real estate photography:
| Lighting Type | Best Uses | Common Mistakes to Avoid |
|---|---|---|
| Natural Light | Living rooms, kitchens, sunrooms | Shooting in direct sunlight; closed blinds |
| Artificial Light | Basements, bathrooms, night shots | Mismatched color tones; harsh direct flash |
| Mixed Lighting | Large spaces, dimly lit rooms | Poor white balance; competing light sources |
Quick Tips for Better Lighting:
- Open blinds and curtains to let in as much natural light as possible.
- Use bounce flash techniques by reflecting light off neutral-colored walls or ceilings to create soft, even lighting.
- Try HDR imaging to balance bright and dark areas in photos.
- Use softboxes or diffusers with artificial lights to mimic the look of natural light.
Did you know? Listings with twilight photos as the main image see a 76% increase in views. Lighting is just one piece of the puzzle – room preparation is up next.
2. Poor Room Preparation
Getting a room ready for real estate photography is often overlooked, but it plays a big role in how a property is perceived. A messy or cluttered space can make a home seem less appealing and even lower its perceived value.
| Area | Common Mistakes | Impact on Photos |
|---|---|---|
| Kitchen | Cluttered countertops, visible appliances, dish towels | Makes the space look smaller and messy |
| Bathroom | Personal items, toiletries, cleaning supplies | Distracts viewers and reduces perceived hygiene |
| Living Areas | Too much furniture, personal photos, scattered items | Makes it hard for buyers to imagine themselves there |
| Bedrooms | Unmade beds, crowded nightstands, visible storage | Feels neglected and cramped |
| Exterior | Unkempt lawn, outdoor clutter, visible trash bins | Hurts curb appeal and first impressions |
Key Steps to Prepare a Room for Photos
- Deep Clean and Declutter
Start with a thorough cleaning. Remove any clutter on countertops, organize storage spaces, and ensure all surfaces are spotless.
"Make your home look like the in-laws are coming to visit".
- Depersonalize the Space
Take down family photos, unique decorations, and personal collections. A neutral space helps buyers imagine themselves living there.
"Clearing clutter from the mind and environment allows for a clearer vision of what truly matters".
- Rearrange Furniture for Flow
Arrange furniture to make the room feel open and inviting. Take out extra pieces that crowd the space, and highlight the room’s best features. - Polish the Details
Small touches can make a big difference:- Make beds neatly with simple, neutral linens
- Adjust window treatments for a clean, uniform look
- Remove pet items like bowls, beds, and toys
- Hide cords and small appliances
- Straighten artwork and mirrors
A well-prepared space is more than just clean – it sets the stage for buyers to imagine their future there. Creating that inviting, neutral canvas can make your listing stand out.
Next up: photo composition mistakes that can ruin even the best-prepared rooms.
3. Basic Photo Composition Errors
Even the most stunning properties can look unappealing with poor photo composition. Knowing a few key principles can help you present spaces in the best possible way and grab buyers’ attention.
Common Composition Mistakes
| Mistake | Effect on Photo | How to Fix |
|---|---|---|
| Crooked Lines | Warps perspective and feels unbalanced | Use a tripod with a bubble level; align with door frames |
| Wrong Camera Height | Alters room proportions | Shoot at chest height (about 47 inches) |
| Flat Perspective | Makes rooms look cramped | Include elements in the foreground, middle ground, and background |
| Poor Framing | Misses important features | Use natural frames like doorways or windows to highlight key areas |
Capturing Room Angles
For interior shots, stand in a corner and shoot at a 45° angle. This method highlights three walls, giving the room depth and a sense of space.
The Rule of Thirds
Activate your camera’s grid overlay to apply the Rule of Thirds effectively:
- Align focal points like furniture, fireplaces, or windows along the grid lines or intersections.
- Frame shots through doorways for added depth.
- Use natural elements, such as trees or fences, to frame exterior photos.
Height and Perspective Tips
Photographer Rob Moroto suggests shooting from chest height (around 47 inches) for most interior photos. This height creates a balanced perspective by:
- Keeping floor and ceiling proportions accurate.
- Avoiding distortion caused by extreme angles.
- Ensuring consistency across all listing photos.
- Accurately portraying room dimensions.
For specific areas, adjust the height slightly:
- Kitchens: Shoot higher to focus on countertops.
- Dining Rooms: Use a lower angle to enhance the table setting.
- Bathrooms: Shoot straight on for a clean, symmetrical look.
- Exteriors: Use a tripod with a bubble level for straight, professional shots.
4. Wrong Camera Equipment
Using the wrong gear can ruin real estate photos. Let’s break down the essentials and common pitfalls.
Camera Settings Matter
Getting the right camera settings is key for professional real estate photography. Here’s a quick guide:
| Setting | Recommended Value | Why It Matters |
|---|---|---|
| Shooting Mode | AV (Aperture Value) | Gives better control over depth of field |
| Aperture | F8 (or F16) | Ensures sharp focus across the entire room |
| ISO | 100 | Reduces digital noise |
| Format | RAW | Offers more flexibility during editing |
| White Balance | Auto | Simplifies workflow; adjustable in post |
Now, let’s talk about lenses and how they impact your photos.
Essential Equipment Checklist
Here’s a list of must-have gear for real estate photography:
| Equipment | Purpose | Recommended Model | Price Range |
|---|---|---|---|
| Tripod | Stability & leveling | Manfrotto MT190XPRO4 | $279 |
| Tripod Head | Precise adjustments | Manfrotto 410 Junior | $249 |
| External Flash | Boosts lighting in dark areas | Yongnuo YN560 IV | $85 |
| Flash Controller | Remote flash triggering | Yongnuo YN560-TX II | $45 |
Lens Selection Mistakes
One of the most common errors is choosing the wrong lens. Wide-angle lenses are a staple in real estate photography, but they can be tricky to use correctly. Professional photographer Rick McEvoy suggests sticking to wide-angle lenses with focal lengths between 12-16mm.
"Wide-angle lenses are ideal for capturing full room views."
However, ultra-wide lenses can cause issues like:
- Distorting room proportions
- Making spaces look unnaturally large
- Misrepresenting colors
- Misleading potential buyers
Lighting Equipment Considerations
Lighting gear is just as important as your camera and lens. To maintain consistent image quality, consider the following:
- Use at least one external flash for dimly lit spaces
- Invest in wireless flash triggers for reliable lighting
- Add diffusers to soften harsh light
- Keep extra batteries and chargers on hand
Stability is also critical for sharp photos, especially in low-light conditions or when using HDR techniques. Make sure your gear supports steady and precise framing.
sbb-itb-82c5f45
5. Missing Photo Editing Steps
Photo editing plays a key role in creating effective property listings. Homes with professionally edited photos sell 32% faster, averaging 89 days on the market compared to 123 days for listings with unedited images.
Here’s a quick breakdown of editing phases and common mistakes:
| Editing Phase | Actions | Common Mistakes |
|---|---|---|
| Basic Corrections | Adjusting white balance, exposure, contrast | Forgetting to fix color casts |
| Technical Fixes | Lens correction, noise reduction | Overlooking perspective issues |
| Enhancement | Selective adjustments, HDR | Over-saturating colors |
| Final Touch | Object removal, sky replacement | Altering permanent fixtures |
Common Editing Errors to Avoid
To maintain credibility and appeal, focus on these key areas:
- White Balance and Color Accuracy
- Adjust white balance for natural-looking colors.
- Balance window light to avoid harsh contrasts.
- Ensure wall colors appear true to life.
- Structural Adjustments
- Use tools to straighten vertical lines and level horizontal surfaces.
- Correct lens distortions and fix perspective issues for a balanced look.
- Detail Refinement
- Highlight architectural details by adjusting shadows.
- Reduce noise in low-light areas for a cleaner image.
- Remove temporary distractions while keeping permanent features intact.
"Professional photographs, which are so easy for Realtors® to obtain, are more likely to attract viewers everywhere they shop for homes, and are important for listings in all price ranges."
"High-quality photographs capture buyers’ attention and that’s one reason why my clients’ homes sell faster than the competition."
Legal Considerations in Photo Editing
Editing must stay within legal and ethical boundaries. Avoid:
- Removing permanent fixtures from images.
- Changing backgrounds to mislead about the property’s surroundings.
- Misrepresenting the property’s condition.
- Over-editing to the point of creating unrealistic expectations.
6. Mixed Photo Standards
Consistent image quality is just as important as good lighting and composition. High-quality, uniform photos help create a professional look, build buyer confidence, and can even speed up sales.
Key Areas for Photo Consistency
| Element | Standard to Maintain | Common Issues |
|---|---|---|
| Lighting | Balanced mix of natural/artificial | Mixed color temperatures |
| Composition | Fixed camera height and angles | Varying perspectives |
| Color Management | Calibrated white balance | Inconsistent colors |
| Image Resolution | High-resolution files | Mixed quality levels |
| Processing Style | Uniform editing | Over-processed or basic edits |
A standardized workflow can help you tie these elements together for a polished and professional outcome.
Creating a Standardized Workflow
- Lighting Techniques: Photograph east-facing rooms in the morning and west-facing rooms in the afternoon to ensure even lighting. Use natural light as a base and add fill lighting when necessary.
- Composition Framework: Stick to standard lighting setups, fixed camera heights, and consistent focal lengths. Arrange furniture uniformly to create balanced compositions.
- Color Management: Use tools like a color checker and set white balance presets to maintain accurate colors. Custom camera profiles can also help you achieve consistent results.
Quality Control Measures
To keep your photos consistent, compare new images with previous successful ones. Use a checklist to confirm that key style elements are met, review photos in batches, and apply the same editing presets across all images.
Your post-processing workflow should include consistent exposure levels, specific color temperature targets, and perspective corrections. This ensures uniform lighting, resolution, and editing style throughout your photos. A solid quality control process lays the groundwork for capturing external property features next.
7. Weak Exterior Photography
Exterior photos are what make a property’s first impression online. Listings with high-quality exterior shots tend to attract far more views.
Weather and Timing Considerations
When it comes to exterior photography, timing is everything. Shooting during the "golden hour" – 1–2 hours after sunrise or before sunset – provides soft, warm light that enhances the look of the property. The direction the property faces also plays a role:
| Property Facing | Optimal Shooting Time | Lighting Advantages |
|---|---|---|
| East/South | Morning | Even lighting across the front |
| North/West | Afternoon | Balanced shadows |
| Any direction | Overcast days | Soft, diffused light |
"Depending on the aspect of the property, i.e. which way it’s facing, you’d want to plan the shoot either facing the sunrise or sunset. Generally speaking, you want to avoid harsh sunlight, as well as having the front covered in shade. The rule of thumb is East/South-facing properties should be shot in the morning, North/West-facing houses shot in the afternoon." – Matias Galeano, Real Estate Photographer, HCE Visuals
By following these timing tips, you can avoid lighting pitfalls and improve the overall quality of your exterior shots.
Common Exterior Photography Challenges
- Lack of Staging: Make the exterior shine by tidying up landscaping, trimming bushes, and arranging outdoor furniture strategically.
- Weather and Technical Issues: Bad weather? Use HDR, bracketed exposures, or sky replacement tools to create balanced and appealing images.
Advanced Techniques
Modern tools can take your exterior photos to the next level. Drones, for instance, provide aerial views that showcase the property’s size, landscaping, and architectural details. When dealing with harsh sunlight, tools like diffusers and advanced post-processing can help balance exposure, contrast, and color for a polished final image.
8. Missing Key Property Features
Leaving out important property features in your photos can hurt buyer interest and the overall performance of your listing. Nicole Pirnie, Senior Director of Residential Brokerage, emphasizes:
"The quality of listing photos is crucial because they are the first impression that potential buyers or renters have of a property. High-quality photos can help to showcase the property’s best features, highlight its unique selling points, and create an emotional connection with viewers".
Key Features to Highlight
When photographing a property, make sure to focus on these essential elements:
| Feature Category | Must-Capture Elements | Why It Matters |
|---|---|---|
| Interior Upgrades | Modern appliances, updated fixtures, quality woodwork | Boosts perceived value |
| Storage Solutions | Walk-in closets, built-in organization systems | Addresses practical buyer needs |
| Luxury Amenities | Spa features, professional gym equipment, pool design | Appeals to buyers seeking premium living |
| Outdoor Living | Fire pits, outdoor bars, water features | Expands the sense of livable space |
| Architectural Details | Fireplaces, columns, crown molding | Highlights craftsmanship and character |
By focusing on these features, your photos can better showcase the property’s strengths and attract more interest.
Photography Tips for Maximum Impact
To make your property photos stand out, use a targeted photography plan. Each shot should emphasize one standout feature, avoiding clutter or distractions.
- Room Layout:
- Take photos from various angles and heights.
- Keep doors open to show how rooms flow together.
- Highlight how spaces connect and function.
- Details Matter:
- Zoom in on features like cabinets, woodwork, and fixtures.
- Showcase upgraded spaces and premium materials to justify higher pricing.
- Optimize Views:
- Capture outdoor views in the best lighting.
- Highlight water, mountain, or cityscape views.
- Show how the property fits into its surroundings.
Using these techniques alongside good staging and thoughtful composition will make your listing more appealing.
Why It Matters for Your Listing
Professional photos that include all key features can significantly enhance a property’s market appeal. Highlighting these details not only strengthens your listing’s story but also draws more interest from potential buyers. A well-rounded approach, combining feature-focused photography and proper staging, ensures your property gets the attention it deserves.
Conclusion
Applying the techniques shared above can completely change the game for property listings. Poor photography directly affects listing performance and profit. Research shows that listings with professional photos get 61% more views and sell for $3,400–$11,200 more. HDR listings? They sell 50% faster and attract 118% more views.
The Role of Quality Photography
Let’s break down some numbers that highlight how avoiding common photography mistakes can impact your results:
| Photography Element | Market Impact | Performance Boost |
|---|---|---|
| Professional Photos | Faster Sales | 32% fewer days on the market |
| Aerial Photography | Higher Sale Prices | Up to 10% price increase |
| Multiple Photos (20+) | Reduced Time on Market | From 70 days to 32 days |
| HDR Imagery | Increased Engagement | 118% more listing views |
These stats clearly show how quality photography directly influences market success.
"These days, our first showing is online. Potential buyers see the home on search platforms and they make an instant judgment about whether they want to visit".
Long-term Advantages
Beyond improving individual listings, avoiding photography mistakes can enhance your overall business. Real estate agents who consistently use professional photographers earn twice as much commission. Why? Because 83% of buyers rely heavily on photos when deciding which homes to visit.
The National Association of REALTORS® backs this up:
"Eighty-seven percent of homebuyers who searched for a home on the internet found photos to be among the most useful features of REALTOR® websites".
With 79% of buyers starting their search online, strong visuals are no longer optional – they’re a must. Success in real estate photography comes down to avoiding common errors, showcasing properties effectively, and paying attention to detail. These skills are what truly drive better results.

