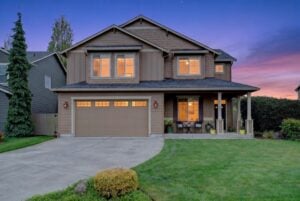
Lighting can make or break real estate photography. Natural light offers soft, warm tones that highlight spaces beautifully, while artificial light provides control and flexibility for consistent results. Combining both often delivers the best outcomes, maximizing a property’s appeal. Here’s a quick breakdown:
- Natural Light: Best for accurate colors, depth, and atmosphere during specific times (e.g., golden hours or mid-morning).
- Artificial Light: Ideal for dark spaces, flexible schedules, and precise control using tools like speedlights or LED panels.
- Mixed Lighting: Combines both for balance, especially in large spaces or twilight shots.
Quick Comparison
| Factor | Natural Light | Artificial Light | Mixed Lighting |
|---|---|---|---|
| Time of Day | Limited (e.g., golden hours) | Any time | Flexible |
| Weather Dependency | Yes | No | Minimal |
| Space Suitability | Rooms with windows | Any space | Large/open layouts |
| Cost | Low | Requires equipment | Moderate |
Choosing the right lighting depends on the property’s features, available time, and weather conditions. Balancing natural and artificial light ensures photos that attract buyers.
Natural Light Photography
Advantages of Natural Light
Natural light brings out accurate colors and soft shadows, enhancing architectural features without creating harsh contrasts. This helps potential buyers see spaces as they truly are, making them feel warm and inviting.
| Natural Light Benefits | How It Improves Property Photos |
|---|---|
| Color Accuracy | Shows true colors of paint, finishes, and materials |
| Depth Perception | Offers a clearer sense of room size and layout |
| Atmosphere | Creates a welcoming feel that appeals to buyers |
| Cost-Saving | No need for extra lighting equipment |
Next, let’s discuss the best times to make the most of this light.
Optimal Times for Natural Light
Natural light changes throughout the day. The “golden hours” – about an hour after sunrise and an hour before sunset – offer the best light for real estate photography. During these times, the sunlight is soft and warm, enhancing the look of the property.
For interior shots, mid-morning (9:00 AM to 11:00 AM) and mid-afternoon (2:00 PM to 4:00 PM) are ideal. The sun is high enough to brighten rooms evenly without creating harsh shadows or glare. For exterior shots, timing depends on the property’s orientation to ensure the light hits it just right.
However, natural light isn’t always reliable.
Natural Light Limitations
While natural light has many advantages, it also comes with challenges. Weather conditions and limited optimal hours can disrupt schedules. Seasonal changes, like shorter days in winter, can further restrict photography windows.
Some common issues include:
- Unpredictable weather and timing, requiring flexibility
- Dark areas far from windows
- Overexposed windows that can wash out interior details
- Seasonal shifts impacting light availability
To work around these challenges, professionals often mix natural light with subtle artificial lighting or use HDR techniques to balance exposure in tricky conditions. This ensures high-quality results, even when natural light alone isn’t enough.
Lights ON vs Lights OFF for Real Estate Photography
Artificial Light Photography
After covering natural light, let’s dive into techniques for using artificial lighting.
Common Artificial Light Sources
Real estate photographers rely on a variety of tools for artificial lighting:
| Light Source | Best Use Case | Key Features |
|---|---|---|
| Speedlights | Small to medium rooms | Portable, battery-powered, quick to set up |
| Studio Strobes | Large spaces, high ceilings | High output, consistent color temperature |
| LED Panels | Video tours, continuous lighting | Adjustable brightness, low heat emission |
| Softboxes | Diffused lighting for interiors | Even light, reduces harsh shadows |
These tools allow for precise control over how spaces are illuminated.
Benefits of Artificial Light
Artificial lighting gives photographers the freedom to work without depending on natural light conditions. Here’s why it’s so useful:
- Consistent Results: Ensures uniform lighting regardless of weather.
- Enhanced Details: Brightens dark areas and highlights key features.
- Flexible Scheduling: Allows shooting at any time of day.
- Color Control: Fine-tunes white balance and temperature for accuracy.
For spaces like basements, windowless bathrooms, or other dimly lit areas, artificial lighting is essential to create appealing and accurate photos.
However, using artificial light isn’t without its challenges.
Artificial Light Problems
Despite its advantages, artificial lighting can introduce some technical hurdles:
- Setup Complexity: Using multiple lights and making adjustments can take extra time.
- Technical Skills Required: Photographers need to manage factors like:
- Light intensity and placement
- Matching color temperatures
- Adjusting power output
- Using light modifiers and diffusers
- Common Issues: Problems like hot spots, mixed color temperatures, unwanted reflections, and shadow management in large spaces are frequent.
To address these challenges, professionals often rely on tools like diffusers, light modifiers, and strategic positioning. With the right techniques, photographers can avoid these pitfalls and achieve polished, professional results in real estate photography.

Mixed Lighting Techniques
When natural and artificial lighting aren’t enough on their own, combining them can provide the perfect balance.
How to Combine Light Sources
Blending natural and artificial light can enhance daylight without overwhelming it. Here’s how:
- Position strobes or speedlights to fill in natural shadows.
- Use diffusers on windows to soften harsh sunlight.
- Set artificial lights at 45° angles to minimize reflections.
- Match color temperatures (daylight is typically around 5500K).
Matching Artificial and Natural Light
To make artificial light blend seamlessly with natural light, focus on matching both intensity and color temperature. Here’s a breakdown:
| Technique | Goal | How to Do It |
|---|---|---|
| Light Metering | Match power levels of both light types | Use a handheld meter to measure natural light on the subject. |
| Color Gels | Balance color temperatures | Use CTO or CTB gels to match window light. |
| Gradient Lighting | Create a natural light fall-off | Position lights farther from well-lit areas. |
| Diffusion | Soften artificial light sources | Use softboxes or bounce light off walls or ceilings. |
Ideal Scenarios for Mixed Lighting
Mixed lighting works particularly well in these situations:
1. Large Open Spaces
- Balance light between windows and interior areas.
- Highlight architectural features that are away from windows.
- Add depth to expansive floor plans.
2. North-Facing Rooms
- Warm up the cooler, blue-toned light from northern exposure.
- Brighten darker corners without making the space look artificial.
- Keep exposure consistent throughout the room.
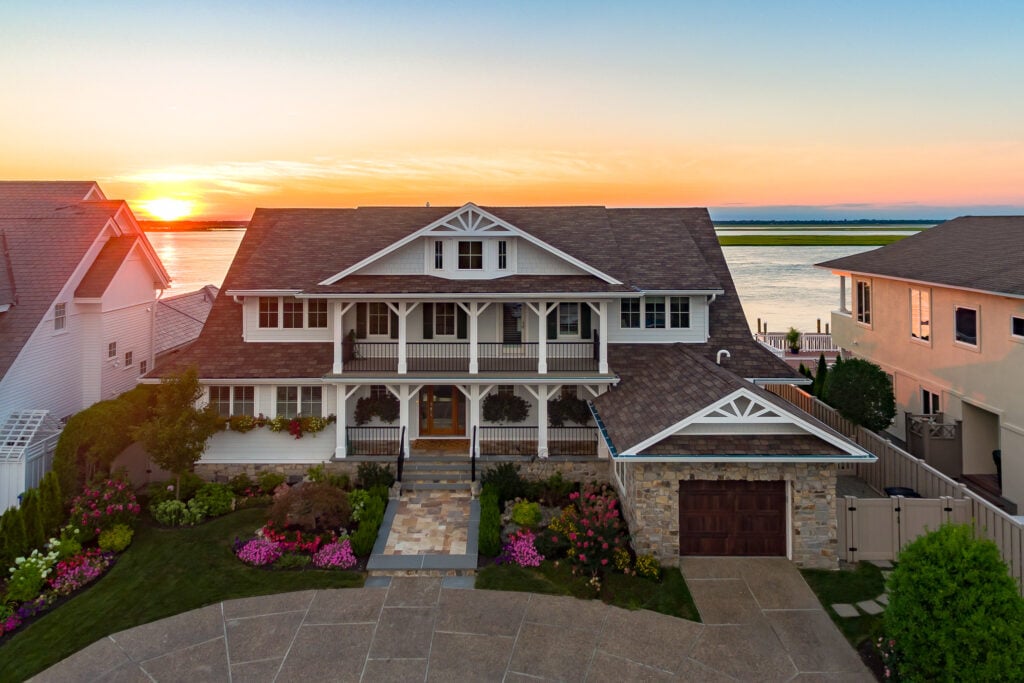
3. Twilight Exterior Shots
- Blend natural ambient light from the fading sun.
- Showcase interior lighting through windows.
- Use external flashes to emphasize landscaping and architectural elements.
The secret to effective mixed lighting is subtlety. Artificial light should complement the natural light rather than overpower it. This approach results in a more realistic and visually appealing look.
Selecting Your Lighting Method
When deciding on a lighting method, think about how your property’s features interact with different lighting conditions.
Key Lighting Decision Points
Here’s a quick comparison of natural, artificial, and mixed lighting to help guide your choice:
| Decision Factor | Natural Light | Artificial Light | Mixed Lighting |
|---|---|---|---|
| Time of Day | 10:00 AM–3:00 PM | Any time | Twilight/Dawn |
| Weather | Clear skies needed | Works in any weather | Flexible |
| Room Position | Needs window access | Works anywhere | Adapts to most setups |
| Space Size | Best for small/medium rooms | Great for large spaces | Perfect for open layouts |
| Property Style | Bright, modern homes | Suits traditional interiors | Ideal for luxury homes |
Lighting Tips by Property Type
- Luxury Homes: Highlight premium finishes with natural light. Use artificial lighting to brighten shadowed areas and add accent lights to draw attention to architectural features.
- Urban Condos: Take advantage of window light to complement city views. Use artificial lighting to brighten tighter spaces and balance the overall look.
- Historic Properties: Maintain the charm by using soft natural light. Add warm artificial lighting for darker interiors, and use focused lights to highlight period details.
These strategies can help bring out the best in your real estate photography. If you want expert assistance, professional services like HomeJab can make the process easier.
Professional Services from HomeJab

HomeJab offers packages starting at $175 for 15–50 HDR images. Enhanced HDR options are available from $229, and specialized twilight Real Estate Photography is also offered. Most projects are delivered within 24 hours.
Conclusion: Making the Right Lighting Choice
Now that we’ve covered various lighting strategies, it’s time to refine your approach with some practical insights.
The right lighting setup can boost a property’s appeal and make it stand out in the market. Success lies in finding the right mix of natural and artificial lighting that suits the property’s unique features, timing needs, and weather conditions.
“This was my first time using HomeJab and I was extremely impressed… the photos were delivered within 48 hours. The finished photos were OUTSTANDING! I was a little nervous of what we would get with me not being at the site, but I couldn’t have been happier. Also, the prices were very reasonable. Can’t wait to use them again in other projects.” [1]
When planning your lighting, think about the property’s architecture, scheduling flexibility, weather, and the specific requirements of each space. These factors directly affect the quality of the final images and how well the property is presented.
Partnering with professionals can help you apply these principles effectively, ensuring your real estate photos highlight each property’s best features and attract potential buyers.