
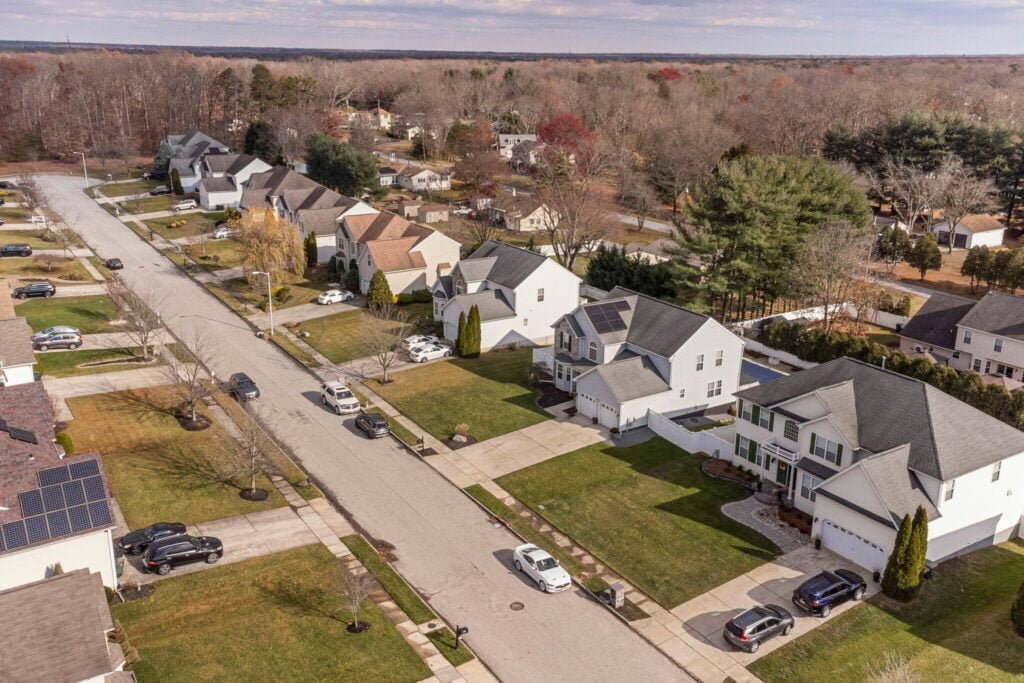
Wide-angle lenses are essential for photographing small spaces like bathrooms or compact kitchens. They help capture entire rooms, enhance depth, and showcase layouts effectively. However, improper use can lead to issues like distortion or warped perspectives. Here’s how to make the most of wide-angle lenses:
- Choose the Right Lens: Use focal lengths between 16mm-24mm on full-frame cameras for balanced views with minimal distortion.
- Position Your Camera Thoughtfully: Keep the camera level, about 4-5 feet off the ground, and maintain a 3-foot distance from walls to avoid perspective issues.
- Fix Distortion in Editing: Use software to correct barrel distortion, converging verticals, and stretched edges.
- Leverage Lighting: Maximize natural light and add extra lighting to eliminate shadows.
These tips ensure your photos are clear, accurate, and visually appealing, whether for personal projects or professional real estate listings.
Wide-Angle Lens Basics
What Defines a Wide-Angle Lens
A wide-angle lens is characterized by its short focal length – usually less than 35mm on a full-frame camera. This design allows the lens to capture a much broader field of view compared to standard lenses. In real estate photography, focal lengths between 16mm and 24mm are frequently used. These ranges strike a balance, offering expansive views without introducing too much distortion. Essentially, the lens lets you include more of the scene in your shot without needing to physically step back.
This ability to cover more space is especially useful when photographing compact areas.
Benefits for Small Space Photography
Wide-angle lenses bring distinct advantages when working in tight spaces:
- Showcasing Entire Rooms: They can capture a full room, corner to corner, helping viewers understand the overall layout and flow.
- Highlighting Depth: These lenses naturally enhance depth, making rooms appear more three-dimensional. This helps convey the spatial relationship between different areas.
- Functionality in Tight Spaces: In cramped areas like bathrooms or small kitchens, where stepping back isn’t an option, wide-angle lenses allow you to capture the entire space effectively.
Common Challenges in Use
While wide-angle lenses are incredibly useful, they come with their own set of challenges. Here are some common issues and how to address them:
| Issue | Description | Solution |
|---|---|---|
| Barrel Distortion | Straight lines curve near the frame edges | Keep the camera level and centered; correct distortion during editing |
| Perspective Distortion | Edges of the frame may stretch or warp | Position key elements in the center; maintain appropriate shooting distance |
| Converging Verticals | Vertical lines may tilt inward | Use the camera’s level indicator and keep the sensor parallel to walls |
For best results, position your camera about 4–5 feet off the ground and maintain at least a 3-foot distance from walls or furniture. This helps reduce barrel and perspective distortions.
Up next: tips on choosing the perfect wide-angle lens for your needs.

Selecting Your Wide-Angle Lens
Lens Specs and Camera Types
The size of your camera’s sensor directly affects how a lens performs. Smaller sensors introduce a crop factor, which reduces the field of view compared to a full-frame sensor. To get the best results, check your camera’s documentation to understand how its sensor size interacts with lenses. This will help you choose a lens that captures small spaces effectively while reducing distortion.
Top Lenses for Real Estate
When choosing a lens for real estate photography, look for these key features:
- Maximum aperture of f/2.8 or wider: Helps in low-light settings.
- Fast autofocus: Ensures sharp images, even in dynamic conditions.
- Durable build with weather-sealing: Adds reliability in different environments.
- Image stabilization: Keeps shots steady, especially in dim lighting.
- Built-in distortion control: Saves time in post-editing.
Additionally, focus on these critical aspects for photographing small spaces:
| Feature | Why It Matters for Small Spaces |
|---|---|
| Minimum Focus Distance | Lets you capture tight corners and close-up details easily. |
| Field of View | A wide view (around 90° or more) provides better room coverage. |
| Edge Sharpness | Essential for showcasing architectural details clearly. |
| Flare Resistance | Helps manage strong natural light or glare from windows. |
These features ensure your lens performs well in tight spaces, providing clear, professional-quality images.
Small Space Photo Methods
Photo Composition Rules
When photographing small spaces, use the rule of thirds to align key architectural features like windows and doorways. This creates a natural flow and makes the space feel larger.
- Keep vertical lines (like walls and doors) perfectly straight to avoid distortion.
- Use natural leading lines such as baseboards or countertops to guide the viewer’s eye through the space.
- Position the camera at chest height (about 4-5 feet) for balanced room proportions.
- Include both ceiling and floor transitions in the frame to add depth.
Once you’ve considered these composition tips, focus on finding the best camera position to highlight the space.
Camera Position Tips
The ideal camera position depends on the room’s layout. Here’s a quick guide:
| Camera Position | Best For | Advantages |
|---|---|---|
| Room Corner | Open floor plans, bedrooms | Maximizes visible floor space and depth |
| Doorway | Bathrooms, small offices | Captures the full width of the room with minimal distortion |
| Center Wall | Kitchens, narrow spaces | Creates a balanced, symmetrical composition |
Maintain a moderate distance from walls to avoid exaggerated perspective distortion.
Reducing Lens Distortion
Fine-tune your setup to minimize lens distortion:
- Keep the camera level.
- Align the camera parallel to walls and floors.
- Avoid tilting the lens more than 5°.
- Step back slightly and crop the image during editing if needed.
For interior corners, maintain at least an 18-inch gap from the walls to prevent vertical lines from converging. If shooting towards windows, angle yourself slightly (about 15 degrees) to reduce glare while keeping the perspective intact.
In very tight spaces like bathrooms, use a slightly longer focal length (around 24mm instead of 16mm). If possible, step back to maintain natural proportions while still capturing the room’s essential details.
Ultra Wide Angle Distortion in Real Estate Photography
Lighting Small Spaces
Good lighting can make all the difference when photographing small spaces with wide-angle lenses. It helps you minimize harsh shadows and create a balanced exposure that looks natural.
Using Natural Light
Natural light from windows is an excellent way to brighten up small spaces. Position your camera to take full advantage of the light streaming in, ensuring the space is evenly illuminated.
Adding Additional Lighting
Even if natural light is plentiful, adding extra lights can help eliminate any lingering shadows and achieve a more balanced look.
Once you’ve captured well-lit photos, fine-tune them with careful photo editing to bring out the best details.
Photo Editing Steps
Post-processing helps refine wide-angle photos by addressing distortion and improving lighting.
Fixing Lens Issues
Start by correcting geometric distortions, such as barrel distortion, which can cause straight lines to appear curved. Use lens-specific correction profiles for precise results.
Key steps include:
- Straightening vertical lines and fixing walls that appear to converge
- Leveling floors and ceilings for a balanced perspective
- Cropping to remove stretched edges while keeping the composition intact
Once the geometry is corrected, move on to fine-tuning the lighting and colors in your image.
Light and Color Adjustments
Small spaces often come with tricky lighting conditions. Begin with global adjustments:
- Modify highlights and shadows to bring out details in both bright and dark areas
- Ensure the color temperature is consistent across the entire space
- Add depth to the image without creating an overly processed HDR effect
In cases where rooms have mixed lighting (natural and artificial), use selective adjustments to balance the color temperatures for a more cohesive look.
Professional Photo Services
Once you’ve refined your own photography and editing skills, you might want to explore professional services to achieve consistently stunning results. Capturing small spaces with wide-angle techniques can be tricky, but professional services guarantee high-quality outcomes while minimizing distortion.
HomeJab’s Real Estate Photography

HomeJab specializes in HDR photography that perfectly balances natural and artificial light, making it ideal for small spaces. Their certified real estate photographers are skilled at reducing barrel distortion, managing mixed lighting, and positioning cameras to capture the most flattering angles. Edited photos, complete with geometric corrections and color adjustments, are delivered in just 24 hours.
“The photos turned out absolutely fantastic – crisp, professional, and beautifully lit. The quality exceeded expectations, and the attention to detail was evident in every shot.” – Liz Zeng [1]
For especially tricky small spaces, HomeJab provides additional services to enhance listings:
| Service | How It Helps Small Spaces |
|---|---|
| Virtual Staging | Adds purpose and functionality to rooms |
| HDR Photography | Handles mixed lighting seamlessly |
| Blue Sky Replacement | Enhances window views |
| 3D Virtual Tours | Offers a complete view of the space |
Their team excels at minimizing distortion and ensuring balanced lighting, creating images that accurately represent the space. Backed by a 4.8-star rating from 865 reviews, they are a trusted choice for real estate professionals [1].
“Loved the HomeJab app – very easy to use! I also had a great experience working with Derrick; he was professional, friendly, and easy to work with. I received my real estate photos in less than 24 hours, which was amazing! This service is a game-changer for my real estate business. Highly recommend!” – Makenzie Miller [1]
Using professional services like HomeJab ensures your small spaces are showcased with accuracy and appeal, making your real estate listings stand out.

Conclusion
Excelling in wide-angle photography requires both precision and a creative approach. Success comes from choosing the right gear, understanding composition techniques, and using effective lighting to highlight spaces accurately.
Professionals often rely on specific techniques to capture small spaces effectively. Proper camera placement, handling mixed lighting conditions, and making adjustments during post-processing are crucial for creating images that make spaces look inviting while staying true to their actual proportions.
For real estate professionals, hiring a photography service can be a smart move. Professional photographers bring expertise that simplifies the process and delivers high-quality results. HomeJab, for instance, showcases how skilled photography can turn even the most challenging spaces into visually appealing images that tell a story.
Whether you’re refining your own skills or opting for professional services, following these principles ensures your photos connect with potential buyers and present spaces in their best light.


