Setting clear expectations with clients is critical for successful real estate photo shoots. Here’s what you need to know:
- Why It Matters: Clear communication ensures smoother workflows, consistent quality, efficient time management, and stronger trust between photographers and clients.
- Key Steps:
- Understand Client Needs: Use survey forms to gather property details, key selling points, and style preferences.
- Prepare for the Shoot: Guide clients on how to prepare properties, both inside and out, for the best results.
- Plan the Schedule: Share a detailed shot list, allocate time wisely, and prepare for weather challenges.
- Set Delivery Expectations: Communicate processing times, file formats (web vs. print), and revision policies upfront.
- Handle Revisions: Offer basic edits (color correction, composition fixes) and advanced options (sky replacement, virtual staging) with clear timelines and fees.
Quick Tip: Align on everything – scope, timeline, deliverables – before the shoot to avoid surprises later.
This approach ensures a smooth process, happy clients, and professional results.
Clarification of Expectations between Real Estate Photographers & their Agents
Getting Client Requirements
Understanding what your client needs and expects is the foundation of delivering top-tier real estate photography. A well-organized process for gathering this information ensures nothing gets missed and helps establish clear expectations right from the start.
Client Survey Forms
Using a survey form is an efficient way to gather all the key details about a property and your client’s vision. It keeps the process streamlined while ensuring you don’t miss anything important. The form should be concise but cover all the essentials.
Here are some key areas to include:
- Property Details: Basic information like square footage, number of rooms, and standout features.
- Key Selling Points: Highlights of the property that should be emphasized in the photos.
- Problem Areas: Any spaces that may need extra attention or creative solutions.
- Outdoor Elements: Specific exterior features the client wants to showcase – or downplay.
- Special Requirements: Unique requests for photography or editing that go beyond standard practices.
Keeping the survey focused and purpose-driven will make it easier for clients to provide the information you need.
Photo Style Examples
Sometimes, written descriptions aren’t enough to fully understand a client’s vision. That’s where visual examples come in. Showing clients different styles of photography can help them pinpoint their preferences and ensure everyone is on the same page.
When discussing style options, focus on technical aspects like:
- HDR vs. Natural Lighting: Does the client prefer a polished, high-dynamic-range look or a more natural feel?
- Exposure Levels: Bright and airy shots versus moodier tones.
- Composition Styles: Symmetrical framing, wide angles, or creative perspectives.
- Shooting Heights: Eye-level shots versus higher or lower angles.
"For clients who aren’t aware of the differences, doing this can actually help them realize their style preferences, and better communicate that when it’s time for a consultation."
"Ask them to show you pictures they’ve seen on the Internet or social media representing the type of work they seek."
For interior shots, a wide-angle lens (16–35 mm for full-frame sensors) is often ideal. Adjusting shooting heights can also help capture the best angles for each space.
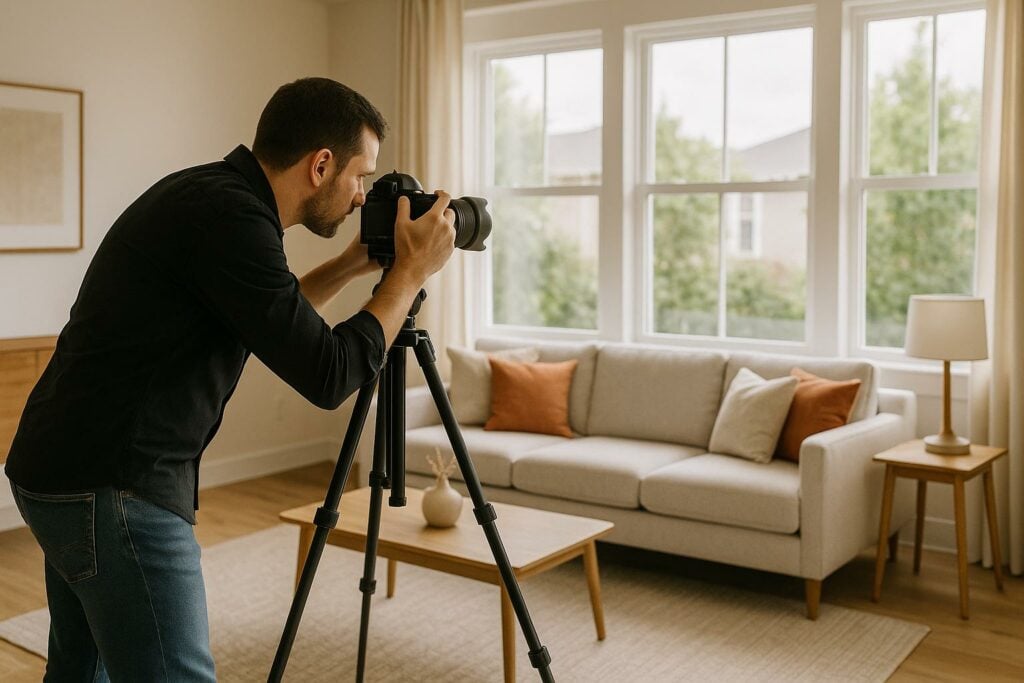
Photo Shoot Steps
Setting clear expectations for photo shoots ensures smoother sessions and helps clients prepare effectively.
Property Preparation
Getting the property ready for the camera is key. Here’s how to prepare:
Exterior Preparation
- Move vehicles away from driveways and street parking.
- Mow the lawn and tidy up landscaping.
- Store away garbage bins, garden tools, and outdoor equipment.
- Clean windows and any glass surfaces.
- Arrange outdoor furniture neatly and remove seasonal decorations.
Interior Preparation
- Turn on all interior lights and replace any burnt-out bulbs.
- Open blinds and curtains to let in as much natural light as possible.
- Remove personal items like family photos and refrigerator magnets.
- Clear countertops of small appliances and everyday clutter.
- Hide electrical cords and cables.
- Put away pet items such as beds, toys, and food bowls.
Shoot Schedule
A well-planned timeline keeps the session efficient and organized:
| Time Allocation | Activity |
|---|---|
| 15–20 minutes | Equipment setup and initial walkthrough |
| 45–60 minutes | Interior room photography (for a 2,000 sq ft home) |
| 20–30 minutes | Exterior and architectural shots |
| 15–20 minutes | Detail shots and unique features |
To ensure consistency and cover all the important details, photographers should:
- Share a detailed shot list with clients ahead of time.
- Have a backup plan for weather-related challenges.
- Conduct a final walkthrough with the client to confirm must-have shots.
- Allocate extra time for larger properties or homes with special features.
sbb-itb-82c5f45
Delivery Times and File Types
Processing Times
Setting clear delivery expectations can go a long way in building trust with clients. HomeJab ensures next-day delivery for most real estate photography services, with photos typically ready within 24 hours.
Here’s a quick look at delivery timeframes:
| Service | Standard | Rush (+50%) |
|---|---|---|
| HDR Photography | 24 hours | 12 hours |
| Virtual Staging | 48-72 hours | 24 hours |
| Aerial Photography | 24-48 hours | 12 hours |
| Twilight Photos | 48-72 hours | 24 hours |
"I can have a professional photographer here tomorrow and have the photos back the next day ready to list your property." – HomeJab
What Can Affect Delivery Times?
While HomeJab strives for quick turnarounds, some factors can influence how fast images are delivered:
- The size and complexity of the property
- Number of images requested
- Weather conditions (especially for exterior and aerial shots)
- Special editing or retouching needs
- Overall workload and scheduling demands
Once processing is complete, photos are delivered in formats suited for both online and print use.
File Formats
After editing, images are tailored to meet specific needs, whether for online listings or print materials. Here’s how the photos are formatted:
Online Listing Photos:
- Format: JPEG
- Resolution: 2048×1365 pixels
- DPI: 72
- Aspect Ratio: 3:2 landscape
- File Size: Optimized for web
Print-Ready Photos:
- Format: JPEG
- Resolution: 4000×2666 pixels
- DPI: 300
- Color Profile: Adobe RGB
- File Size: Optimized for print
All photos comply with MLS standards, meeting or exceeding the Bright MLS requirement of a minimum resolution of 1024×768 pixels. They are delivered through a secure online platform, ensuring immediate access to both web and print-ready versions.
Additional File Details:
- Exterior shots maintain consistent orientation.
- Interior images adhere to standard aspect ratios.
- Files are systematically named for easy organization.
- Images are optimized for their intended use.
- Metadata includes relevant property details for added convenience.
Photo Revision Rules
Having clear guidelines for photo revisions helps set client expectations and ensures a smooth post-production process. HomeJab follows specific standards for both basic and advanced adjustments.
Standard Edits
Every photo package includes these essential adjustments:
| Standard Edit Type | What’s Included |
|---|---|
| Color Correction | Adjustments to white balance, exposure, and contrast |
| Composition | Fixing perspective and straightening lines |
| Basic Enhancement | Improvements to brightness, clarity, and sharpness |
| Lens Corrections | Removing distortion and adjusting vignettes |
These edits ensure polished, professional-quality photos and are completed within the standard delivery timeframe.
Extra Edits
For more tailored results, advanced edits go beyond the basics. These specialized adjustments cater to specific needs, require additional processing time, and may involve extra fees:
| Enhancement | Processing Time | Use Case |
|---|---|---|
| Object Removal | 24–48 hours | Eliminating temporary items or distractions |
| Sky Replacement | 24–48 hours | Improving the visual appeal of exteriors |
| Virtual Staging | 48–72 hours | Highlighting the property’s potential with staged interiors |
| HDR Enhancement | 24 hours | Achieving balanced lighting and exposure |
To get the best results:
- Provide clear, detailed instructions and reference images.
- Plan for extended processing times when requesting advanced edits.
- Combine multiple enhancement requests to simplify processing.
If you have specific editing needs, discuss them during the initial booking to ensure everything is scheduled properly and aligns with your marketing goals.
Conclusion
Clear communication and well-defined expectations are the backbone of successful real estate photography projects. By thoroughly understanding client needs and establishing guidelines – like revision policies and delivery timelines – photographers can set the stage for smooth collaborations and long-term partnerships.
When both parties are aligned on the scope of work, deliverables, and schedules, trust is built, workflows become more efficient, and client satisfaction increases – ultimately opening the door for repeat business.
At HomeJab, the focus remains on key elements such as:
- Project scoping to clarify requirements
- Property preparation for seamless shoots
- Delivery timelines to meet expectations
- Editing and revision policies for polished results
These practices ensure a professional experience that benefits both clients and photographers alike.
FAQs
How can I make sure my real estate photo shoot matches my client’s vision?
To make sure your real estate photo shoot matches your client’s expectations, start with a thorough discussion about their preferences. Talk about the style they’re aiming for, the angles they prefer, and the property features they want to emphasize. Be sure to agree on the essentials, like the number of photos, editing style, and delivery timeline, so there are no misunderstandings later.
Building a custom shot list based on their feedback is a smart way to focus on the property’s standout features and key selling points. This not only helps deliver images that align with their vision but also strengthens trust and creates a positive working relationship.
What details should I ask clients to provide before a real estate photo shoot?
To make your real estate photo shoot as seamless as possible, gather essential property details from your clients ahead of time. Start with the property address, including the city, state, and zip code, and confirm the property type – whether it’s a single-family home, condo, or something else. Don’t forget to note the square footage, along with the number of bedrooms and bathrooms. If the property boasts special features like a pool or unique architectural elements, make sure to include those as well.
Ask about the client’s preferred photography styles – whether they’re looking for HDR, twilight, or aerial shots – and secure any access details, such as entry instructions or lockbox codes. Collect the client’s contact details, including their name, phone number, and email, and confirm their preferred turnaround time for receiving the final images. Finally, leave space for any additional notes or special requests to ensure you can cater to specific client needs effectively.
How can I clearly communicate delivery timelines and manage client expectations for photo shoots?
To establish clear delivery timelines and manage expectations effectively, start by discussing the process with your clients during the initial consultation. Be upfront about the turnaround time for edited photos and any extra deliverables, like videos or virtual tours. For example, saying something like, "Your final images will be ready within 48 hours", sets a clear expectation and builds trust.
After the shoot, send a quick follow-up message to confirm the session and outline the next steps. For even more clarity, include delivery timelines in a formal agreement or contract. This gives both parties a solid reference point and helps avoid any confusion. Keeping communication open and providing timely updates creates a professional and seamless experience for your clients.