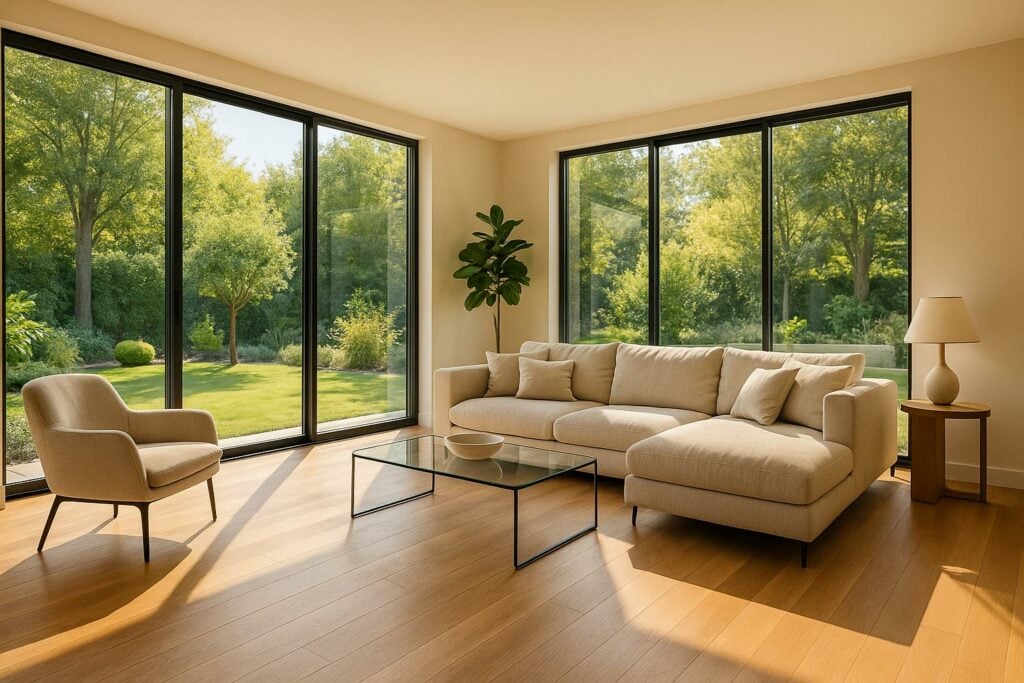
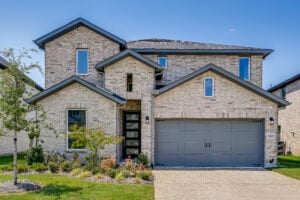
HDR real estate photography helps properties sell 50% faster and gain 118% more online views. By merging multiple exposures, HDR creates balanced, detailed images that showcase homes as they appear in person. Here’s what you need to know:
- Why HDR Matters: HDR photos attract more buyers and can increase home sale prices by $3,000–$11,000.
- Key Equipment: Use a DSLR or mirrorless camera with Auto Exposure Bracketing (AEB), wide-angle lenses (e.g., 12–24mm), and a sturdy tripod for sharp, consistent shots.
- Shooting Tips: Capture 5+ bracketed exposures, shoot in RAW format, and use manual settings for control. For interiors, balance lighting; for exteriors, shoot during soft natural light.
- Editing Tools: Software like Photomatix Pro, Lightroom, or Aurora HDR ensures polished, natural results with tone mapping and local adjustments.
- Delivery Standards: Export images in sRGB, 72 DPI for web (2048×1365 px) or 300 DPI for print (4000×2666 px).
HDR photography transforms real estate marketing, making listings stand out and sell faster. Want pro results? Services like HomeJab offer expert HDR photos starting at $229 with a 24-hour turnaround.
How To Edit Natural Looking HDR Photography For Real Estate
Required Equipment
Having the right gear is crucial for producing high-quality HDR real estate photos. Using professional-grade equipment ensures consistency and sharpness in your images. Let’s dive into the essentials, starting with the camera and lens.
Camera and Lens Selection
For HDR photography, a DSLR or mirrorless camera with Auto Exposure Bracketing (AEB) is a must. Ideally, the camera should support at least 5 shots at 2 EV or 9 shots at 1 EV to capture a full range of exposures.
| Camera Type | Key Features | Recommended Settings |
|---|---|---|
| DSLR/Mirrorless | AEB Support | 5-9 bracketed shots |
| Manual Mode | Full exposure control | |
| RAW Format | Maximum editing flexibility |
Pair your camera with a wide-angle lens (12–24mm) for capturing expansive spaces. Some top picks include:
- Canon EF 16-35mm f/4L IS USM: Equipped with built-in image stabilization.
- Nikon Nikkor 16-35mm f/4: Features nano-crystal coating to reduce ghosting.
- Sony SEL1224G 12-24mm f/4-22: Offers a wide focal range for comprehensive coverage.
Once you have your camera and lens, securing a steady shot is the next step. This is where a reliable tripod comes in.
Tripod Requirements
A sturdy tripod is non-negotiable for HDR photography. As photographer Dan Zeeff puts it:
"I ultimately would have saved time, money, and frustrations if I had bought a high-end tripod up front, rather than discover the inadequacies of multiple tripod setups as I progressed through various models."
When picking a tripod, look for these features:
- Durable build with sufficient weight capacity
- Adjustable height with built-in level indicators
- Quick-release plate for convenience
- Stable center column for added support
- Non-slip feet to handle different surfaces
Optional Photography Gear
While the basics will get you started, adding a few extra tools can elevate your results:
| Equipment | Purpose | Benefits |
|---|---|---|
| Remote Shutter Release | Minimize camera shake | Produces sharper bracketed shots |
| Polarizing Filters | Manage reflections | Reduces glare, enhances colors |
| LED Panels | Fill lighting | Improves shadow details |
| Cleaning Kit | Equipment maintenance | Helps maintain image quality |
In bright conditions, consider using neutral density (ND) filters. These allow you to control exposure without affecting color accuracy, ensuring your photos look natural and well-balanced.
Taking HDR Property Photos
With your equipment ready, it’s time to capture HDR real estate photos that truly highlight a property’s features. Achieving this requires the right techniques and camera settings.
Camera Setup Guide
Start by mounting your camera on a tripod to ensure stability. Then, adjust the following settings:
| Setting | Recommended Value | Purpose |
|---|---|---|
| Mode | Manual | Gives you full control over exposure |
| Format | RAW | Provides maximum flexibility during editing |
| ISO | 100-400 | Reduces noise for cleaner images |
| Aperture | f/8 to f/16 | Ensures sharpness across the frame |
| White Balance | Manual | Keeps colors consistent throughout |
According to Modern Angles Real Estate Photography, mastering HDR involves both technical accuracy and skillful editing. Once your camera is set, move on to exposure bracketing to capture a wider dynamic range.
Exposure Bracketing Steps
1. Set Your Base Exposure
To find the middle exposure (0.0 EV), lightly press the shutter button to meter the scene.
2. Configure Bracketing
Adjust your camera to capture five exposures at these intervals:
- Darkest: -4.0 EV
- Dark: -2.0 EV
- Base: 0.0 EV
- Bright: +2.0 EV
- Brightest: +4.0 EV
3. Verify Coverage
Check the histogram to ensure it captures the full range of light and shadow.
"Exposure bracketing is a great way to increase the dynamic range of your camera… and the great thing is that most digital cameras have a bracketing option".
These steps work seamlessly for both indoor and outdoor photography.
Indoor and Outdoor Photo Tips
Interior Shots:
- Turn on all interior lights to brighten the space.
- Be mindful of mixed lighting temperatures, which can affect color balance.
- Use manual white balance for consistency.
- Pay attention to windows and darker corners – local adjustments may be necessary.
Exterior Shots:
- Shoot during early morning or late afternoon for softer, natural light.
- Overcast days can help balance exposure, reducing harsh shadows.
- Focus on shadow details to maintain depth.
- Avoid oversaturating colors to keep the scene looking natural.
"The right HDR approach balances technical precision with artistic vision".
sbb-itb-82c5f45
HDR Photo Editing Process
Once you’ve captured your carefully bracketed shots, the next step is editing. This is where exposures are transformed into eye-catching HDR photos using the right tools and adjustments.
HDR Software Options
Choosing the right software is key to achieving the best results. Here are some popular options:
| Software | Key Features | Best For | Price |
|---|---|---|---|
| Photomatix Pro 7 | Strong deghosting, batch processing | Professional workflows | $99 one-time |
| Lightroom Classic | Built-in HDR merge, lens correction | Basic HDR needs | Subscription |
| Aurora HDR | AI-powered merging, layers support | User-friendly editing | Subscription/Lifetime |
| EasyHDR | One-click presets, simple interface | Quick processing | One-time purchase |
"Photomatix is by far the best HDR software out there, and I have tried them all!" – Jeff Dean
Once you’ve selected your software, it’s time to fine-tune the image using color and tone adjustments.
Color and Tone Adjustments
To create a polished HDR image, focus on these key adjustments:
- White Balance Correction
Adjust the temperature to match the actual lighting conditions. This ensures consistent color across merged exposures while eliminating unwanted color casts. - Tone Mapping
Work on highlights and shadows separately to maintain natural contrast. Be cautious to avoid creating oversaturated colors that look unrealistic. - Local Adjustments
Pay attention to specific areas, like bright windows or dark corners. This step helps balance interior and exterior exposures while preserving architectural details.
After making these adjustments, it’s essential to review your work.
Quality Checks
Before considering your HDR photo complete, run through these checks:
- Technical Elements
Ensure proper alignment between exposures, ghost-free merging, consistent sharpness, and smooth light transitions. Accurate colors and clear detail in both highlights and shadows are a must. - Final Optimization
Apply noise reduction, especially in shadow areas, and use selective sharpening to enhance details. Balance the interior and exterior views for a polished, professional finish.
"Each HDR photo is completely different and requires us to take a completely different path. It’s also the part of the process where I spend the most time." – Elia Locardi, Photographer
Interestingly, 82% of professional real estate photographers now incorporate AI tools into their editing workflows. However, manual verification remains critical to ensure the best results.
Photo Delivery Guidelines
Delivering high-quality images that adhere to industry standards is crucial for client satisfaction and professional results.
File Preparation
When it comes to HDR real estate photos, meeting MLS and platform technical requirements is essential. Below are the key specifications:
| Requirement | Standard Size | Professional Print |
|---|---|---|
| Dimensions | 2048×1365 px | 4000×2666 px |
| Resolution | 72 DPI | 300 DPI |
| Format | JPEG | JPEG |
| File Size | 100KB–500KB | 1MB–3MB |
| Color Space | sRGB | sRGB |
To achieve the best results, export HDR photos using 80–90% JPEG compression. This ensures a good balance between image quality and manageable file size.
Now, let’s look at how HomeJab simplifies the delivery process.
HomeJab Delivery System
HomeJab’s delivery platform is designed for speed and quality. It relies on an AI-driven quality control system that evaluates key aspects of each photo, such as:
- Exposure balance
- Contrast levels
- Camera angle precision
- Image sharpness
- Proper cropping
This advanced automation is paired with human review to ensure every image meets high standards. Photographers upload raw files directly to the platform, where they are processed and optimized for various client needs.
"We pride ourselves on delivering unmatched quality and reliability." – Jimmy Hennessey, Head of Sales at HomeJab
Delivery Timeframes
HomeJab sets a high bar by delivering completed HDR photos within 24 hours of the shoot. This rapid turnaround doesn’t sacrifice quality, as every photo undergoes a detailed technical review before it reaches the client.
Photographers are expected to:
- Upload raw files immediately after the shoot
- Clearly label images with the property address, room details, and any special editing instructions
- Confirm upload completion through the mobile app
This streamlined process, combining automation with professional oversight, ensures fast and reliable results. In fact, properties featuring HDR photos see 61% more online views compared to those with standard images.
Conclusion
HDR photography brings property images to life, grabbing buyers’ attention and boosting sales potential.
Main Points Review
The numbers speak for themselves: HDR photography transforms real estate marketing. Listings with HDR photos sell 50% faster, attract 118% more online views, and achieve 47% higher asking prices per square foot.
Important technical details include:
- Shooting in RAW format for maximum editing flexibility
- Using apertures between f/8 and f/16
- Capturing at least five bracketed exposures
- Ensuring results look natural and realistic
"HDR photography creates stunning, high-quality images that highlight your home’s best features, making your listing stand out from the competition." – Wilson Leung, The Own Team
These techniques underline the importance of professional HDR photography in real estate.
HomeJab HDR Services
HomeJab combines advanced HDR methods with convenience to deliver polished, professional property images. Their HDR photo packages range from 15 to 50 images, starting at $229. Here’s what sets them apart:
- 24-hour turnaround for edited images
- Nationwide network of skilled local photographers
- Expert post-processing for natural, balanced results
HomeJab photographers are trained to eliminate distractions and handle tricky lighting conditions, ensuring every photo captures a property at its best.
With 32% of homes featuring high-quality images selling faster than those without, HDR photography is a smart investment for real estate professionals. By choosing HomeJab, agents can save time, boost listing appeal, and close deals quicker – all while increasing property value.
FAQs
What are the main advantages of using HDR photography for real estate listings?
HDR (High Dynamic Range) photography brings a host of benefits to real estate listings that standard photography simply can’t match. By capturing a broader spectrum of light and balancing exposure, HDR ensures that both the brightest highlights and the darkest shadows in a scene are richly detailed. The result? Properties appear more vibrant, welcoming, and closer to how they look in person.
Homes showcased with HDR images often grab more attention from potential buyers, which can lead to quicker sales. The striking visual quality of these photos helps listings stand out in a crowded market, making HDR photography a go-to strategy for real estate professionals who want to make a lasting impression.
How does HDR editing improve real estate photos?
HDR (High Dynamic Range) editing transforms real estate photos by blending multiple exposures into one well-balanced image. This method captures a wide spectrum of light and detail, ensuring that bright spots like windows and shadowy corners of interiors are both clearly visible.
The outcome? Photos that are vivid and realistic, presenting properties in the best possible way to catch a buyer’s eye. With true-to-life colors and crisp details, HDR editing makes listings pop, drawing more attention and interest, which can help properties sell faster and generate greater engagement.
What are the best camera settings and techniques for capturing high-quality HDR real estate photos?
To create eye-catching HDR real estate photos, start by shooting in RAW format. This setting captures the most detail, giving you flexibility during editing. Use a sturdy tripod to keep your camera steady, as HDR photography involves blending multiple exposures of the same scene. For sharp images, set your aperture between f/8 and f/11, and keep the ISO low – around 100 or 200 – to minimize noise.
Activate Automatic Exposure Bracketing (AEB) to capture at least three shots with varying exposures, ideally spaced by 2 EV steps. Skip the flash, as it can lead to harsh, unnatural lighting. Instead, rely on natural light for a more authentic feel. To balance exposures, use spot metering and focus on an area with average brightness. This approach ensures you capture interior details while maintaining clear views through windows, avoiding overexposed highlights.
By following these steps, you’ll produce polished photos that showcase properties beautifully and professionally.

