Crooked walls, tilted floors, and leaning doorways in real estate photos can hurt your listings. These distortions make spaces look smaller, awkward, or uninviting, driving potential buyers away. Correcting perspective ensures rooms appear natural and balanced, making properties more appealing.
Key Takeaways:
- Why It Matters: 99% of homebuyers rely on listing photos, and homes with professional images sell 32% faster and get 118% more views.
- Causes of Distortion: Wide-angle lenses and camera tilts lead to keystoning and warped lines.
- Top Tools: Use Adobe Lightroom (Guided Upright tool) for quick fixes and Photoshop (Perspective Warp) for precise edits.
- AI for Speed: Tools like Imagen automate corrections for large photo batches.
- Pro Tips: Always start with high-resolution images, use non-destructive editing, and minimize cropping to maintain quality.
Straight lines and proper proportions make your listings stand out, attract more buyers, and sell faster. Ready to learn how? Let’s dive in.
Correcting Verticals and Perspective for Real Estate Photography
What Is Perspective Distortion
Perspective distortion occurs when objects in photos appear warped – straight lines may curve, vertical walls can lean, and room proportions might look off.
This happens because of the camera’s distance and angle relative to the subject. Unlike the human eye, a camera often captures scenes in a way that can feel awkward or unpolished, especially when photographing rooms or buildings.
What Causes Perspective Distortion
To fix perspective distortion effectively, it’s important to understand what causes it.
Wide-angle lenses are the main reason behind perspective distortion in real estate photography. Lenses in the range of 24–35mm (wide-angle) and below 24mm (ultra-wide-angle) are especially prone to creating two common types of distortion:
- Extension distortion: This makes objects close to the lens appear much larger than they actually are compared to those farther away. For instance, a coffee table in the foreground might look oversized, while a distant wall seems unusually small.
- Compression distortion: This has the opposite effect, making distant objects appear closer in size and compressing the space between them.
Another frequent issue in real estate photography is keystoning or perspective convergence. This happens when you tilt the camera upward to capture tall ceilings or buildings, causing vertical lines to lean inward. Modern lenses can only render straight lines accurately when the camera is perfectly level with the subject. Tilting the camera disrupts this balance, creating the effect of converging lines.
The position of the camera and the angle of the shot also play significant roles. For example, tilting the camera upwards while photographing vertical structures narrows the appearance of the building in the frame. Ultra-wide-angle lenses, which can exceed the human field of vision at 120°, often exaggerate these effects, making the resulting image feel unnatural.
How Distortion Affects Real Estate Listings
Leaving perspective distortion uncorrected can hurt the effectiveness of your property marketing. Converging or leaning vertical lines create an unnatural look, which can make potential buyers feel uneasy. The impact is clear: listings with professional photos get 61% more views online than those with amateur images, and homes with high-quality photos sell 32% faster and for 1–3% more on average.
Wide-angle distortion can also misrepresent the space. Ultra-wide-angle lenses often exaggerate perspectives, making rooms and furniture appear larger than they are. Misaligned vertical and horizontal lines can give the impression of instability or poor construction. This is a problem when 87% of homebuyers say photos are the most important feature in online property listings.
Tools for Fixing Perspective
The right software can make the difference between spending hours on manual corrections and achieving polished results in just minutes. While basic tools can handle minor tweaks, real estate photography often requires software capable of tackling more intricate perspective challenges. Below, we’ll explore the top tools available and why Adobe’s suite continues to dominate in this field.
Best Tools for Perspective Correction
Adobe Lightroom is a favorite among real estate photographers, offering a subscription at $9.99 per month or $119.88 annually. Its standout features include efficient batch processing, photo management, and tools for enhancing shadow details and color correction. Lightroom’s ease of organization and import capabilities make it an excellent choice for managing multiple property shoots.
Adobe Photoshop takes perspective correction to the next level with its advanced, layer-based editing system. The Photography Plan is priced at $9.99 per month, while the standalone Photoshop Plan costs $20.99 per month. Photoshop is ideal for precise adjustments, including intricate architectural edits, and supports a wide range of image formats. Its tools for color grading and detailed retouching make it indispensable for complex corrections.
For photographers managing large volumes of images, AI-powered tools like Imagen offer a faster alternative. With pricing as low as $0.05 per photo, plus optional features like cropping and straightening for an additional $0.01 per photo, these tools are transforming workflows.
Canadian real estate photographer Jen McLeod highlights the efficiency of Imagen:
"Imagen is so accurate and fast that for the first time in well over a decade, I stay caught up before tomorrow’s shoot even happens. This is a true game changer."
For those seeking even more hands-on support, specialized editing services are available. These services handle tasks like HDR blending, exposure correction, and line straightening, offering comprehensive solutions for real estate photo editing.
Why Lightroom and Photoshop Work Best
Adobe’s Lightroom and Photoshop are a powerful duo for real estate professionals. Lightroom’s Guided Upright tool enables quick, non-destructive perspective corrections, while Photoshop’s Perspective Warp feature offers pixel-level precision for more complex architectural adjustments. Together, they streamline the editing process, allowing photographers to move seamlessly between bulk edits in Lightroom and detailed refinements in Photoshop.
Here’s a quick comparison of their features:
| Feature | Lightroom | Photoshop |
|---|---|---|
| Best for | Quick batch edits, organization | Complex retouching, precision work |
| Learning curve | Beginner-friendly | Intermediate to advanced |
| Perspective tools | Guided Upright, manual correction | Perspective Warp, Transform tools |
| Workflow | Non-destructive, catalog-based | Layer-based, pixel-level control |
One of the biggest advantages of Adobe’s ecosystem is its seamless integration. You can start editing in Lightroom and move directly to Photoshop for finer adjustments without losing quality or metadata. Both programs come with built-in lens profile correction tools, making it easy to address everything from basic keystone issues to intricate architectural distortions.
For photographers dealing with high volumes, a hybrid approach can be the most efficient. Start with AI-powered tools for automated corrections, then refine key images in Lightroom or Photoshop for the best results. This method ensures a balance between speed and quality, helping you deliver polished photos for your most important listings.
How to Fix Perspective Step-by-Step
Using tools like Lightroom and Photoshop, you can correct perspective issues in your photos with precision and ease. Each tool has its own approach, but they all aim to align lines and bring architectural balance to your images. Here’s how you can do it, starting with Lightroom’s Guided Upright tool.
Using Lightroom’s Guided Upright Tool
Lightroom’s Guided Upright tool is a powerful way to tackle perspective corrections. It allows you to draw custom guides directly on your photo, making it especially useful for real estate photography where automatic adjustments might miss key architectural details.
Begin by opening your image in Lightroom’s Develop module and locating the Transform panel on the right-hand side. Select the Guided Upright tool, which activates a crosshair for drawing guides along important lines in your photo.
For real estate images, focus on elements like doorframes, window edges, or building corners. Once you add two guides, Lightroom generates a preview. You can refine the perspective further by adding more guides – for example, one along a vertical wall and another along a horizontal ceiling. Each guide helps Lightroom better interpret the geometry and adjust accordingly.
Pro Tip: If you’ve already made cropping or transform edits, applying any Upright option will reset them. To keep your previous adjustments intact, hold the Option key (Mac) or Alt key (Windows) when selecting an Upright mode.
Fixing Perspective in Photoshop
Photoshop provides several methods for correcting perspective, ranging from automatic tools to manual adjustments. To ensure flexibility throughout the editing process, convert your image layer into a Smart Object before making any changes. As editing expert Damien Symonds points out:
"It’s critical for your image to be a smart object when transforming or distorting. Smart objects can be manipulated as many times as needed, and never lose their original quality."
Here are three effective ways to fix perspective in Photoshop:
Method 1: Lens Correction and Camera Raw Filter
Start by navigating to Filter > Lens Correction and selecting the Custom tab. Use the Vertical Perspective slider to address vertical distortions or the horizontal slider for horizontal issues.
Once you’ve applied lens corrections, enhance the results further with Filter > Camera Raw Filter. Under the Geometry tab, click the Auto icon to let Camera Raw refine the perspective for you.
Method 2: Perspective Warp for Complex Adjustments
For more detailed corrections, use Photoshop’s Perspective Warp tool. Access it via Edit > Perspective Warp and define the planes of your image by drawing quads along architectural surfaces. Keep the edges of these quads aligned with the straight lines in your photo.
Once in Warp mode, adjust the perspective by dragging quad corners. You can also straighten lines automatically by Shift-clicking them. This tool gives you pixel-level control, making it ideal for intricate architectural edits.
Method 3: Manual Transform Approach
If you prefer hands-on adjustments, Photoshop’s manual transform tools are a great option. Enable a grid (set to 5% intervals with 1 subdivision via Preferences) to guide your edits.
Expand the canvas size through Image > Canvas Size to create space for corrections. Then, use Ctrl/Cmd + T to activate transform handles. From there, apply options like Perspective, Skew, and Scale to fix distortions. For example, you can correct inward-slanting vertical lines by widening the top edge of a building photo and then using the Scale option to adjust the height proportions.
AI Tools for High-Volume Editing
When working on dozens of property photos weekly, AI-powered tools can save you time while ensuring consistent results. These tools use machine learning to analyze the structure of your images and automatically correct perspective issues.
How AI Perspective Correction Works
AI tools examine your uploaded images, identifying elements like walls, windows, and rooflines to determine the correct perspective. They then provide automated suggestions for adjustments, offering uniform results across large batches of photos.
Incorporating AI into Your Workflow
Choose an AI tool that fits your needs, considering factors like ease of use, supported file formats, and compatibility with your existing workflow. Upload your images, let the AI analyze them, and tweak the suggested corrections to match your creative vision.
For example, Imagen offers AI-powered tools tailored for real estate photography. Their platform handles perspective correction, color adjustments, and even HDR photo merging. As they explain:
"Imagen helps you tackle real estate photography challenges with ease, leaving you to focus solely on your business."
AI tools are a game-changer for high-volume photographers, providing both speed and consistency in editing.
sbb-itb-82c5f45
Keeping Image Quality During Edits
When making perspective corrections, it’s easy to lose image quality if you’re not careful. To avoid this, start with the highest-quality image possible and use techniques that preserve details as you make adjustments.
Preventing Resolution Loss
Stick to non-destructive editing whenever you can. Tools like Adobe Lightroom save your edits as instructions instead of altering the original file. This lets you make multiple perspective adjustments, undo changes, and keep the original resolution intact throughout your workflow.
Minimize cropping during perspective corrections. Cropping reduces the number of pixels in your image, so it’s better to plan your shots with extra space by stepping back or using a wider lens. If cropping is unavoidable, focus on trimming only the distorted edges while keeping as much of the original frame as possible.
For archiving or printing, export your images as TIFF or PNG to avoid compression. For online use, JPEG works fine when exported at quality settings between 90% and 100%, with dimensions between 2,000 and 3,000 pixels wide.
After making adjustments, apply sharpening sparingly while viewing at 100% to avoid introducing halos or over-sharpening.
Lastly, resize your image only after completing all edits. Use Bicubic Sharper for reducing image size and Bicubic Smoother for enlargements to maintain quality .
These steps help preserve details and ensure your images are ready for further adjustments or final use.
Adjusting Exposure and Perspective Together
Perspective corrections can alter how exposure looks across an image. Stretching or warping parts of the photo may make some areas appear darker or lighter, requiring careful exposure adjustments for balance.
Fix the perspective first, then adjust the exposure to ensure tonal consistency. The stretching process can make certain areas seem underexposed or overexposed compared to the rest of the image.
Use selective exposure adjustments rather than global ones. Lightroom’s masking tools and Photoshop’s adjustment layers let you fine-tune brightness in specific areas without affecting the entire image. This is especially useful for architectural shots where corrections might create uneven lighting.
Keep an eye on your histogram as you adjust exposure to avoid clipping highlights or shadows. A balanced tonal range ensures details remain visible in both bright and dark areas, like windows and shadowed interiors.
In Exposure X4, many photographers rely on highlight and shadow recovery tools, along with gradient masks, to even out brightness differences – such as balancing bright skies with darker foregrounds after perspective corrections.
Shoot with the "expose to the right" technique whenever possible. By slightly overexposing without blowing out highlights, you can reduce noise in shadow areas and recover details during post-processing. Just be careful not to push highlights too far.
Finally, remember that major perspective corrections can crop your image edges. Plan your composition with this in mind, and always save a copy of your original file before making any changes. Apply edits gradually to maintain control and avoid overdoing it.
Using Corrected Photos in Real Estate Marketing
Once your photos have been expertly adjusted, they become a powerful tool for boosting your marketing efforts. High-quality, polished images not only attract potential buyers but also help speed up the sales process. In fact, studies show that homebuyers consider photos the most critical feature in real estate listings.
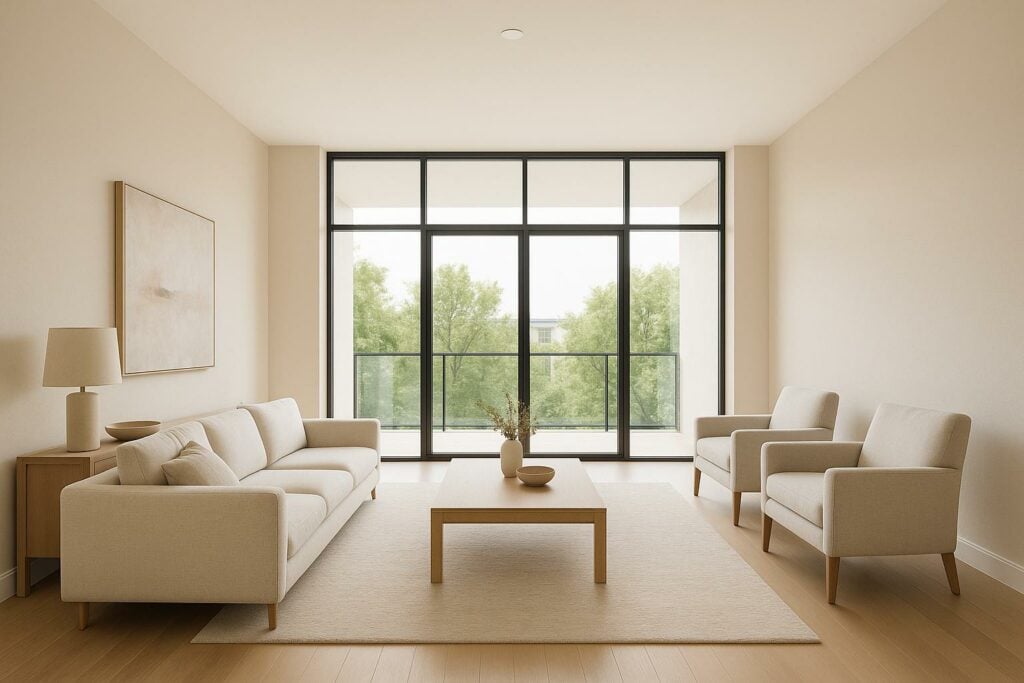
Perspective-corrected photos make an immediate impression by showcasing properties as they truly appear in person. When vertical lines are straight and horizontal elements are aligned, rooms look natural, proportional, and welcoming. This level of accuracy builds trust with buyers, allowing them to better understand the property’s layout and dimensions.
By presenting straight lines and balanced proportions, your listings convey a more accurate and appealing story of the property’s potential. These corrected images demonstrate professionalism and attention to detail – qualities that serious buyers notice and value.
Adding Corrected Photos to Marketing Materials
Once every detail in your photos is refined, using them across your marketing channels can significantly enhance your property’s appeal. Perspective-corrected images are highly effective in MLS listings, social media posts, and email campaigns. Their clean lines and balanced layouts grab attention and encourage engagement.
These images also shine in 3D virtual tours, creating a seamless and inviting experience for prospective buyers. On MLS platforms, corrected photos stand out from listings featuring amateur photography. Straight walls and aligned architectural details give your listing a polished, professional edge, encouraging buyers to explore further.
For print materials like brochures and flyers, corrected images ensure that even the smallest details look professional. Subtle distortions, which might detract from the overall presentation, are eliminated. Email campaigns also benefit from these polished visuals, reinforcing your expertise and attention to detail.
How HomeJab Helps Real Estate Professionals
HomeJab takes the clarity of perspective-corrected photos to the next level, offering services that elevate your property’s presentation. Their HDR photography packages, priced between $229 and $379, capture rich lighting details. When combined with perspective correction, these photos present properties in their best light.
Virtual staging, available for $50 per photo, becomes even more impactful when applied to perspective-corrected images. Digitally furnished rooms appear more realistic and proportional, helping buyers imagine themselves living in the space.
HomeJab’s 3D virtual tours, ranging from $315 to $869, also benefit greatly from corrected photos. Properly aligned images ensure that virtual tours flow smoothly from one room to the next, avoiding any distracting perspective shifts.
With a 24-hour turnaround, HomeJab delivers professional photography that’s ready for perspective correction, keeping your marketing on schedule. Their nationwide service ensures consistent quality, and their bulk pricing options make premium photography accessible for high-volume agents.
Additionally, HomeJab’s aerial photography services, priced between $249 and $499, provide striking exterior shots that complement your ground-level images. These aerial photos highlight property boundaries and neighborhood features, creating a comprehensive visual package that attracts serious buyers and supports premium pricing.
Conclusion: Better Real Estate Photos with Perspective Correction
Mastering perspective correction can transform your real estate photos into polished, professional assets that truly stand out. When vertical lines are straight and horizontal elements are properly aligned, properties look natural, proportional, and far more appealing to serious buyers.
High-quality images can make a huge difference – properties with professional photos have been shown to sell for as much as $116,076 more than those with lower-quality visuals. This level of visual quality not only sets your listings apart but also draws in more interest from potential buyers.
Tools like Lightroom’s Guided Upright feature and Photoshop’s Free Transform Tool offer the precision needed to align images perfectly along vertical and horizontal axes. These adjustments ensure your photos accurately represent the property, building trust with buyers by showing spaces as they truly appear.
Corrected images are powerful across all marketing platforms. Straight lines and balanced proportions immediately convey professionalism and care. By addressing distortions from wide-angle lenses or tricky shooting conditions, you eliminate the awkward visuals that can make rooms appear unnatural or out of proportion.
For real estate professionals juggling multiple listings, perspective correction is a must-have skill. Paired with professional photography, these techniques elevate your marketing materials, showcasing properties with the quality and expertise today’s buyers expect. Incorporate these corrections into your workflow to consistently deliver compelling, trustworthy visuals that drive results.
FAQs
How can I take real estate photos with the correct perspective to minimize editing later?
To get the right perspective in real estate photos from the very beginning, start with a tripod. Set your camera at a steady height – usually around 4 to 5 feet – so it lines up with the midpoint of the walls. This simple step helps avoid odd angles and ensures vertical lines stay straight.
Another key tip: keep your camera level. This is especially important when using wide-angle lenses, which can distort perspective if you tilt the camera up or down.
For those looking to take precision up a notch, a tilt-shift lens is worth considering. These lenses let you make in-camera adjustments to correct perspective issues, saving you time in post-editing. With these techniques, you can create polished, professional-quality photos right from the start.
How can I minimize perspective distortion when using wide-angle lenses for real estate photography?
To minimize perspective distortion when using wide-angle lenses for real estate photography, start by ensuring your camera is perfectly level. This keeps vertical lines straight, helping the space appear more natural and well-proportioned. Positioning the camera at eye level is another key tip for achieving a balanced and visually appealing shot.
For the best results, stick to a focal length between 16mm and 24mm on full-frame cameras. This range is ideal for capturing wide spaces without introducing too much distortion. Whenever possible, try to position the camera farther away from your subject. Getting too close can exaggerate perspective effects, making rooms look warped or unnatural.
These straightforward techniques can help you produce polished real estate photos that showcase properties accurately and professionally.
How do AI-powered tools compare to traditional software like Lightroom and Photoshop for fixing perspective in real estate photos?
AI-powered tools have revolutionized the way photographers correct perspective in real estate photos, offering a much quicker and more efficient alternative to traditional software like Lightroom or Photoshop. With these tools, distortions are automatically detected and corrected within seconds, eliminating the need for time-consuming manual edits.
What sets AI tools apart is their ability to deliver consistent, high-quality results. By leveraging advanced algorithms, these tools analyze and enhance images with impressive precision. This not only minimizes the risk of human error but also ensures a uniform look across all photos – something that’s crucial for professional real estate listings. While traditional software still offers flexibility, AI tools are a game-changer for speeding up workflows and meeting the tight deadlines that come with the fast-moving real estate industry.