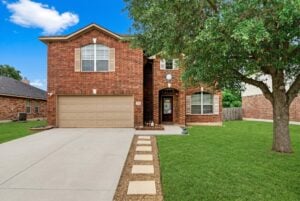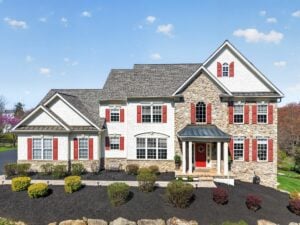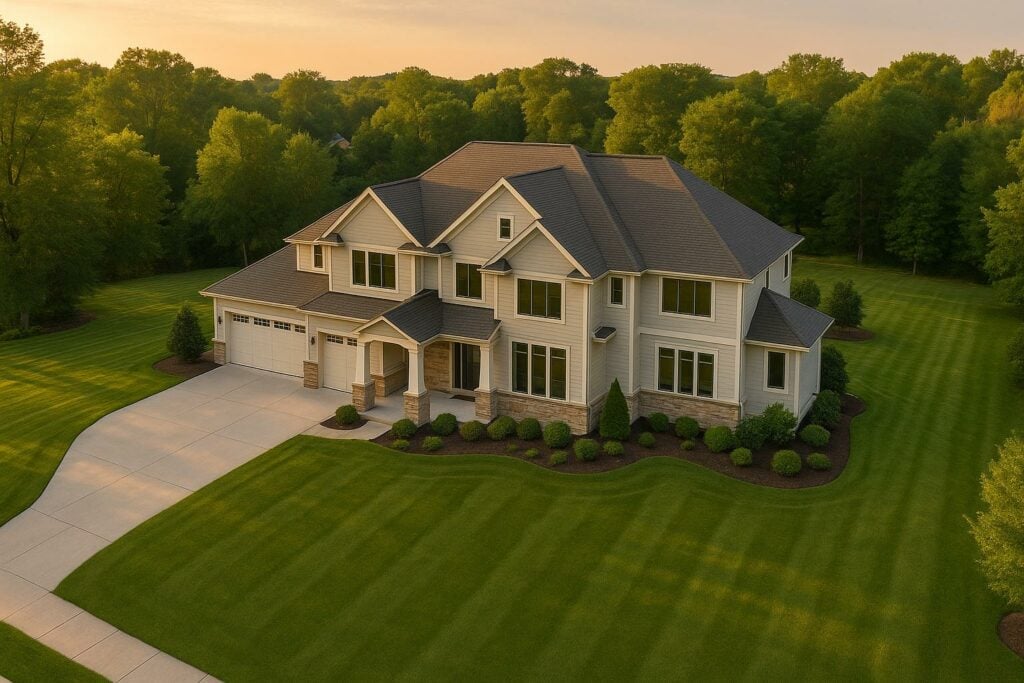
Drone photography is transforming the way large homes are marketed by offering stunning aerial views that showcase scale, landscaping, and architectural details. This guide covers everything you need to know to use drones effectively in real estate, from selecting equipment to executing professional shoots and editing media for MLS listings. Here’s what you’ll learn:
- Why drones are ideal for large properties: Highlight outdoor features, rooflines, and surroundings.
- Top drones for real estate: DJI Mavic 3 Pro, Mavic 3 Pro Cine, and Mini 4 Pro.
- Pre-shoot tips: Scout the property, plan flight paths, and check FAA regulations.
- Shooting techniques: Use automated flight modes, vary angles, and ensure smooth movements.
- Editing essentials: Tools like Adobe Lightroom and Premiere Pro for polished visuals.
- MLS-ready formats: Correct resolutions and metadata for seamless uploads.
For busy agents, services like HomeJab provide a hassle-free option with certified photographers, fast turnarounds, and tailored marketing packages. Drone photography not only elevates listings but also meets the expectations of today’s buyers.
Full Drone Real Estate Photography Course (Photo & Video!)
Equipment Needed for Drone Photography
To capture stunning visuals of large homes, you’ll need drones and accessories that combine high-resolution imaging with precise flight control.
Best Drone Models for Real Estate Photography
The DJI Mavic 3 Pro is a standout choice for real estate photography. Its Hasselblad camera system delivers 20-megapixel still images and 5.1K video, ensuring sharp, detailed visuals that highlight every feature of a property. Thanks to its 1-inch CMOS sensor, it handles bright skies and shadowed areas effortlessly, offering a wide dynamic range.
For even greater flexibility, the DJI Mavic 3 Pro Cine includes a triple-camera system. Alongside the main Hasselblad camera, it features dual telephoto lenses, making it easy to capture sweeping wide shots and detailed close-ups without needing to move the drone.
If you’re looking for a lightweight and maneuverable option, the DJI Mini 4 Pro is a solid mid-range choice. It offers 4K video recording and impressive image quality, making it ideal for covering expansive properties with ease.
When choosing a drone, prioritize features like 3-axis gimbal stabilization, RAW image capture with flat profiles (like D-Log), adjustable apertures, and settings optimized for clarity. For photos, aim for settings like f/5.6–f/8 and ISO 100–400 to minimize noise. For video, achieve natural motion blur by setting your shutter speed to about double your frame rate – such as 1/60th of a second for 30fps – and use ND filters to maintain the proper exposure.
Essential Accessories for Large Property Shoots
Neutral Density (ND) filters are a must-have for controlling exposure in bright outdoor environments. Use ND16 filters on sunny days and ND8 filters for cloudy conditions to avoid overexposure while keeping your shutter speed in check. This is especially important for achieving smooth motion blur in videos, where the rule of thumb is to set the shutter speed to twice the frame rate.
To fine-tune your exposure, enable features like histogram and zebra pattern displays on your drone’s controller or app. These tools help you keep brightness levels in check during your flight, ensuring every shot is properly exposed and visually striking. With the right equipment and settings, you’ll be ready to capture professional-quality images and videos of any property.
Pre-Shoot Planning and Preparation
Getting the perfect drone shots starts well before the drone leaves the ground. Careful planning ensures you capture all the key details while avoiding potential hiccups.
Property Scouting and Highlighting Key Features
Before you even think about flying, take the time to scout the property. This step helps you identify the standout features that will make your aerial shots pop. For larger properties, these features often define the appeal of the space.
Pay attention to outdoor amenities like swimming pools, tennis courts, outdoor kitchens, lush gardens, or tree-lined driveways. These elements can showcase the property’s scale and charm. Architectural features like rooflines, courtyards, wraparound porches, or multi-level designs also add depth and dimension to your shots.
Don’t forget the property’s surroundings. Large homes often come with scenic perks like expansive acreage, nearby lakes, mountain views, or wooded areas. Including these in your compositions can highlight the property’s setting and privacy.
During your walkthrough, note any obstacles that might complicate your shoot. Power lines, tall trees, neighboring buildings, or other aircraft flight paths can limit your options. Spotting these challenges early allows you to adjust your flight paths and angles accordingly.
Once you’ve mapped out the key features and potential hurdles, plan your shoot around the best lighting, weather conditions, and any local regulations.
Timing, Weather, and FAA Compliance
Timing is everything when it comes to drone photography. Schedule your flights during full daylight hours to ensure sharp, high-quality images. Bright light not only enhances your photos but also helps maintain a clear visual line of sight with your drone for safer operation.
While dawn and dusk might seem tempting for their soft lighting, these low-light conditions can compromise image clarity. For professional real estate photography, stick to times when the light is strong and consistent.
Weather conditions are another critical factor. Always check the forecast before heading out. The best results come with clear skies, minimal cloud cover, low winds, and good visibility. These conditions also make it easier to operate your drone smoothly and safely.
Avoid flying in rain or snow at all costs. Moisture can wreak havoc on your drone’s electronics. If your drone does get wet, immediately remove the battery and dry all components thoroughly to prevent lasting damage. High winds are another issue – they drain your battery faster, make the drone harder to control, and can cause shaky footage.
Extreme temperatures can also affect your equipment. Hot weather can overheat your drone’s batteries and internal components, while cold weather can significantly shorten battery life and flight time.
And, of course, FAA compliance is a must. If you’re flying commercially, you’ll need a Part 107 Remote Pilot Certificate. Make sure your drone is registered with the FAA if it weighs more than 0.55 pounds, and always fly within visual line of sight during daylight hours.
Before your shoot, use apps like B4UFLY or AirMap to check for any airspace restrictions. Properties near airports, military bases, or busy urban areas might have flight limitations that could impact your plans.
Once you’ve accounted for these environmental and legal factors, it’s time to create a detailed shot list to make the most of your flight time.
Creating a Complete Shot List
A solid shot list is your roadmap for a smooth and efficient drone shoot.
Start with wide establishing shots to set the scene and show the property in its full context. Then, move on to medium shots to highlight key areas like outdoor living spaces, pools, or gardens. Finally, capture close-ups of unique details that make the property stand out.
Adding movement shots – like flyovers or orbitals – can bring your footage to life and add a dynamic touch. Vary your altitudes to keep the visuals engaging and diverse.
To maximize your time in the air, group nearby shots together. This strategy reduces unnecessary flying and conserves battery life, giving you more flexibility to capture everything on your list while keeping safety in mind.
Executing the Drone Shoot: Taking Professional Shots
With your planning complete, it’s time to launch your drone and turn your vision into reality. Capturing professional-level footage hinges on smooth execution, smart use of your drone’s features, and thoughtful composition. Equipped with your detailed shot list, these strategies will help you create footage that stands out.
Flight Path Planning and Smooth Execution
Your shot list and chosen equipment are your foundation, but executing smooth flight paths is what elevates your footage. Controlled, steady movements are essential to avoid the amateur look of jerky or abrupt changes. Begin each flight with gradual movements, allowing your drone’s gimbal to stabilize the camera and deliver silky-smooth footage.
Start high to capture wide, establishing shots of the entire property. Then, gradually lower your drone to showcase outdoor features like pools, gardens, or patios. When planning your flight paths, follow natural curves – like a winding driveway or a curved walkway – to create a sense of flow. Avoid rigid, straight-line movements that can feel mechanical. Also, manage your drone’s battery efficiently by grouping similar shots together, ensuring you have enough power for safe operation and to complete your shoot.
Using Automated Flight Modes
Modern drones come with automated flight modes that make capturing professional footage easier. For instance, Orbit mode automatically circles a focal point, offering a dynamic view of a home’s facade and its surroundings. Waypoint mode allows you to pre-set a flight path, ensuring consistent and smooth transitions as you highlight different features of the property.
Other modes, like Follow Me or Point of Interest, can help you create dynamic shots or keep specific elements in focus. These automated features work best on large properties with minimal obstacles, giving you room to maneuver safely and creatively. Once you’ve used these tools to capture steady, automated shots, you can refine your visuals with more intentional camera angles and techniques.
Camera Angles and Composition for Large Homes
To truly showcase a property, vary your shooting heights. High-altitude shots provide a sense of scale, mid-range views highlight architectural details, and low angles draw attention to specific features like landscaping or outdoor amenities.
Instead of relying solely on top-down aerial views, experiment with oblique angles that blend architectural details with the property’s overall layout. Use classic composition techniques, such as the rule of thirds, to position key features in visually engaging ways. Leading lines – like driveways or walkways – can guide the viewer’s eye through the frame, while layering foreground, middle ground, and background elements adds depth to your shots. Subtle camera movements, like slow pans or tilts, can keep viewers engaged, while the interplay of natural light enhances both the home’s architecture and its landscaping. By combining these techniques, you’ll create footage that feels polished and professional.
sbb-itb-82c5f45
Post-Production and Editing Aerial Media
Raw aerial footage often needs careful editing to truly highlight a property’s appeal. Post-production plays a crucial role in refining these shots, ensuring they meet the high visual standards expected in luxury home marketing. Through professional editing, good footage transforms into powerful marketing material that grabs attention and helps listings stand out in competitive markets.
Recommended Software for Editing Aerial Media
For aerial photography, Adobe Lightroom is a standout tool. Its user-friendly interface and advanced RAW processing capabilities make it a go-to for real estate professionals. One of its best features? Batch processing, which lets you apply similar edits across multiple images – perfect for managing large property portfolios efficiently.
When it comes to video editing, Adobe Premiere Pro takes the lead. It offers tools like stabilization to smooth out minor drone movements and advanced color grading to give footage a polished, cinematic feel. Its proxy workflow is especially handy for editing 4K drone footage on less powerful hardware.
For Mac users, Final Cut Pro is an excellent alternative. It boasts faster rendering times and integrates seamlessly with other Apple products. Its magnetic timeline feature simplifies quick edits, while built-in tools for color correction and stabilization work wonders on drone footage.
If you’re looking for a cost-effective option, DaVinci Resolve is hard to beat. While it has a steeper learning curve, this free software offers professional-grade color correction tools that can elevate property visuals to a professional level.
Key Editing Techniques for Real Estate Media
Color correction is one of the first steps in editing aerial footage. Drone cameras often capture flat, desaturated images, so enhancing colors and adjusting exposure is crucial. This ensures the property looks vibrant and well-lit while preserving details in both bright and dark areas. For shots featuring both bright skies and shadowed ground, HDR blending is invaluable. By blending multiple exposures, you can bring out details in highlights and shadows, making architectural features pop without over-editing.
Contrast adjustments further enhance depth and texture. A slight contrast boost can make architectural details like roofing, siding, and landscaping stand out. At the same time, lens corrections address issues like barrel distortion or vignetting – common with drone cameras. Most editing software includes automatic lens profiles for popular drone models, making this step quick and effective.
When editing, the goal is to present properties in their best light without misrepresenting them. Temporary distractions like vehicles or trash cans can be removed, but avoid altering permanent features like power lines or neighboring structures. Over-editing colors or textures to an unrealistic degree can harm credibility, so aim for enhancements that reflect the property as it naturally appears.
Exporting Media in MLS-Ready Formats
Proper formatting is essential to ensure compatibility with MLS systems and online platforms. For photographs, export JPEGs in the sRGB color space, optimized for fast loading without sacrificing quality.
For most MLS platforms, a resolution of 1920×1080 pixels works well, but for premium listings, consider offering 4K images (3840×2160 pixels) for marketing materials while sticking to standard resolutions for MLS uploads.
Videos require specific settings for compatibility. Export in H.264 format with AAC audio compression, aiming for bitrates of 10–15 Mbps for 1080p footage and 25–35 Mbps for 4K. This keeps file sizes manageable while maintaining high quality.
Metadata management is another important step. Embedding details like the property address, shoot date, and photographer credits into the image’s EXIF data helps agents stay organized and protects your work legally.
Always ensure your edits comply with MLS guidelines to avoid any issues. Photos should focus solely on the property, avoiding lifestyle elements or featuring people in virtual tours. If significant edits are made – such as adjustments to lighting or the addition of virtual staging – include a disclaimer to maintain transparency.
Lastly, review your local MLS photo editing rules to ensure full compliance. When in doubt, lean toward minimal processing to avoid potential issues. Once your media is polished and ready, consider using professional services like HomeJab to streamline your real estate marketing efforts.
Using HomeJab for Professional Drone Photography

Once you’ve mastered your shooting and editing skills, it might be time to simplify your workflow by turning to a trusted professional service. Outsourcing aerial photography to experts can deliver better results while saving you time and effort. HomeJab makes this process easy by connecting real estate agents with a network of skilled photographers who handle everything from flight planning to delivering polished media – perfect for showcasing large homes.
Overview of HomeJab Services
HomeJab is a one-stop platform for real estate media, offering aerial photography and drone videos across the country. Their photographers are FAA-compliant and specifically trained for real estate, ensuring they meet all legal and industry standards.
But HomeJab doesn’t stop at drone photography. They combine aerial media with HDR photography, 3D virtual tours, and virtual staging to create a complete marketing package. The virtual staging service, for example, digitally furnishes empty spaces, helping potential buyers visualize the property’s possibilities.
For large homes, HomeJab’s walkthrough videos seamlessly integrate aerial footage, giving an all-encompassing view that highlights both the property’s architectural details and its surrounding landscape. They also offer floorplan creation services, which provide clear spatial context – especially helpful for expansive properties.
Why Real Estate Professionals Choose HomeJab
HomeJab is built for busy agents who need quick, reliable results. With a guaranteed 24-hour turnaround, it eliminates the waiting time often associated with traditional photography services.
Their network of vetted photographers ensures consistent quality, no matter the location. Agents also don’t have to worry about the technical side – HomeJab handles FAA regulations and local flight restrictions, so photographers arrive fully certified and ready to work.
To make things even easier, HomeJab integrates directly with MLS platforms. Photos and videos are delivered in MLS-ready formats, properly sized and compressed. Agents also receive branded property pages that can be shared instantly with clients and prospects.
For agents managing multiple listings, HomeJab offers bulk pricing options, including a referral program and volume discounts. For example, agents earn $50 in credits for every $1,000 spent, making it a cost-effective solution for scaling up marketing efforts.
HomeJab Pricing and Package Options
HomeJab’s pricing is designed to fit different property sizes and marketing needs, allowing agents to select the best option for their listings.
| Package Type | Price Range | Included Services | Best For |
|---|---|---|---|
| Aerial Photography Only | $249–$499 | 10–15 aerial photos, aerial video | Homes with standout exteriors |
| Photo + Aerial Combo | $275–$549 | 15–50 interior photos, 10–15 aerial photos, aerial video | Comprehensive listings |
| 3D Virtual Tour + Aerial | $315–$869 | Interactive 3D tour, aerial photos, aerial video | Luxury properties and remote buyers |
| HDR + Aerial Package | $229–$499 | HDR photos and aerial shots | Listings requiring precise lighting |
For agents who already have interior photos, the aerial-only package is a great choice for capturing professional exterior and overhead shots. Meanwhile, combo packages offer more value by combining interior and aerial media, making them ideal for full-scale marketing campaigns.
Luxury properties benefit most from the 3D Virtual Tour + Aerial package, which provides an immersive experience by blending detailed interior tours with stunning aerial views. And for agents juggling multiple listings, bulk pricing and credits make these services even more budget-friendly.
To further enhance property presentations, HomeJab also offers a virtual staging add-on for $50 per photo. This feature allows agents to digitally furnish spaces, giving listings a polished and inviting look.
Conclusion and Key Takeaways
Drone photography brings a fresh perspective to marketing large homes by highlighting sprawling grounds, intricate landscaping, and stunning architectural features. It allows potential buyers to truly grasp the scale and allure of luxury properties.
Best Practices for Drone Photography
To make the most of drone photography for large homes, focus on these essentials:
- High-quality equipment: Invest in drones equipped with 4K cameras, gimbal stabilization, and necessary accessories.
- Proper planning: Scout the property, monitor weather conditions, ensure FAA compliance, and create a detailed shot list.
- Skilled execution: Use automated flight modes and experiment with strategic camera angles to capture cinematic visuals.
- Polished post-production: Apply color corrections and export images and videos in formats ready for MLS listings.
By following these steps, agents can create visually stunning marketing materials that stand out and help close deals more efficiently.
Why Consider HomeJab?
For agents looking to take their marketing to the next level, professional services like HomeJab can make a big difference. HomeJab simplifies the process with certified photographers, quick 24-hour turnarounds, and a range of marketing solutions tailored for real estate.
If you’re managing multiple luxury listings, HomeJab’s bulk pricing and $50 credit for every $1,000 spent make it an accessible and cost-effective choice. Large homes demand marketing that reflects their grandeur, and investing in professional drone photography not only enhances buyer interest but also leads to faster sales and happier clients. Aerial views have become a must-have in luxury real estate marketing, meeting the expectations of today’s discerning buyers.
FAQs
What FAA regulations and legal requirements should I know about for using drones in real estate photography?
To legally use drones for real estate photography in the U.S., you need to comply with FAA regulations. This means obtaining a Part 107 Remote Pilot Certificate, which requires passing a test covering airspace rules, weather conditions, and safety procedures. On top of that, any drone used for commercial purposes must be registered with the FAA.
While flying, it’s essential to keep the drone within your line of sight, maintain an altitude of 400 feet or lower unless you have specific authorization, and adhere to local safety and privacy laws. Be mindful of private property rights and ensure your operations align with both federal and local rules to steer clear of any legal complications.
What’s the best way to format and optimize drone footage for MLS listings?
To make sure your drone footage is ready for MLS, save it in MP4 or MOV format and ensure the resolution is at least 1080p. Keep the video short – under 2 minutes – to hold the viewer’s attention. Take advantage of natural light for better visibility, shoot in RAW for more editing options, and prioritize angles that highlight the property’s standout features. Once filming is complete, use professional editing software to polish the video and double-check that it aligns with MLS requirements before uploading.
Why should I hire a professional service like HomeJab for drone photography instead of doing it myself?
Hiring a professional service like HomeJab means you’ll get breathtaking, high-quality aerial visuals that highlight large homes and their surroundings in the best possible way. These professionals bring a mix of expertise, creativity, and technical know-how, ensuring every shot captures the perfect angle and lighting to make your property stand out.
On top of that, they’re familiar with drone regulations and safety guidelines, which helps reduce any legal or safety concerns. Letting the experts handle this not only saves you time but also allows you to focus on other parts of your property listing. Plus, the polished media they produce can draw in more buyers, potentially speeding up sales and even leading to higher offers.