The best time for exterior real estate photos depends on lighting conditions and the property’s orientation. Here’s a quick guide:
- Morning and Evening (Golden Hour): Soft, warm light highlights textures and reduces harsh shadows.
- Morning: Best for east-facing features.
- Evening: Ideal for west-facing facades.
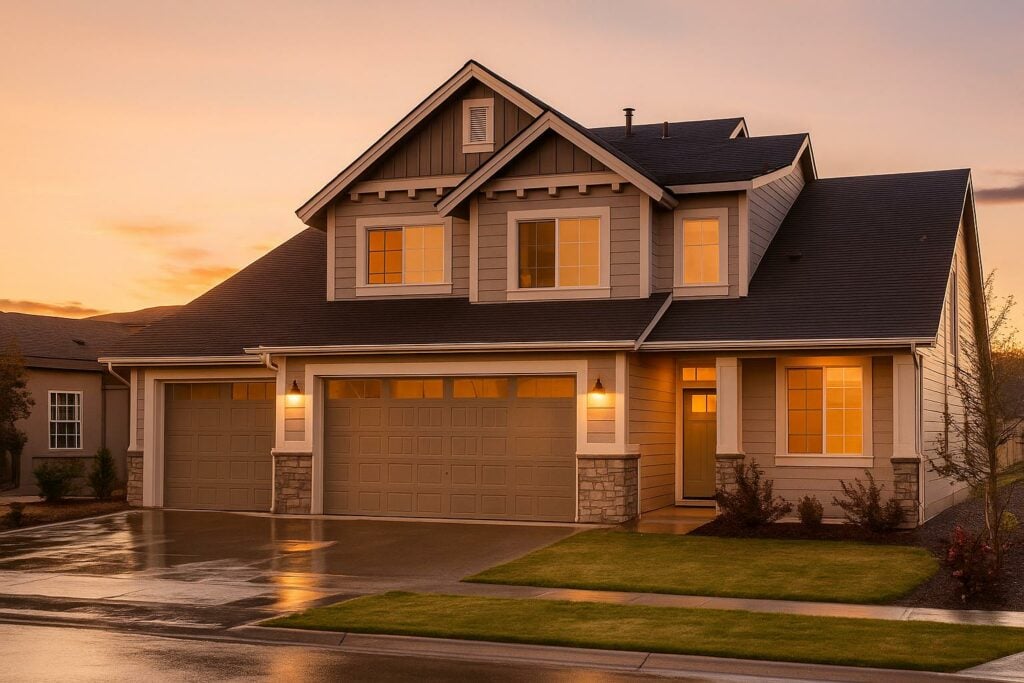
- Sunset and Dusk: Combine natural twilight with artificial lighting for dramatic shots.
- Best for: Luxury properties with pools or landscape lighting.
- Cloudy Days: Overcast skies create even lighting, ideal for capturing details and textures without harsh shadows.
Quick Comparison
| Time of Day | Best For | Limitations | Tips |
|---|---|---|---|
| Golden Hour | Warm, inviting photos | Short shooting window | Use HDR for balanced exposure |
| Dusk | Luxury features, ambiance | Very limited time frame | Combine exposures for lighting |
| Cloudy Day | Details, dark exteriors | Flat lighting, less depth | Enhance contrast in editing |
Plan shoots based on property orientation, weather, and seasonal sunlight changes to get the best results.
Enhance Your Real Estate Photography with Natural Light
1. Morning and Evening Sun (Golden Hour)
The golden hour – right after sunrise and just before sunset – offers soft, low-angle sunlight that can elevate exterior photos.
In the morning, the light emphasizes east-facing features, accentuating textures and contours. In the evening, it bathes west-facing facades in a warm, inviting glow. This type of light reduces harsh shadows and highlights materials like brick or stone beautifully.
To capture this effect, plan shoots around local sunrise and sunset times, considering the property’s orientation to make the most of the light and shadows.
Up next, we’ll explore how sunset and dusk lighting can further enhance exterior visuals.
2. Sunset and Dusk Photos
Dusk photography combines the soft twilight glow with carefully planned artificial lighting to highlight property exteriors. This technique requires precise control of lighting to achieve the best results.
For the perfect shot, aim to start 20–30 minutes before sunset to capture warm golden hues, and continue shooting 15–20 minutes after sunset during the blue hour for more dramatic backgrounds. According to a 2023 National Association of Realtors® study, 68% of agents believe dusk photos are the most effective for showcasing luxury properties, especially those with pools or outdoor lighting features.
| Lighting Source | Timing | Purpose |
|---|---|---|
| Interior Lights | Turn on 45 minutes before sunset | Adds a warm glow to windows |
| Landscape Lighting | Activate 10 minutes before shooting | Highlights key outdoor features |
| Path Lights | Use warm LEDs (2700K) | Illuminates walkways and entrances |
Photographers often use HDR bracketing with 3–5 exposures to handle the rapidly changing light. HomeJab photographer Maria G. shares this tip:
"Scout locations an hour before the shoot to plan your lighting activation sequence."
Weather can also play a big role. Clear skies create sharp contrasts, while partial clouds can add depth and drama to sunsets. Even light rain can enhance reflections and improve lighting effects by 30–40% when using polarized filters.
Here’s a practical example: A Tampa waterfront property saw impressive results by capturing sunset reflections in the pool at 6:42 PM, then transitioning to twilight shots with dock lights at 7:05 PM. This approach led to a 41% increase in online engagement compared to traditional sunset-only photos.
Keep seasonal timing in mind:
- Summer: 7:45–8:15 PM EST
- Winter: 4:15–4:45 PM EST
Leveraging twilight photography can significantly enhance a property’s appeal and attract more buyer interest.
sbb-itb-82c5f45
3. Cloudy Day Photography
Cloudy skies provide excellent conditions for exterior real estate photography. The soft, diffused light reduces harsh shadows and ensures a balanced exposure, making architectural features stand out.
Photographers often take advantage of overcast days to highlight exterior details. This type of lighting works especially well for:
- Dark-colored building exteriors
- Properties with complex angles or textured surfaces
- Landscaping elements that need consistent lighting
Using HDR photography combined with tools like virtual sky replacement can enhance these shots even further. HDR helps capture a wide range of tones, bringing out subtle textures that might otherwise be lost. This approach works well alongside the warm tones of golden hour or the dramatic colors of dusk, but it excels in evenly lit conditions like cloudy days.
Professional real estate photographer Liz Zeng highlights the value of shooting on overcast days:
"The photos turned out absolutely fantastic – crisp, professional, and beautifully lit. The quality exceeded expectations, and the attention to detail was evident in every shot."
To make the most of cloudy day photography:
- Keep an eye on weather forecasts to plan shoots on consistently overcast days.
- Use advanced editing techniques to enhance fine details and achieve a polished look.
One of the biggest advantages of shooting on cloudy days is the ability to capture intricate details and textures that bright sunlight might wash out. This makes it an excellent choice for properties with complex design elements or those requiring detailed exterior documentation.
Next, we’ll compare how cloudy day photography stacks up against other lighting conditions to determine the best overall strategy.
Time of Day Comparison
Lighting conditions can dramatically impact exterior property photos. Different times of day offer distinct advantages and challenges.
| Time of Day | Optimal Conditions | Best For | Limitations | Professional Tips |
|---|---|---|---|---|
| Golden Hour (Morning) | Clear skies; 30–60 minutes after sunrise | Eastern-facing properties; highlights architectural details | Short time window, making scheduling crucial | Use HDR to balance light and shadow |
| Golden Hour (Evening) | Clear skies; 60–30 minutes before sunset | Western-facing properties; creates a warm, inviting look | Limited shooting time | Add virtual staging to emphasize curb appeal |
| Cloudy Day | Even overcast skies with consistent cloud cover | Complex designs, dark exteriors, and textures | Flat lighting can reduce depth and vibrancy | Increase contrast during editing |
| Dusk | 15–30 minutes after sunset | Properties with landscape lighting; dramatic ambiance | Extremely short window for optimal shots | Combine exposures to enhance lighting effects |
Each time of day works best for specific property orientations and features. As one expert notes:
"High-quality photos are essential for supercharging listings. The right timing combined with professional photography services can make properties shine and sell faster".
When selecting the best time for a shoot, consider factors like the property’s orientation, architectural features, seasonal sun position, and weather. For tricky lighting or angles, professional photographers often use multiple shooting times to capture each side of the property at its best.
HomeJab’s advanced techniques, including HDR and virtual enhancements, have made it easier to tackle challenging lighting scenarios. These tools ensure high-quality results regardless of the conditions.
Summary and Recommendations
Here’s how to make your exterior shots stand out, based on key insights:
Plan Around Orientation:
- For eastern-facing facades, aim to shoot 30–60 minutes after sunrise.
- For western-facing facades, schedule your shots 30–60 minutes before sunset.
Tips by Property Type:
- Residential Properties
- Overcast days work well for darker exteriors and intricate architectural details.
- Capture landscape lighting 15–30 minutes after sunset for a dramatic effect.
- Use HDR techniques to balance exposure and highlight details.
- Luxury Estates
- Plan for multiple angles during the best lighting times.
- Combine HDR photography with virtual enhancements for a polished look.
- Highlight premium features under different lighting conditions to showcase their full appeal.
Scheduling Guidelines:
- Book at least 48 hours in advance.
- Always have a backup plan for bad weather.
- Adjust your schedule based on seasonal changes in sunlight.
- Consider virtual staging to elevate the final presentation.
"High-quality photos are essential for supercharging listings. The right timing combined with professional photography services can make properties shine and sell faster".
With a 4.8 out of 5 rating from 904 reviews, professional photography delivers results you can count on – typically within 24 hours. Timing and expert techniques are the keys to creating exterior shots that truly enhance a property’s appeal.
FAQs
What’s the best time to photograph a property’s exterior if it faces multiple directions?
The best time to photograph a property with multiple orientations depends on how sunlight interacts with each side of the home. For optimal results, schedule photos when the sun illuminates the primary side of the property you want to highlight. For example, east-facing sides are best photographed in the morning, while west-facing sides look their best in the late afternoon.
If you’re unsure, consider visiting the property at different times of the day to observe the lighting. Clear skies typically provide the most vibrant photos, but overcast weather can also create soft, even lighting that reduces harsh shadows. Professional real estate photographers, like those available through HomeJab, can help you determine the ideal timing for your specific property.
How can I handle unpredictable weather when scheduling exterior real estate photos?
Unpredictable weather can be challenging when planning exterior real estate photos, but there are ways to adapt. Monitor the forecast closely and schedule shoots during times with the highest likelihood of clear skies. Early mornings or late afternoons often provide the best lighting conditions, even on partly cloudy days.
If unexpected weather occurs, consider rescheduling or using overcast conditions to your advantage for softer, more even lighting. For rainy days, focus on capturing unique angles that highlight the property’s features while avoiding puddles or wet surfaces in the frame. Flexibility and preparation are key to achieving great results despite changing conditions.
What is HDR photography, and how does it improve exterior real estate photos?
HDR (High Dynamic Range) photography enhances exterior real estate photos by combining multiple exposures into a single image. This process captures a broader range of light and detail, balancing bright highlights and dark shadows for a more natural and visually appealing result.
HDR photography is especially effective for exterior shots taken in challenging lighting conditions, such as during midday or when there are strong contrasts between sunlight and shade. By showcasing properties in their best light, HDR photography helps create stunning, professional-quality images that attract potential buyers.