
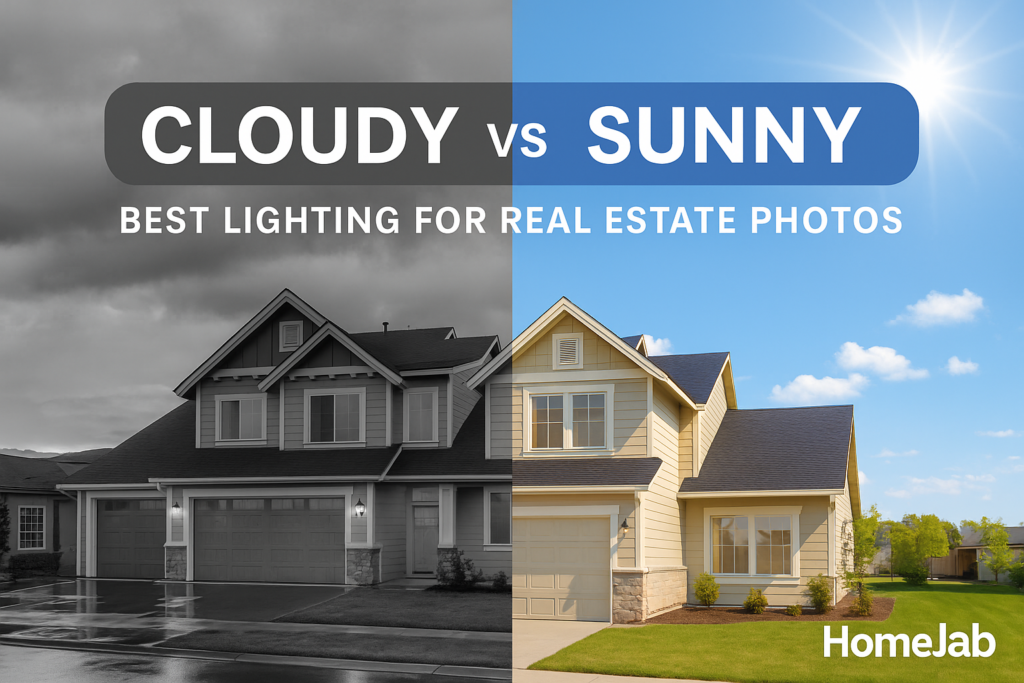
Lighting can make or break real estate photos. Cloudy days offer soft, even light that reduces glare and highlights textures, but can make photos look flat. Sunny days provide vibrant colors and dramatic depth but can create harsh shadows and glare. Here’s a quick comparison:
Cloudy Weather Benefits
- Soft, even lighting with no harsh shadows
- True-to-life colors and textures
- Reduced glare on reflective surfaces
Sunny Weather Benefits
- Dynamic lighting with depth and contrast
- Enhanced curb appeal and vibrant colors
- Best results during golden hours (early morning or late afternoon)
Quick Comparison
| Weather Condition | Pros | Cons |
|---|---|---|
| Cloudy | Soft, even lighting; accurate colors; no glare | Flat exposure; dull skies may need editing |
| Sunny | Vibrant colors; dramatic depth; golden hours add warmth | Harsh shadows; glare; complex exposure settings |
For the best results, adjust your techniques based on the weather. Use HDR photography to balance light and shadow, and consider professional editing for polished images. Whether it’s sunny or cloudy, proper lighting ensures your property looks its best.
Enhance Your Real Estate Photography with Natural Light
Shooting in Cloudy Weather
Cloudy weather brings both opportunities and challenges for real estate photography, offering a unique set of conditions to work with.
Benefits of Cloudy Days
Cloudy skies act like a natural softbox, providing soft, even lighting that can enhance real estate photos in several ways:
Even Lighting: Clouds diffuse sunlight, delivering soft, shadow-free illumination.
More Accurate Colors: Overcast conditions help capture colors as they truly appear, making details like:
- Exterior paint and siding
- Landscaping features
- Architectural details
- Window frames and doors
stand out more clearly.
Less Glare: Diffused light reduces reflections on surfaces such as:
- Windows and glass
- Metal fixtures
- Polished finishes
- Water features
Better Texture Visibility: Soft lighting highlights textures, making elements like:
- Brick and stonework
- Roof details
- Decorative trim
- Landscape features
appear more defined and detailed.
Challenges of Cloudy Days
While overcast weather has its perks, it also comes with some hurdles:
Flat Exposure: Cloudy skies can lead to images that look flat or lack depth.
Technical Adjustments: To counteract lower light levels, you may need to:
- Increase ISO, which can introduce noise
- Use longer exposure times, requiring a tripod or other stable support
- Adjust the white balance to offset cooler tones
Sky Replacement Needs: Uniform cloud cover can result in blank, uninteresting skies, often requiring additional editing to add detail.
HomeJab‘s professional photographers are equipped to handle these challenges. Using advanced HDR techniques and specialized gear, they ensure high-quality results, even in less-than-ideal weather. Up next, we’ll explore how sunny conditions compare in terms of opportunities and obstacles.
Shooting in Sunny Weather
Taking property photos on sunny days comes with its own set of perks and challenges. The right approach can make all the difference in capturing stunning images.
Benefits of Sunny Days
Dynamic Lighting: Direct sunlight creates depth and dimension by:
- Highlighting architectural features with strong contrasts
- Adding natural shadows for visual interest
- Clearly defining property lines and edges
Boosted Curb Appeal: Bright sunlight enhances:
- Landscaping details
- Water elements
- Reflective surfaces
- Exterior textures
Golden Hour Advantage: Shooting during golden hour (6:00–8:00 AM and 4:00–6:00 PM) delivers:
- Warm, inviting tones
- Soft, pleasing shadows
- Vibrant, natural colors
- Eye-catching, dramatic skies
While sunny days offer these advantages, they also bring specific challenges that require attention.
Limitations of Sunny Days
Harsh Contrast Problems:
- Deep shadows can obscure key property details
- Overly bright areas may look washed out
- Extreme contrasts can exceed the camera’s sensor range
- Reflections on windows may create distracting glare
Technical Hurdles:
- Careful camera positioning is essential to control shadows
- Additional lighting tools might be needed for balance
- Exposure settings become more complex
- Multiple shots may be required to achieve balanced exposure
To tackle these issues, professional photographers often use HDR (High-Dynamic Range) techniques. HDR combines multiple exposures, capturing both bright and shadowed areas to create balanced, detailed images that present properties in the best light [1].
HomeJab’s photographers are experts in HDR photography, ensuring that even challenging sunny conditions result in high-quality property photos. Their skills help turn difficult lighting into attractive images that catch buyers’ attention. Up next, learn how photo editing can further refine these images for a polished final result.

Photo Tips for Different Light Conditions
Capturing great real estate photos means adjusting your techniques based on the lighting. Whether it’s cloudy or sunny, the right approach can make all the difference in showcasing a property.
Outside Photo Tips
Timing Matters
For cloudy weather:
- Shoot when the clouds are lighter and avoid stormy skies.
- The best time is between 10:00 AM and 2:00 PM when light is evenly diffused.
For sunny weather:
- Take photos during the “golden hours” (6:00-8:00 AM or 4:00-6:00 PM).
- Position the sun behind the property for balanced lighting.
- Use a polarizing filter to reduce reflections and enhance the sky’s color.
Recommended Camera Settings
| Weather | ISO | Aperture | Shutter Speed | White Balance |
|---|---|---|---|---|
| Cloudy | 200-400 | f/8-f/11 | 1/125-1/250 | 6500K |
| Sunny | 100-200 | f/11-f/16 | 1/250-1/500 | 5500K |
When you head indoors, you’ll need to adjust your techniques to balance natural and artificial light effectively.
Inside Photo Tips
Managing Natural Light Through Windows
- On cloudy days, keep window coverings fully open to bring in as much light as possible.
- On sunny days, use sheer curtains to soften intense sunlight.
- For mixed lighting, balance natural and artificial light by using a flash.
Room-Specific Tips
Kitchen
- Position the camera to highlight the flow of natural light.
- Use a bounce flash directed at the ceiling for even lighting.
- Showcase countertops without creating harsh glare.
Living Areas
- On cloudy days, shoot toward windows to capture soft light.
- On sunny days, shoot away from windows to avoid overexposure.
- Use HDR techniques for rooms with high contrast between light and shadow.
Bathrooms
- Add extra lighting to reduce shadows.
- Position the camera carefully to avoid reflections in mirrors.
- Use a wider aperture (f/4-f/5.6) to keep the space bright and well-exposed.
Photo Editing for Different Weather
Editing can turn dull images into eye-catching property photos. With the right techniques, properties can look their best no matter the weather.
Editing Cloudy Day Photos
Boosting Contrast
- Add depth by increasing contrast, but avoid going overboard.
- Adjust highlights and shadows to create a sense of dimension.
- Sharpen clarity to bring out architectural details.
Adjusting Colors
- Increase vibrance to counter the gray tones of overcast skies.
- Warm up the white balance for a more inviting feel.
- Focus on enhancing key architectural features and landscaping.
Improving the Sky
Replace a gray, overcast sky with a bright, clear blue one using sky replacement tools. Services like HomeJab offer blue sky replacements and virtual staging, which can greatly improve a property’s visual appeal.
Now, let’s tackle the challenges of editing sunny-day photos.
Editing Sunny Day Photos
Using HDR Processing
- Combine multiple exposures to capture details in both highlights and shadows.
- Balance bright outdoor light with interior lighting for a natural look.
- Minimize glare on reflective surfaces.
Recovering Shadows
- Brighten shadows to reveal hidden details.
- Maintain natural contrast for a balanced image.
- Ensure darker areas still showcase architectural details.
Managing Highlights
- Restore detail in overexposed areas.
- Balance outdoor brightness with indoor features.
- Create a seamless blend between bright and dark areas.
The goal is to enhance the property’s appeal while keeping the images natural. Whether dealing with cloudy or sunny conditions, these techniques can help create inviting visuals that attract potential buyers.
Professional Photo Services for Any Weather
Editing can enhance images, but professional photography ensures they’re captured perfectly, no matter the weather. High-quality real estate photos require expert skills and specialized equipment to handle various conditions.
HDR Photography for Balanced Lighting
Using HDR techniques, photographers balance light and shadow to make every room look welcoming. HomeJab’s team creates realistic, appealing images that highlight properties effectively.
Solutions for Challenging Weather
Bad weather doesn’t have to mean bad photos. Professionals offer creative ways to keep your images looking great:
- Virtual Blue Sky Replacement: Turn gloomy skies into bright, sunny backdrops.
- Virtual Staging: Add warmth and charm to interiors, even in poor lighting.
- Professional Editing: Enhance natural light and refine details through expert post-processing.
These options ensure your listing stays on schedule, no matter the weather.
Quick Delivery for Tight Deadlines
Don’t let weather slow you down. HomeJab prioritizes fast turnaround times, delivering edited photos within 24 hours to keep real estate agents on track.
“I’ve been using HomeJab for the past two years across our properties nationwide, and I couldn’t be more impressed. They’re affordable, reliable, and consistently deliver top-notch photos.” – Tara Foristal [1]
Maintaining High Standards
Professional real estate photography services ensure quality with:
- Experienced local photographers specializing in real estate
- Consistent editing processes across all weather scenarios
- Thorough quality checks before delivering the final images
With an impressive 4.8 out of 5 rating from 916 reviews [1], HomeJab consistently delivers outstanding results. Whether it’s sunny or overcast, their photographers know how to capture properties at their best. This level of expertise helps agents present high-quality listings year-round.
Summary: Best Light for Property Photos
Here’s a quick recap of key lighting tips to make your real estate photos stand out.
Weather plays a big role in how a property looks in photos. Both sunny and cloudy days have their perks, so plan shoots with these conditions in mind to get the best results.
Best Times for Outdoor Shots
For exterior photos, aim for early morning (6:00 AM to 8:00 AM) or late afternoon (4:00 PM to 6:00 PM). These “golden hours” provide soft, natural light that reduces harsh shadows and adds a warm, inviting glow to the property.
What to Do When Weather Doesn’t Cooperate
If the weather isn’t ideal, professional photography services can still deliver great results. Techniques like HDR imaging, precise lighting setups, expert editing, and virtual adjustments can make a big difference.
For reliable, high-quality property photos, you might want to check out services like HomeJab (https://homejab.com), which specialize in showcasing properties in the best possible light.
FAQs
What are the best ways to enhance real estate photos taken on cloudy days?
Cloudy days can actually create ideal lighting for real estate photography due to the soft, even light that reduces harsh shadows. To make your cloudy-day photos more appealing, you can enhance them by adjusting brightness, contrast, and color balance during post-processing. Increasing the warmth slightly can help counteract the cooler tones often associated with overcast skies.
For a more polished look, consider replacing the sky digitally with a sunny or blue sky using editing tools or professional services. This technique, often referred to as sky replacement, can make the property feel more inviting while maintaining the natural lighting from the original photo. If you’re not confident in editing yourself, professional real estate photography services like HomeJab can help you achieve stunning results with quick turnaround times.
How can I reduce harsh shadows and glare when taking real estate photos on a sunny day?
To minimize harsh shadows and glare in sunny conditions, try shooting during the early morning or late afternoon when the sunlight is softer and more diffused. If you must shoot midday, position yourself so the sun is behind you or use shaded areas to soften the light. Reflectors or fill flash can also help balance shadows, while polarizing filters can reduce glare on windows and shiny surfaces. These techniques will ensure your photos look professional and inviting, even under bright sunlight.
What is HDR photography, and why is it ideal for balancing light and shadow in real estate photos?
HDR (High Dynamic Range) photography is a technique that combines multiple photos of the same scene taken at different exposures. These images are merged to create a final photo that captures a wider range of light and shadow, ensuring details are visible in both bright and dark areas.
This method is particularly useful in real estate photography, where lighting conditions can vary greatly between indoor and outdoor spaces. HDR helps create well-balanced, professional-looking photos that highlight a property’s features, making it more appealing to potential buyers.


