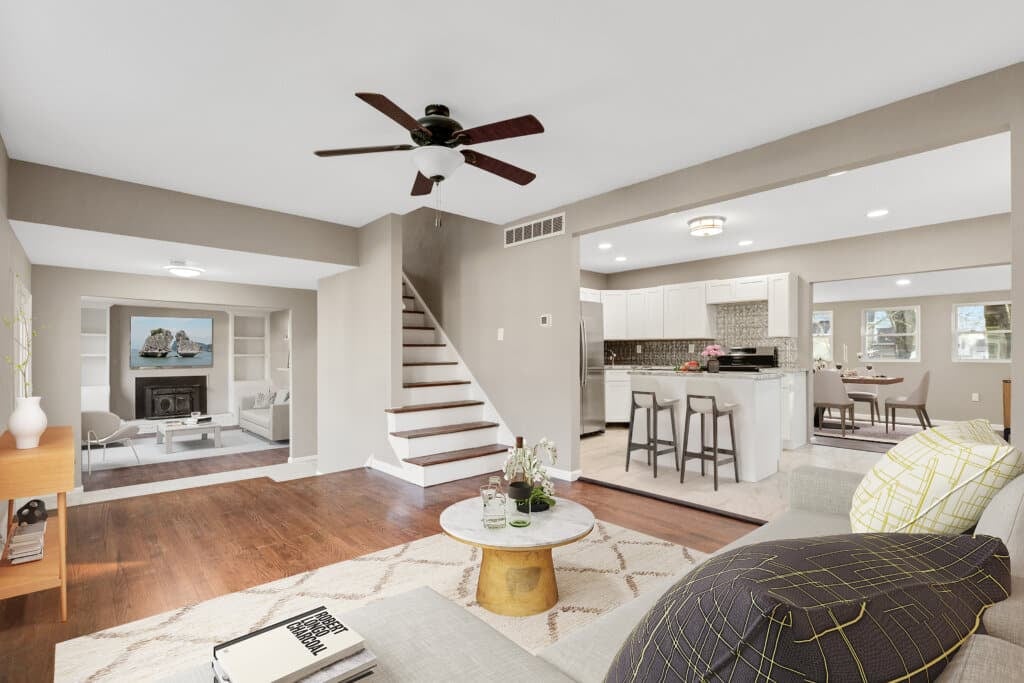
Virtual tours are a powerful tool for real estate marketing, but preparation is crucial to make them effective. Common mistakes like cluttered spaces, poor lighting, and technical issues can ruin a tour and turn off potential buyers. Here’s a quick summary of what to avoid and how to fix it:
- Clutter and Cleaning: Messy rooms, dirty surfaces, and personal items distract buyers. Deep clean, declutter, and keep decor neutral.
- Lighting and Staging: Poor lighting makes spaces look small and uninviting. Use natural and layered lighting, and stage rooms to feel open and functional.
- Access Issues: Locked doors or blocked areas disrupt the flow. Ensure all spaces are accessible and well-lit.
- Skipping Walkthroughs: Without a pre-shoot walkthrough, key features may be missed. Plan the route, angles, and lighting in advance.
- Technical Problems: Dead batteries, bad Wi-Fi, or outdated software can derail a shoot. Prepare a checklist to avoid interruptions.
- Missing Features and Floorplans: Highlight standout details and provide a detailed floorplan for better engagement.
Proper planning and professional photography services like HomeJab can transform your virtual tour into a polished, engaging experience that attracts serious buyers.
Top 10 Tips For PROFESSIONAL Virtual Tours
Mistake 1: Poor Property Cleaning and Decluttering
Clutter is a major turn-off for potential buyers during a virtual tour. Things like messy countertops, unmade beds, or cluttered closets make it hard for viewers to picture themselves living in the home. Instead of showcasing the property’s potential, the mess becomes a distraction that can push buyers away.
How Clutter and Mess Impact Virtual Tours
Clutter creates “visual noise” that pulls attention away from the home’s best features. If rooms are filled with personal items, buyers may miss details like gorgeous hardwood floors or a spacious kitchen island. Instead of appreciating the space, they focus on the mess.
Dirty surfaces – like smudged windows, dusty baseboards, or grimy fixtures – send the wrong message. They suggest the home hasn’t been well-maintained, which can raise red flags for buyers. And since high-resolution cameras capture every detail, these issues are even more noticeable in virtual tours.
Beyond appearance, cluttered rooms often feel smaller and less functional. A bedroom packed with furniture or personal belongings can look cramped, even if it’s generously sized. Buyers also struggle to imagine their own furniture in the space when it’s dominated by someone else’s things.
Storage areas are especially important. Overflowing closets or pantries make buyers question whether the home has enough storage. On the flip side, a tidy, well-organized closet highlights the home’s storage potential and reflects positively on the current owners.
To avoid these pitfalls, a structured cleaning and decluttering plan is essential.
How to Fix It
The key to fixing clutter issues is preparation. Start at least a week before the photography session to give yourself enough time to tackle every room without rushing. Go through the house room by room, removing distractions and reorganizing as needed.
Deep clean every surface. Pay attention to areas that often get overlooked, like baseboards, light fixtures, and window sills. Mirrors and windows should be spotless, as streaks and smudges stand out in photos. Bathrooms and kitchens deserve extra care since their cleanliness can heavily influence buyer impressions.
Keep decor simple and neutral. The goal is to create a blank slate where buyers can imagine their own style fitting in. Too much decor or personal touches can make this harder.
Don’t forget storage spaces. Closets and pantries should look spacious and functional. Remove excess items, neatly arrange what’s left, and avoid overstuffing shelves.
Eliminate unpleasant odors before the shoot. Lingering smells from pets, cooking, or mustiness can even translate into photos. Open windows to let fresh air in, and use neutral air fresheners sparingly to create a clean, inviting atmosphere.
For homes that feel too empty after decluttering, virtual staging can help. Services like HomeJab’s virtual staging add furniture and decor digitally, creating a warm, welcoming look without the expense or hassle of physical staging. This is especially helpful for vacant properties or those that feel bare after personal items are removed.
Investing time in cleaning and decluttering makes a huge difference in the quality of your virtual tour. Photographers can focus on capturing the home’s best features without working around clutter or distractions. The result? A polished, inviting virtual tour that helps buyers fall in love with the space.
Mistake 2: Bad Lighting and Poor Staging
Lighting and staging can make or break how a space is perceived. Poor lighting can make rooms feel dark, uninviting, and even smaller. Harsh lighting, on the other hand, creates stark contrasts that wash out features, making spaces look cold and unappealing.
Dark rooms are an instant turn-off for potential buyers. Shadows obscure architectural details, dull the colors, and shrink the space visually.
“Poor lighting can make a tour seem dull or unappearing.” – Activate Tours
Staging issues only amplify lighting problems. For example, furniture pushed against walls can make rooms feel disjointed. Oversized furniture or misplaced pieces block natural light, creating visual clutter that disrupts the flow of the space. When buyers can’t imagine how they’d use a room, they lose interest fast.
Why Good Lighting Matters
Natural light is your biggest ally during a virtual tour. To maximize it, open all blinds and turn on every light about 30 minutes before the shoot. Use a combination of overhead fixtures, lamps, under-cabinet lighting, and accent lights to create a warm, inviting glow. Layering light sources helps eliminate shadows and ensures every corner is well-lit. The small cost of electricity is worth the payoff in visual appeal.
“Too much lighting can be overwhelming and distracting, while too little light can make it difficult to see what’s in the frame.” – Activate Tours
Before the shoot, replace any burned-out bulbs. Stick to daylight-balanced LED bulbs (around 5000K) for consistent, clean lighting throughout the home. Mismatched light temperatures can create odd color casts – yellow, blue, or green – that distract from the room’s features.
Bathrooms and basements often lack natural light, so pay extra attention to these areas. Turn on vanity lights, shower lights, and any ambient lighting available to brighten these spaces. A well-lit bathroom feels clean and inviting, while a dark one might suggest neglect.
Simple Staging Tips
Staging doesn’t have to be complicated. Small tweaks can make a big difference. For example, pull furniture 12–18 inches away from walls to create a sense of openness and allow light to flow more freely.
Clear pathways are essential. Buyers should be able to mentally walk through the space without being hindered by furniture or decor. If a room feels crowded, remove extra furniture. It’s better to have fewer pieces that highlight the space than an overstuffed room that feels cramped.
Arrange seating areas to encourage conversation. Instead of pointing all furniture toward walls, position chairs and sofas to face each other. In bedrooms, ensure there’s easy access to both sides of the bed and avoid placing dressers or large furniture in front of windows.
For listings that need an extra visual boost, twilight photography is a great option. HomeJab offers twilight and virtual dusk photos that showcase homes during the golden hour. This technique works particularly well for properties with large windows, outdoor lighting, or striking exteriors, casting them in a warm, dramatic light.
If a room lacks furniture or feels uninspired under poor lighting, virtual staging can bring it to life. HomeJab’s virtual staging service costs $50 per photo and can transform empty rooms into spaces that feel livable and inviting, helping buyers connect emotionally with the property.
The key is striking a balance between aspirational and relatable. Buyers want to see themselves living in the home, but they also want to envision a polished, idealized version of their life there. Lighting and thoughtful staging work hand in hand to create this vision.
Once you’ve perfected the lighting and staging, it’s time to make sure all access and technical details are ready for a seamless shoot.
Mistake 3: Locked Doors and Access Problems
Locked doors, blocked pathways, and inaccessible spaces can throw a wrench into virtual tour shoots, leading to delays and incomplete coverage of your property. Every moment spent trying to access locked areas means missed opportunities to showcase the home in its entirety.
When photographers can’t get into certain rooms or outdoor spaces like patios, decks, or yards, it disrupts the flow of the tour. Potential buyers want a complete picture of the property, including functional areas like laundry rooms, closets, and storage spaces. Features such as pools, gardens, or entertainment areas lose their charm if they aren’t properly included in the tour.
Getting ahead of these access issues is essential to fully capture the property’s appeal.
How to Prepare Access
To avoid these setbacks, take a few simple steps to ensure everything is ready for the shoot. Start with a walkthrough of the property to confirm that all doors – both interior and exterior – are unlocked and accessible. Test every entry point, whether it’s a bedroom door, a closet, or an outdoor gate.
Make sure all lights, inside and out, are turned on and replace any burned-out bulbs. Proper lighting is key to highlighting each space. For outdoor areas, clear pathways to features like patios, pools, or gardens by removing obstacles, and check that gates and latches open easily.
If the property has multiple levels, ensure stairways are clutter-free and well-lit. A well-thought-out access checklist that covers every door, gate, and entry point – and sharing it with your photographer – can help prevent any surprises during the shoot.
Mistake 4: Skipping the Pre-Shoot Walkthrough
Skipping a pre-shoot walkthrough can lead to a range of issues, from missing out on highlighting key features to creating awkward transitions between rooms. Real estate professionals who overlook this step risk producing tours that fail to showcase the property’s full potential. Poor planning can also lead to technical hiccups that could have been easily avoided with just a bit of preparation.
Why Pre-Shoot Walkthroughs Matter
A pre-shoot walkthrough isn’t just a formality – it’s your game plan for success. It’s the perfect time to figure out the best camera angles, assess lighting conditions, and design a logical flow that takes viewers through the property in a way that feels natural and engaging.
For instance, during the walkthrough, you might notice that the basement lighting is too dim or realize that the garden view from the master bedroom deserves extra attention. Addressing these details ahead of time ensures they’re properly captured during the shoot. Without this preparation, these standout features can easily be overlooked or poorly executed.
This step also allows you to rehearse key talking points for each room. A well-prepared presenter makes a world of difference, ensuring the narrative is clear and compelling. When you know exactly what to highlight and how to describe it, the tour instantly feels more polished and professional.
Another advantage? Mapping out your route in advance eliminates the risk of backtracking or creating confusing navigation sequences. Viewers should feel like they’re walking through the home naturally, not wandering aimlessly. A well-thought-out route ensures smooth transitions between rooms, keeping viewers engaged from start to finish. Plus, this preparation makes it easier to collaborate effectively with your photographer.
Collaborating with Your Photographer
Clear communication with your photographer can elevate a virtual tour from good to exceptional. Before the shoot, take time to discuss the property’s standout features and agree on the sequence and style that will best showcase them.
For example, if the home has brand-new kitchen countertops or a beautifully landscaped backyard, make sure your photographer knows these are priority areas. Sharing your vision ensures that both the visuals and the narrative work in harmony to highlight the property’s best attributes.
While professional photographers bring technical expertise, they rely on your insights to understand what buyers in your market care about most. Platforms like HomeJab connect you with vetted photographers who not only excel in their craft but also understand the importance of preparation. These professionals can guide you through the walkthrough process, helping you spot potential challenges and plan accordingly.
During your pre-shoot discussion, address any potential hurdles, such as rooms with tricky lighting or areas with weak cell service that might disrupt connectivity. Tackling these issues upfront saves time and ensures a smoother shoot. When you and your photographer are aligned and well-prepared, the result is a high-quality tour that resonates with both your clients and prospective buyers.
sbb-itb-82c5f45
Mistake 5: Technical Problems and Equipment Issues
Technical hiccups – like dead batteries, spotty internet, or malfunctioning equipment – can ruin the flow of a virtual tour.
Even minor issues, such as a drained battery or a weak Wi-Fi signal, can escalate into major disruptions, making it difficult for viewers to enjoy the experience seamlessly across devices.
Most of these problems boil down to a lack of preparation. While staging and lighting are essential, skipping technical groundwork can lead to avoidable setbacks. The good news? Many of these issues can be prevented with a simple, proactive checklist.
Technical Preparation Checklist
You don’t need to be a tech wizard to ensure smooth operations – just pay close attention to the details. Here’s a checklist to help you steer clear of common technical pitfalls:
- Charge and clear your devices: Make sure all your devices are fully charged, backed up, and have enough storage by deleting unnecessary files.
- Test the internet connection: Check the property’s Wi-Fi beforehand, focusing on upload speeds since they’re crucial for virtual tours. If the connection is unreliable, bring a mobile hotspot as a backup.
- Update software: Ensure your virtual tour apps, camera software, and editing tools are updated well before the shoot.
- Run a full workflow test: Take a few test shots, transfer them, and simulate the editing process. This will help you identify and resolve any small glitches before the actual shoot.
By following this checklist, you can reduce the risk of technical interruptions and ensure everything runs smoothly on the big day.
Why Professional Equipment Matters
Pairing solid preparation with professional-grade equipment can take your virtual tours to the next level. Experienced photographers come equipped to handle technical challenges with ease. For instance, HomeJab’s vetted photographers bring backup cameras, extra batteries, professional lighting, and reliable internet solutions. Their expertise allows them to troubleshoot unexpected issues on the spot.
High-end equipment also makes a noticeable difference in the final product. Advanced cameras capture intricate details, even in tricky lighting conditions, while professional software ensures smoother navigation. These tools, combined with up-to-date knowledge of virtual tour technology, guarantee your tours perform well on any device – whether it’s a smartphone, tablet, or desktop.
Investing in professional expertise not only reduces the risk of technical hiccups but also saves time and enhances the overall quality of your virtual tours. Proper technical preparation ensures your property shines without interruptions, leaving a lasting impression on potential buyers or clients.
Mistake 6: Missing Key Features and Floorplans
Virtual tours that skip over a property’s standout features or fail to provide a clear sense of the layout can quickly lose a buyer’s interest. If viewers can’t grasp what makes a home special or how its spaces flow together, they’re likely to move on to the next listing. While good lighting and accessibility are essential, showcasing unique elements and including a detailed floorplan can make all the difference.
Too often, agents rush through creating virtual tours, focusing only on basic room shots. This approach overlooks the upgraded kitchen appliances, the breathtaking backyard view, or the gleaming hardwood floors that could set the property apart from the competition.
Why You Should Highlight Key Features
Every property has something that makes it shine. It’s crucial to identify and emphasize these features early on. Think about what initially caught your attention – those are the details buyers need to see.
Start with upgrades like granite countertops, stainless steel appliances, crown molding, or a recently renovated bathroom. Then, highlight architectural details such as vaulted ceilings, exposed brick, or clever built-in storage. Don’t forget the outdoor spaces – whether it’s a cozy covered patio, lush landscaping, or a spacious three-car garage, these features add real value.
Location-specific views, like mountain scenery or waterfront vistas, deserve special attention. Use the best lighting to capture these highlights at their most appealing. Even practical features like walk-in closets, pantries, or dedicated home office spaces are increasingly sought after by buyers and worth showcasing.
Think like a buyer. What would they want to know during an in-person showing? Your virtual tour should answer those questions upfront. When buyers can clearly see a property’s best features, they’re more likely to take the next step – whether that’s scheduling a showing or making an offer.
Once you’ve highlighted the key features, bring it all together with a detailed floorplan to help buyers visualize the entire space.
Adding Floorplans to Your Tour
A floorplan provides buyers with a clear understanding of how the rooms connect and how the space flows. Without it, viewers can feel disoriented, especially with larger properties or homes featuring unconventional layouts.
Floorplans give buyers a sense of scale and functionality that photos alone can’t convey. They can see how the kitchen opens to the living area, where the laundry room is located, or how a bonus room might work as a home office. This context helps buyers imagine how the home could fit their needs.
Including a floorplan doesn’t just clarify the layout – it also increases engagement. Buyers spend more time exploring virtual tours when they can reference a floorplan to navigate rooms intentionally, rather than clicking through at random.
Creating professional floorplans has never been easier. Services like HomeJab offer detailed, professionally drawn layouts that integrate seamlessly with virtual tours. These aren’t just rough sketches – they’re accurate, scaled diagrams showing room dimensions, fixture placements, and architectural details.
Interactive floorplans take it a step further by allowing buyers to jump directly to specific rooms within the virtual tour. This creates a smoother, more intuitive browsing experience, keeping potential buyers engaged and helping them fully appreciate the property’s layout.
Investing in quality floorplans pays off. They attract more serious buyers and lead to better-prepared in-person showings. When buyers arrive already familiar with the layout, they can focus on the home’s atmosphere and finer details, rather than trying to piece together how rooms connect.
Conclusion
Creating a successful virtual tour requires careful planning at every step. Tackling common issues – like clutter, poor lighting, or technical hiccups – lays the groundwork for a virtual tour that leaves a lasting impression on potential buyers.
Preparation is key. A pre-shoot walkthrough, ensuring easy access, addressing technical needs, and showcasing the standout features of your property can give your virtual tour an edge over the competition.
On top of solid preparation, professional services can make a big difference. Did you know that over 98% of real estate agents now rely on professional photography to market their listings? Professional photographers bring the right tools and expertise to highlight what makes your property special. Companies like HomeJab streamline the entire process, offering everything from HDR photography and 3D virtual tours to detailed floorplans and virtual staging. Their vetted photographers know exactly how to present properties in the best light, ensuring your listing shines. This investment doesn’t just improve your property’s presentation – it can also speed up sales.
A well-executed virtual tour does more than just sell homes faster and at better prices – it forges an emotional connection with buyers. In today’s competitive real estate market, taking the time to prepare a top-notch virtual tour isn’t just a nice-to-have; it’s a must for making your property stand out and achieving the best results.
FAQs
How does virtual staging make a property more appealing in a virtual tour?
Virtual staging breathes life into empty or outdated spaces, turning them into inviting, well-designed rooms. By digitally adding furniture and décor, it showcases a property’s functionality and appeal without the expense or inconvenience of traditional staging.
This budget-friendly and efficient approach makes it easy to refresh a space to align with current design trends. The result? Listings that grab attention online, spark more interest, and could even help properties sell faster.
How can I improve lighting in rooms with little or no natural light?
How to Brighten Rooms Without Natural Light
Brightening a room without natural light might seem tricky, but it’s entirely doable with a few clever tricks. One of the best approaches is to use layered lighting. This means combining different types of light – like ambient, task, and accent lighting – to create a well-lit, balanced space. For instance, you can pair overhead lights with table lamps or wall sconces to eliminate dark corners and evenly distribute light.
Another effective strategy is to choose light-colored decor and add reflective surfaces. Mirrors, metallic finishes, or even glossy furniture can help bounce light around the room, making it feel brighter and more open.
Don’t forget about LED bulbs! Look for ones with a warm or daylight color temperature. These bulbs can mimic the feel of natural sunlight, instantly making the room cozier and more inviting.
For a modern touch, you might want to explore smart lighting. These systems let you adjust brightness and even color tones throughout the day, so your room always feels perfectly lit, no matter the time.
Why is it important to do a walkthrough before a virtual tour shoot?
The Importance of a Pre-Shoot Walkthrough
Taking the time for a pre-shoot walkthrough is a crucial step in creating a seamless and professional virtual tour. It allows the photographer to identify and resolve potential challenges – like clutter, maintenance issues, or inadequate staging – before the actual shoot begins.
This process also helps in planning the most flattering angles and pinpointing standout features to emphasize. With this preparation, the virtual tour can effectively showcase the property, offering a polished and engaging experience that grabs buyers’ attention and highlights the space’s best qualities.


