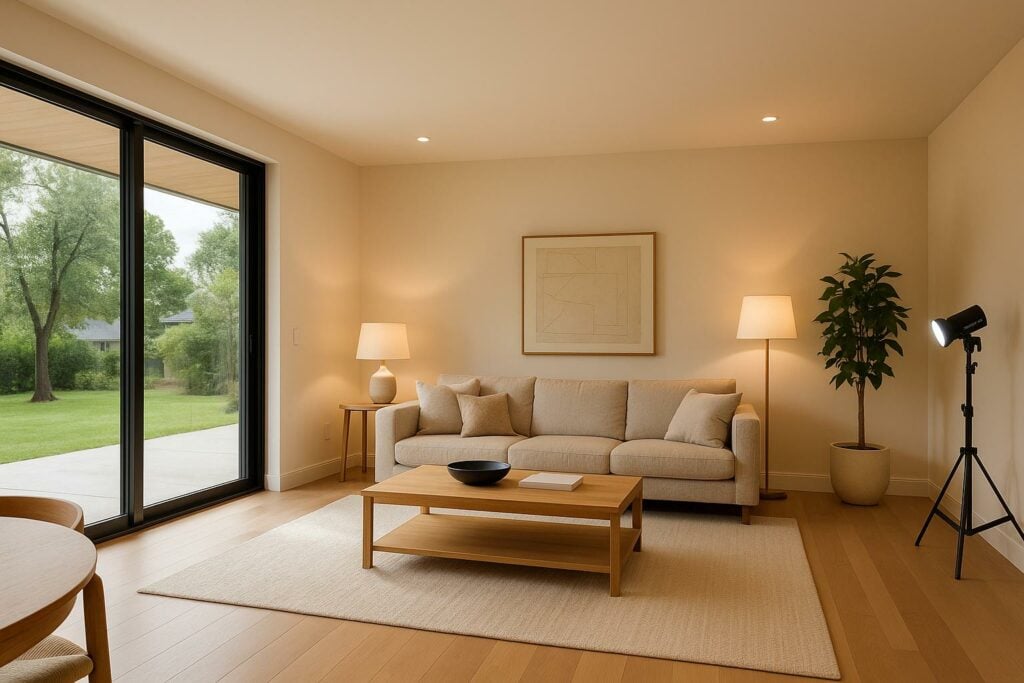
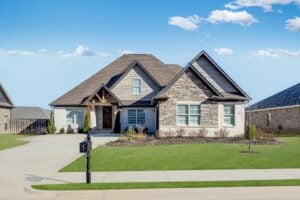
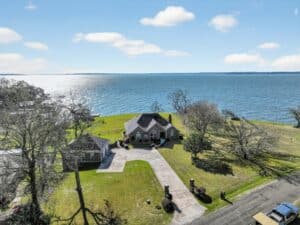
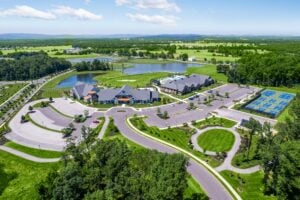
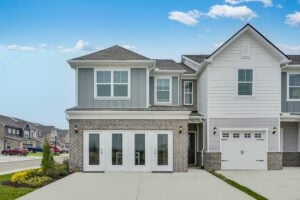
Want real estate photos that stand out? The flambient technique might be your answer. This method blends flash and ambient light to create balanced, well-lit images, perfect for showcasing properties. By combining natural light with controlled strobe lighting, you can highlight every detail of a room while maintaining its natural feel.
Key Takeaways:
- What it is: A photography method mixing flash and ambient light for real estate.
- Why it works: Flash fixes lighting inconsistencies; ambient light keeps the room’s character intact.
- Gear you need: DSLR/mirrorless camera, wide-angle lens, strobes, tripods, and light modifiers.
- Steps involved: Capture ambient shots, add strobe lighting, take window pull shots, and blend exposures during editing.
- Impact: Homes with professional photos sell up to 32% faster and get 118% more online views.
This technique ensures every room looks its best, even in challenging lighting situations. Below, we’ll cover how to use it effectively, from setup to post-processing.
Equipment and Setup Requirements
Required Photography Gear
Having the right gear is crucial when perfecting the flambient technique with strobe lighting. Your equipment lays the groundwork for capturing high-quality real estate photos, and investing in reliable tools can elevate your results significantly.
Camera and Lens Basics: A DSLR or mirrorless camera with full manual controls is a must for flambient photography. Pair it with a wide-angle lens to capture entire rooms and highlight the spaciousness of the property. A sturdy tripod is equally important to keep your camera steady between ambient and flash shots, ensuring proper alignment during post-processing.
Strobe Lighting Tools: Powerful external strobes are essential for evenly lighting larger spaces. Complement them with remote triggers, light stands, and light modifiers like softboxes or umbrellas to control the direction and quality of your lighting.
Additional Must-Haves: Keep color correction gels handy to match your strobe lighting with the room’s ambient light. Neutral density filters can help balance exposures, while a remote shutter trigger prevents camera shake during shots. A reflector is also useful, especially in rooms with non-neutral ceilings.
Once your gear is ready, the next step is preparing the space to make the most of your setup.
Room Preparation
Preparing the room properly is just as important as having the right equipment. A well-arranged space ensures your photos look polished and professional.
Decluttering and Staging: Remove personal items, extra furniture, and anything that might distract from the room’s appeal. Arrange the remaining furniture to create clear sight lines and emphasize the room’s flow. Highlight key features to give viewers a clear sense of the room’s layout and purpose.
Natural Light Optimization: Evaluate the quality and direction of natural light in the space. Open blinds or curtains to let in as much daylight as possible, which serves as your ambient light source. However, in some cases, closing curtains can help reduce reflections or harsh contrasts that may interfere with your lighting setup.
Managing Color Casts: Brightly colored furniture or fabrics can introduce unwanted color casts in your images. To maintain accurate color reproduction, cover vibrant upholstery with neutral white fabric whenever possible.
With the space prepped, it’s time to fine-tune your camera and lighting settings for the best results.
Camera and Lighting Settings
Dialing in the correct camera and lighting settings is key to achieving precise flambient results.
Camera Settings: For interior shots, set your aperture between f/8 and f/11 to ensure sharpness while allowing enough light into the camera. Use an ISO setting between 200 and 400 to brighten your images without adding noticeable noise. Shutter speeds typically range from 1/60s to 1/2s, depending on the ambient light available. Always use a tripod to avoid motion blur.
Flash Power and Placement: Start with your strobe power at ½ or ¼ and adjust as needed based on test shots. Measure the flash brightness in stops from full power. When bouncing the flash off the ceiling, position the strobe slightly above and to the side of your camera for a more natural light distribution.
Balancing Ambient and Flash Light: Use your shutter speed to control the ambient light exposure, while adjusting the flash power to manage strobe brightness. This approach allows you to fine-tune both light sources independently for a balanced result.
Natural Looking Flambient Real Estate Photography – Full Shoot And Edit
Step-by-Step Shooting Process
With your gear ready and camera settings in place, it’s time to dive into the flambient technique. This method involves capturing multiple exposures, which you’ll later blend to craft a perfectly balanced image.
Taking the Ambient Shot
The ambient shot is the backbone of your flambient image, capturing how light naturally interacts with the room. This step preserves the natural shadows and lighting patterns that give the space its authentic feel.
Start by taking a photo without using your flash. Stick to your preset exposure settings: f-stop between 7.1 and 9, ISO 320, and aperture priority mode. Focus on exposing for midtones to maintain balanced detail. Use a well-lit area of the room as your reference point, and don’t worry if the windows appear overexposed – this will be addressed in later steps.
For rooms with high dynamic range, consider capturing three bracketed RAW shots at 0, -2, and +2 stops. This ensures you retain details in both shadows and highlights. Always shoot in RAW format to maximize flexibility during editing.
With your ambient exposure complete, you’re ready to introduce strobe lighting for the next layer of your image.
Adding Strobe Lighting
Now that you’ve captured the ambient shot, the next step is to use strobe lighting to fill in shadows and even out the room’s illumination. The goal here is to blend flash with ambient light for a natural look that doesn’t feel overly staged.
Evaluate the room’s natural light and position your strobe to complement it. Instead of competing with the existing light, aim to enhance it. This approach maintains the room’s natural character while improving overall exposure.
Start with your flash set to 1/16 power and adjust gradually. This prevents overpowering the ambient light, which can result in flat, lifeless images. Always position the flash to mimic the direction of natural light for a cohesive look.
For softer, more natural light, bounce your flash off walls or ceilings. Direct flash can create harsh shadows and an artificial feel, so bouncing the light is key. Position the flash slightly above and to the side of your camera for better light distribution.
Using a white bounce card attached to your flash can help direct light precisely where you need it while maintaining its soft quality. Additionally, if the room’s lighting has a specific color tone (like warm tungsten), apply a gel to your flash to match the ambient light.
Adjust your shutter speed to balance the ambient and flash light. Faster shutter speeds reduce ambient light, while slower speeds let in more. This ability to control both light sources independently is what makes the flambient technique so effective.
Window Pull Shots
After achieving a balance between ambient and strobe lighting, it’s time to tackle the windows. Window pull shots are essential for capturing both the interior and the view outside in a single, well-exposed image.
To handle this, take an additional exposure specifically for the exterior view. This ensures you don’t lose outdoor details due to the stark contrast between interior and exterior lighting.
The timing of this shot matters. Clear, sunny days during the morning or late afternoon are ideal, as the outdoor light is less intense. Overcast days can also work, providing softer, more even exterior lighting.
Be mindful of reflections on the window glass. Adjust your flash angle to avoid glare, experimenting with different positions until reflections are minimized. Sometimes this means moving the flash to the side or bouncing it off another surface.
For the window pull exposure, focus on properly exposing the outdoor scene, even if this makes the interior appear darker. These exposures will later be blended with your interior shots during post-processing to create a seamless final image.
sbb-itb-82c5f45
Post-Processing and Image Blending
In real estate photography, combining ambient, strobe, and window pull shots during post-processing is key to creating vibrant, well-balanced images. The flambient technique merges these exposures to capture a property’s true lighting and colors.
Blending Ambient and Strobe Shots
Blending multiple exposures gives you control over highlights, shadows, and color tones, resulting in polished photos that grab attention. Start by importing your exposures into Adobe Lightroom or Photoshop.
Use Photoshop’s Auto-Align Layers to fix any slight misalignments caused during shooting. Once aligned, stack the images, placing the ambient exposure as the base layer. This preserves the room’s natural lighting and shadows, keeping the space looking authentic.
From there, apply layer masks to combine the best elements from each exposure. Typically, you’ll use the flash layer to fix color inconsistencies and add detail to darker areas while maintaining the ambient light’s character. A soft brush on the layer mask works well for blending flash into shadowed areas like corners or under cabinets, ensuring subtle and natural enhancements.
For window pull shots, carefully blend the exterior views to avoid unnatural transitions. If the blend looks too harsh, adjust the opacity or feather the mask edges for a smoother result. Once the layers are blended, you can move on to fine-tuning the image.
Color Correction and Final Adjustments
After merging your exposures, focus on correcting the white balance to ensure consistent and natural colors. Ambient and flash lighting often have different color temperatures, so this step is critical for avoiding mismatched tones.
Pay special attention to areas affected by mixed light sources. Lightroom’s adjustment brushes or Photoshop’s selective color tools can help fix color casts caused by artificial lights or flash. For example, tungsten lighting often introduces warm yellow tones, while flash tends to be cooler and more neutral.
Next, apply sharpening to enhance image detail. Tools like Photoshop’s Unsharp Mask or Smart Sharpen are effective, but use them sparingly to avoid introducing artifacts.
Don’t forget to correct perspective issues. Use lens correction tools to straighten vertical and horizontal lines, ensuring the room looks natural and professional. Crooked walls or tilted floors can distract viewers and make the image feel less polished.
Finally, make minor adjustments to exposure, contrast, and remove any unwanted spots or blemishes. These finishing touches ensure your photos are clean, visually appealing, and ready to showcase.
Manual Blending vs. Automated HDR
When processing flambient shots, you have two main options: manual blending or automated HDR software. Each approach has its strengths, so choosing the right one depends on your workflow and goals.
| Feature | Manual Blending | Automated HDR Software |
|---|---|---|
| Control | Offers precise adjustments | Limited control |
| Time Required | More time-intensive | Faster, automated process |
| Image Quality | Produces a natural, polished look | Can appear overly processed |
| Handling Color Casts | Excellent for targeted fixes | Struggles with accuracy |
| Learning Curve | Requires more skill | Easier for beginners |
| Consistency | High with experience | Varies by software |
Manual blending involves selective masking, giving you precise control over lighting and color corrections in specific areas. While it takes more time and requires familiarity with software like Photoshop, the results are often more professional and realistic.
Automated HDR software, on the other hand, uses algorithms to merge exposures quickly, making it ideal for batch processing. However, automated results can sometimes feel overdone, with issues like halos or unnatural colors.
For professional real estate photography, manual blending is often the better choice. The extra effort results in higher-quality images that stand out and satisfy clients.
Professional services like HomeJab excel in using advanced manual blending techniques to deliver consistent, high-quality photos quickly. These images not only elevate property listings but also help real estate professionals attract potential buyers effectively.
Tips for Consistent Results and Problem Solving
Flambient photography requires a precise approach and a knack for troubleshooting. By following these strategies, you can ensure consistent, professional results for every property shoot.
Maintaining Consistency Across Shoots
Start each shoot by assessing the room for potential challenges. Look for mirrors, glossy surfaces, unusual light sources, or unique architectural features that might complicate your lighting setup. Identifying these elements early can save time and prevent mistakes.
Use a handheld light meter to measure ambient and flash exposure accurately. Take readings from different points in the room and record your settings for each space. Over time, you can create a reference sheet with your go-to settings for common areas like kitchens, living rooms, and bedrooms.
Plan your flash placement in advance. Walk through the space and decide where to position your strobes, accounting for ceiling height, furniture layout, and reflective surfaces. This preparation minimizes the need for adjustments mid-shoot.
Incorporate color checkers into your workflow to ensure accurate colors during post-processing. Place a color checker card in your first test shot for each room, then remove it for the actual photos. This step is especially helpful when dealing with mixed lighting conditions.
Once you’ve established a consistent setup, it’s time to tackle the challenges of mixed lighting.
Dealing with Mixed Lighting
Mixed lighting can be tricky, but with the right techniques, it’s manageable. Start by setting your camera’s white balance to match the dominant ambient light source. Then, use color correction gels on your strobes to align their color temperature with the ambient light.
For rooms with tungsten lighting, apply CTO (Color Temperature Orange) gels to your strobes. Set your camera’s white balance to tungsten (around 3,200K) to neutralize the yellow cast from tungsten bulbs. This ensures natural-looking illumination.
"When lighting a photo it is not about absolute light levels. It’s about relative levels." – Strobist
Take test shots to confirm your gel selection, paying close attention to skin tones and neutral colors on your camera’s LCD. Keep detailed notes on gel combinations that work well in specific lighting scenarios, including details like the time of day, window direction, and artificial light types. This reference will be invaluable for future shoots.
When possible, turn off artificial lights to simplify your setup. While this isn’t always feasible in real estate photography, reducing competing light sources can help you avoid color cast issues and give you more control over the final image.
With your lighting balanced, you can focus on resolving common exposure issues.
Common Problems and Solutions
To avoid overexposed or unnatural results, start with your flash power at 1/16 and adjust gradually. Use your camera’s histogram to ensure a balanced exposure, capturing details in both highlights and shadows without clipping. Watch for hot spots on walls or ceilings and harsh reflections, which signal excessive flash power.
Unwanted reflections from mirrors, windows, or other shiny surfaces can ruin a shot. Position your strobes at angles that avoid direct reflections back to the camera. Use flags or barn doors to control light spill, and adjust your shooting position to minimize reflective distractions.
If you notice uneven lighting, it’s likely due to poor strobe placement or insufficient light diffusion. Larger softboxes or umbrellas can help create smoother light. Add extra strobes to fill in shadows and bounce light off walls or ceilings for a softer, more natural effect.
Color matching errors often appear during post-processing, especially when different parts of a room have varying color casts. Mixed color temperatures may require experimenting with different gel combinations. Bracketing your shots with various gels can help you find the best balance.
Lastly, don’t overlook the importance of adapting to lighting conditions in each room. Mixed lighting demands extra attention – use a color checker card and document which gel combinations work best. Avoid relying on the same settings for every room, as factors like window orientation and artificial light sources can vary significantly.
Conclusion and Key Takeaways
The flambient technique, paired with strobe lighting, has become a standout method in real estate photography. This approach consistently produces well-balanced, eye-catching images that highlight a property’s true character while tackling common challenges like uneven lighting and exposure discrepancies.
How the Flambient Process Works
At its core, the flambient process merges multiple exposures into a single, polished image. It combines the warmth of natural ambient light with the precision of flash lighting in three main steps: capturing ambient light, layering in flash-lit scenes, and using window pulls to bring out exterior details. The final magic happens in post-processing, where careful blending, color correction, and adjustments ensure the result looks natural yet striking.
The Importance of Professional Real Estate Photography
The precision and artistry of the flambient method do more than just create stunning images – they can directly impact property sales. Listings with professional photos tend to sell 32% faster, and homes priced above $200,000 often gain an extra $3,000 to $11,000, thanks to high-quality visuals.
Professional photographers bring the tools, experience, and creativity that DIY efforts simply can’t match. Companies like HomeJab make it easy to connect with vetted photographers skilled in techniques like flambient photography. These experts deliver not just exceptional photos but also HDR options and comprehensive media packages, helping listings shine in competitive markets.
Beyond boosting sales, high-quality photography builds lasting trust and credibility. Great visuals create strong first impressions and elevate a property’s appeal, addressing lighting or exposure issues that might otherwise detract from its presentation. With 83% of buyers prioritizing photos when deciding which homes to visit, investing in professional photography isn’t just a smart choice – it’s a necessity for success.
FAQs
What makes the flambient technique better for real estate photography than using just ambient or flash lighting?
The flambient technique merges the natural glow of ambient light with the sharpness of flash lighting to produce striking, well-balanced real estate photos. By combining these two lighting styles, it minimizes harsh shadows, avoids overexposed spots, and delivers vibrant, lifelike images.
This method ensures interiors are lit evenly while preserving a natural look, allowing a property’s standout features to shine. The end result? Professional, polished photos that elevate listings and attract more potential buyers.
What challenges do photographers face when using the flambient technique, and how can they overcome them?
Photographers who use the flambient technique often face hurdles like uneven lighting due to inconsistent flash power. This can result in harsh shadows or areas that are overexposed. Another common challenge is finding the right balance between ambient and flash light, especially in spaces with varying natural light levels. This imbalance can lead to unnatural color tones or uneven exposure.
To tackle these problems, try switching to manual flash settings for better control and consistency. Tools like softboxes or diffusers can also help by softening shadows and ensuring the light is more evenly distributed. Taking the time to experiment with different setups and planning your shots carefully will go a long way in improving your results. As you gain more experience, managing these challenges becomes second nature, helping you create striking and well-balanced real estate photos.
Why do photographers prefer manual blending over HDR software for flambient photography?
Photographers often prefer manual blending instead of relying on automated HDR software in flambient photography. Why? It gives them the ability to fine-tune every aspect of the image. By carefully combining multiple exposures, they can retain details in both the brightest highlights and deepest shadows, all while avoiding that overly processed, unnatural look HDR software sometimes creates.
This technique is especially valuable in high-end real estate photography. When it comes to showcasing a property – particularly luxury homes – natural, vibrant, and realistic images make all the difference. Manually blending exposures ensures the final images feel polished and authentic, helping the property truly shine.

