
Want to create stunning HDR photos for real estate? Here’s the quick guide:
- ISO: Keep it low (100–200 for Canon, 160–400 for Nikon) to minimize noise and maintain sharpness.
- Aperture: Use f/8 to f/11 for sharp, detailed images with the right depth of field.
- Shutter Speed: Adjust for bracketed exposures (e.g., -2, 0, +2 EV) while keeping ISO and aperture constant.
- HDR Bracketing: Capture 3–5 exposures at 2-stop intervals for balanced highlights and shadows.
- Editing: Use tools like Lightroom to merge and fine-tune HDR images, avoiding over-saturation or unnatural effects.
Quick Overview of HDR Benefits:
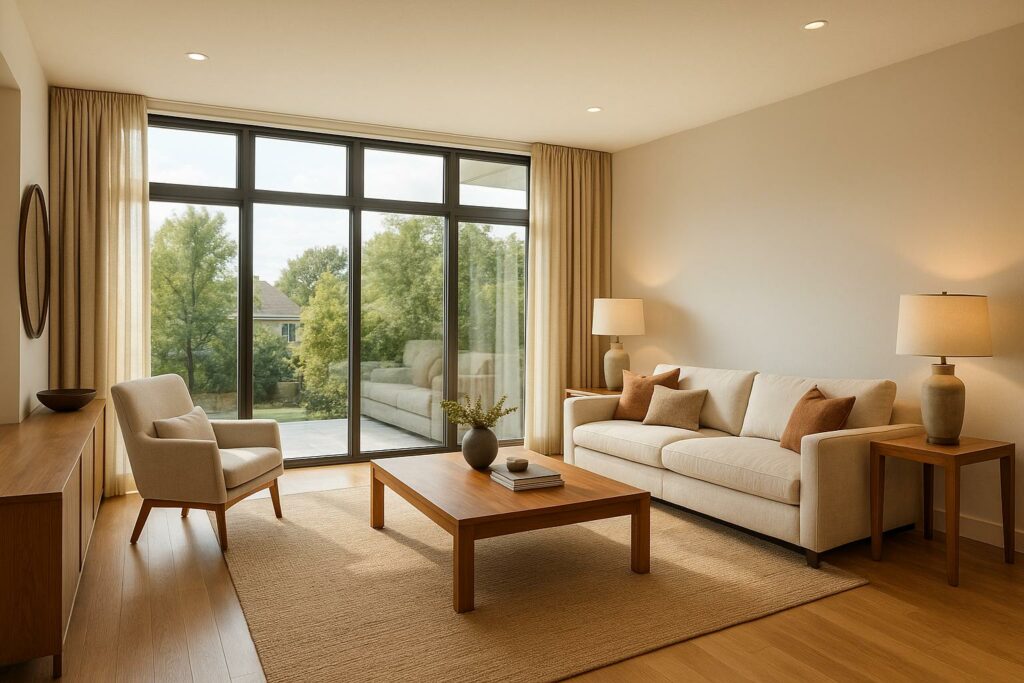
- Real Estate Listings: HDR photos attract 118% more online views and help properties sell 50% faster.
- Lighting Challenges: Perfect for bright windows, uneven lighting, and golden-hour shots.
- Professional Edge: Homes with HDR photos sell for $3,000–$11,000 more.
Mastering these settings ensures clean, sharp, and professional HDR images that make properties stand out.
Copy my HDR camera settings for real estate 🚨
ISO Settings for Clean HDR Images
ISO settings are a key factor in capturing sharp and noise-free HDR real estate photos. While higher ISO can help brighten darker scenes, it also increases noise, which becomes more noticeable during exposure blending.
Best ISO Settings for Property Photos
Stick to your camera’s native ISO settings for the cleanest results. Different camera brands have specific base ISO values:
| Camera Brand | Lowest Native ISO | Maximum Recommended ISO |
|---|---|---|
| Canon | 100 | 400 |
| Nikon | 160 | 640 |
For the best image quality, start with the lowest native ISO setting of your camera. This ensures maximum detail, accurate colors, and a broader dynamic range in your HDR shots. In well-lit conditions, keeping ISO at 100 for Canon or 160 for Nikon will yield the cleanest images. When lighting is less than ideal, adjust ISO cautiously while balancing aperture and shutter speed.
ISO Adjustments with Other Settings
In low-light environments, increasing ISO becomes necessary. However, this adjustment comes with trade-offs:
- Higher ISO reduces the dynamic range of your images.
- It introduces digital noise, which becomes more pronounced when blending multiple HDR exposures.
- Post-processing will require more aggressive noise reduction.
To minimize these issues, consider the following:
- Stick to Native ISO Steps
Gradually increase ISO using your camera’s native increments, such as moving from ISO 100 to 200 or 400 on Canon cameras. - Use Noise Reduction Strategically
Apply noise reduction to individual images before merging HDR brackets. This is especially important at higher ISOs like 400, which is generally the upper limit for HDR real estate photography. - Maximize Available Light
Open up your aperture (e.g., f/2.8 or f/1.4) to let in more light, reducing the need to push ISO.
When creating HDR images for real estate, remember that combining multiple exposures can amplify grain. Keeping ISO as low as possible will help you produce cleaner, professional-quality photos that truly showcase the property at its best.
Aperture Settings for Sharp Property Photos
Aperture is a key factor in achieving sharp, high-quality HDR real estate photos. It determines the depth of field and overall clarity of your images. Let’s dive into the best aperture settings for different property photography scenarios.
Best Aperture Settings for Properties
For most real estate photography, an aperture between f/8 and f/11 strikes the perfect balance between depth of field and image sharpness. This range often corresponds to a lens’s "sweet spot", which is typically 3–4 stops above its widest aperture, where it delivers the sharpest performance.
"The best F Stop (aperture) for general real estate photography is F8, or F11, depending on your specific camera lens. F8 and F11 will give you the highest image quality, and at the same time the correct depth of field to get everything nice and sharp in a photo." – Rick McEvoy, Architectural and Construction Photographer
This range ensures that your photos capture every detail clearly, making them ideal for showcasing properties.
Small Space Aperture Tips
Photographing tight spaces like bathrooms or kitchens requires a bit more precision. Stick to the f/8 to f/11 range for these shots to maintain sharpness and detail. If you need greater depth, avoid narrowing the aperture below f/16, as it can introduce diffraction, which reduces image quality. Instead, consider using focus stacking to achieve the desired depth of field.
While lenses may perform well around f/5.6, opting for f/8 to f/11 ensures better depth of field and sharpness, especially in real estate photography.
sbb-itb-82c5f45
Shutter Speed for HDR Bracketing
Shutter speed is a key factor in HDR real estate photography. It directly controls exposure in bracketed sequences, making it essential for capturing sharp and well-exposed HDR images.
HDR Bracketing Techniques
To achieve the best HDR results, aim for a three-frame bracket captured at 2-stop intervals. Keep the aperture and ISO constant while adjusting the shutter speed. Typically, shutter speeds range between 1/500th and 1/2000th of a second, with 1/1000th being a dependable baseline for 3-stop intervals.
Here’s a quick reference for exposure settings during bracketing:
| Exposure | EV Setting | Typical Use |
|---|---|---|
| Dark | -4.0 | Capturing shadow details |
| Medium Dark | -2.0 | Highlighting interior textures |
| Normal | 0.0 | Base exposure for the scene |
| Medium Bright | +2.0 | Emphasizing window areas |
| Bright | +4.0 | Preserving exterior highlights |
Accurate shutter speed adjustments are the foundation for avoiding issues like motion blur.
Sharp HDR Photos Without Blur
Once you’ve nailed your bracketed exposures, the next step is ensuring your images remain sharp. Motion blur can ruin HDR photos, as Uwe Steinmueller wisely points out:
"If the most overexposed photo of the set can’t be taken without a tripod (without inducing motion blur), the only option is to use a good tripod or forget about HDR."
To prevent blur, follow these steps:
- Use a sturdy tripod: Secure your camera to minimize movement. Disable image stabilization and rely on a remote trigger or timer for added stability.
- Shoot in high-speed continuous mode: This helps capture your bracketed shots quickly, reducing the chance of movement between frames.
- Mind your shutter speed: When shooting handheld, keep it faster than the reciprocal of your lens’s focal length for sharper results.
In low-light situations, consider increasing your ISO or using a wider aperture to maintain faster shutter speeds. If your scene includes moving objects, like curtains or ceiling fans, faster shutter speeds are essential to avoid ghosting effects in your final HDR image. With most modern DSLRs offering shutter speeds up to 1/8000th of a second, you’ll have plenty of flexibility for capturing bright exposures without blur.
HDR Photo Editing Steps
Once you’ve captured your bracketed exposures, the next step is to combine them into natural-looking HDR photos using specialized software.
Combining HDR Brackets in Software
The first step is selecting the right exposures based on the dynamic range of your scene. Here’s a quick guide:
| Bracket Range (EV) | Optimal Exposures |
|---|---|
| -1.5 to +1.5 | 2 |
| -3.0 to +3.0 | 3 |
| -4.5 to +4.5 | 4 |
| -6.0 to +6.0 | 5 |
For most real estate photography, a three-image bracket typically delivers excellent results. Once you’ve identified the exposures you want to use, follow these steps in Lightroom to merge them:
- Highlight the bracketed images in your library.
- Right-click and choose Photo Merge > HDR.
- If you shot handheld, enable Auto Align to correct minor misalignments.
- Turn on Auto Settings for a well-balanced starting point.
- Adjust the Deghost Amount to fix any motion artifacts in the scene.
- Hit Merge to generate your HDR DNG file.
"HDR photos are used to capture scenes having a large dynamic range. However, using more number of photos can lead to unwanted artifacts from poor alignment or ghosting"
With your HDR file created, the next step is refining the image to ensure it looks realistic and polished.
Fixing HDR Image Problems
"Less is more. A lot of beginners go through what’s known as the HDR phase, where the unique/odd look of overly edited HDR images makes them think it’s a stylized aesthetic that helps their images pop. Unfortunately for most people, the hyper HDR look simply isn’t great to look at"
To avoid the overdone "HDR look" and keep your images natural:
- Balance highlights and shadows without overdramatizing them.
- Apply only subtle local contrast adjustments.
- Use luminosity masks for precise blending of tones.
- Keep saturation in check to avoid introducing unnatural colors or artifacts.
- Enable lens corrections to fix any distortions or vignetting.
If your scene includes moving elements, ghosting can be an issue. Lightroom’s deghost settings or Photomatix Pro’s selective deghosting tools are excellent for addressing these problems.
"Lightroom does a great job of avoiding garish, over-saturated HDR photos"
Conclusion: HDR Camera Settings Guide
To master HDR photography, focus on finding the right balance between ISO, aperture, and shutter speed. Aim to keep your ISO between 100 and 200 for crisp, noise-free images. Only increase it to 400 in very low-light conditions to minimize noise. As Rick McEvoy aptly puts it:
"The lower the ISO, in general terms, the higher the quality of the images that you will get. The higher the ISO, the greater the chances of you getting noise and other bad stuff which is not good."
For sharp real estate photography, stick to an aperture range of f/8 to f/11. These ISO and aperture guidelines lay the groundwork for accurate shutter speed adjustments, crucial for HDR bracketing. Architectural photographer Sapna Reddy highlights the importance of mastering these elements:
"The exposure triangle is the foundation on which individual creative style and artistic vision evolves. It is the basic alphabet that needs to be mastered before one can create visual poetry."
HDR photography consistently gives property listings an edge, helping them sell faster and engage buyers more effectively. For flawless execution of these settings, HomeJab offers professional HDR photography services that turn properties into stunning visual narratives. By mastering these essential techniques, your HDR photos will not only showcase every detail but also elevate the performance of your property listings.
FAQs
How can I create natural-looking HDR real estate photos without overdoing the effect?
When editing HDR real estate photos, aim for a natural and balanced look. Avoid cranking up HDR settings to the point where lighting appears unrealistic or colors become overly saturated. Subtlety is your best friend – adjust shadows just enough to bring out details without over-brightening, and keep highlights vivid but not overly harsh.
Instead of boosting saturation across the entire image, focus on specific areas that need a pop of color. This targeted approach helps the photo retain its realistic charm. The ultimate goal is to expand the image’s dynamic range while keeping it lifelike. Avoid the temptation to go overboard, as exaggerated edits can make photos look artificial or cartoonish. Precision and moderation are the keys to professional-quality results.
How can I adjust ISO in low-light conditions for HDR photography without losing image quality?
To get the best results in low-light HDR photography, start by choosing a moderate ISO setting, ideally between 1600 and 3200. This strikes a good balance between capturing enough light and keeping image noise to a minimum. Combine this with a wide aperture (a lower f-number) to let in more light, which helps avoid pushing the ISO too high.
A tripod can be a game-changer here. It keeps your camera steady, allowing for slower shutter speeds without introducing blur. This stability means you can stick to lower ISO levels while still capturing sharp, detailed HDR images, even in dim lighting.
How can I avoid ghosting when capturing HDR real estate photos with moving objects?
To reduce ghosting in HDR real estate photography, start by using a fast shutter speed. This helps capture motionless images, minimizing the risk of movement creating unwanted artifacts in your final shot. Pair this with a tripod to keep your camera steady and maintain consistent framing across all exposures.
When motion can’t be avoided, turn to post-processing tools equipped with ghost removal features. These can identify and fix movement-related issues during editing. Additionally, carefully bracketing your exposures and blending them in post-production can enhance your results. However, significant movement might still pose challenges. The best strategy? Plan your shots to keep movement in the scene to a minimum.


