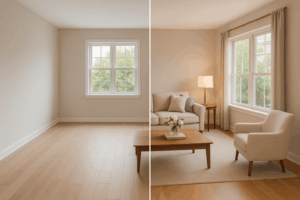
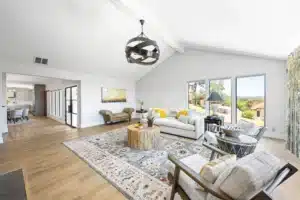
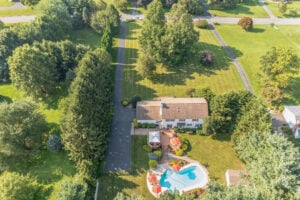
Light shapes how we experience spaces, and in real estate photography, it’s the factor that transforms average listings from exceptional ones. Mastering different lighting techniques—from natural to artificial—takes time, but the fundamentals are surprisingly straightforward. This beginner’s guide covers foundational lighting principles to help you capture properties as they truly deserve to be seen. Whether you’re working with sunlit, bright spaces or navigating the challenges of low-light rooms, these tips will set you on the path to success.
Why Lighting Matters in Real Estate Photography
While staging, composition, and camera settings all play their part in real estate photography, lighting is what truly defines the final image. It’s not just about brightening poorly lit rooms—it’s about using light to create a space that feels welcoming, full of potential, and emotionally resonant.
Thoughtfully lit photos create an ambiance that draws viewers in, encouraging them to linger and imagine themselves in the space. The psychology behind this is fascinating: natural light, in particular, taps into deep-seated emotional responses. Bright spaces evoke feelings of warmth, openness, and even cleanliness, something that most buyers are in search of.
By capturing this in your real estate photos, you’re setting the stage for buyers to fall in love with the property.
Bright Spaces Feel Larger
For homeowners and potential buyers alike, the feeling of spaciousness is invaluable. Natural light streaming through windows, balanced artificial lighting, and thoughtfully illuminated corners work together to create an open, airy atmosphere that buyers want. And for listing photos, this appeal is undeniably important.
Whether it’s a single person searching for their first big purchase or a growing family seeking room to expand, buyers naturally gravitate toward homes that feel open, airy, and inviting. Even modest-sized properties can feel surprisingly expansive when photographed correctly with the right lighting setup in place.
Lighting Impacts Emotional Responses in Homebuyers
A recent TD Bank study revealed that nearly 80% of Millennials prefer move-in-ready homes, hoping to avoid the added costs of renovations. However, with competitive inventory in today’s market, such properties aren’t always available. While realtors help buyers imagine all the possibilities, it’s the photographer’s job to present those possibilities in the best light—literally.
Lightning, regardless of a property’s age or condition, creates an emotional connection. When scrolling through listings online, buyers don’t just want to see a home; they want to feel it. Beyond creating the illusion of space, well-lit photographs communicate something deeper about a property.
They suggest a home that’s been carefully maintained, one where details matter. Clean, bright spaces instinctively feel more welcoming and move-in ready whereas dark or shady areas can raise red flags. Ultimately, good lighting isn’t just a house hack to boost its marketability—it redefines how we experience and perceive it.
Beginner’s Guide to Lighting Spaces
For new real estate photographers, learning to harness light can feel overwhelming. From mastering the right lighting setups to choosing the correct lenses to knowing which editing software is best, every choice you make impacts how a space will appear in your listing images.
But the key lies in understanding how light interacts with key elements of a property: large windows, inviting kitchens, cozy bedrooms, or the flow between rooms. Here are three foundational tips to get started:
Step 1: Maximize Natural Light
Natural light is your greatest asset. Use these strategies:
- Shoot during the “golden hours” (early morning or late afternoon) to get soft, warm lighting. Midday sun can create harsh shadows.
- Let sunlight stream in by opening blinds and curtains fully. This eliminates dark patches and adds depth to your photos.
Step 2: Use Artificial Light Thoughtfully
When natural light isn’t enough—on overcast days or in older homes—artificial lighting can save the day.
- Invest in portable LED light panels like the Godox SL60W, which provide consistent, adjustable light.
- Combine artificial light with natural tones to maintain a cohesive, inviting atmosphere.
Step 3: Know Your Camera Settings
Camera settings are critical for capturing well-lit photos:
- ISO: Adjust for dim conditions but stay under 800 to avoid grain.
- Tripod: Use one to slow shutter speeds in low light without sacrificing clarity.
- RAW format: Shoot in RAW to retain image data for flexible editing.
Step 4: Balance Lighting Across Rooms
Consistent lighting ensures a harmonious flow in your photos, keeping potential buyers interested in the property as they scroll from one image to the next.
- If necessary, use reflectors or bounce cards to soften harsh shadows and distribute light evenly.
- Match the color temperature of light sources (e.g., daylight vs. warm bulbs) to prevent jarring contrasts that can distract from the space.
Step 5: Shine a Light on Unique Features
Direct lighting attention to the standout elements of a home that make it the most memorable.
- Use accent lights to emphasize architectural details, such as crown moldings or exposed beams.
- Illuminate focal points like a cozy fireplace or a kitchen island to guide the viewer’s eye and evoke an emotional connection to that bright space.
Why Bright Spaces Sell Homes Faster
Data consistently confirms what real estate professionals have known for years: well-lit homes simply sell faster and often for higher prices. This isn’t just about stellar photography though— although that’s essential. It’s about understanding how light impacts human experience.
When potential buyers view brightly lit spaces, they’re more likely to notice details, appreciate the flow between rooms, and most importantly, imagine themselves living there. So whether you’re working with a cozy starter home or a luxury estate, proper lighting in your real estate photography accomplishes what endless feature lists can’t—it creates an emotional connection.
These lighting principles are just the beginning of your journey to creating property photos that sell. For more advanced tips, check out our HomeJab feature on navigating night photography, where lighting techniques become even more crucial.


