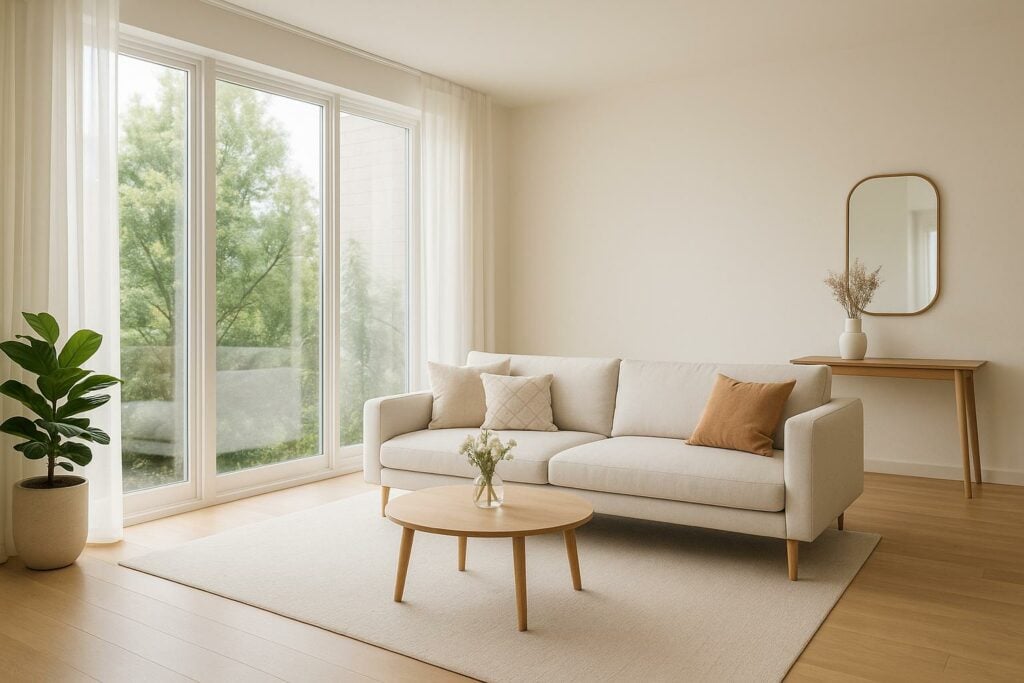
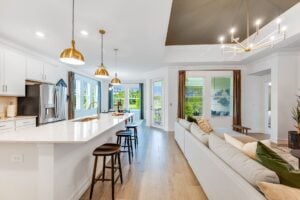
Natural light can make real estate photos look brighter, more inviting, and help homes sell faster. To get the best results, preparation and timing are critical. Here’s what you need to know:
- Timing Matters: Shoot during golden hours (early morning or late afternoon) for soft, warm light or midday for brighter spaces.
- Clean and Declutter: Clean windows, open blinds, and remove clutter to let light flow freely.
- Furniture Placement: Avoid blocking windows with large furniture and use glass or open-back pieces to enhance light distribution.
- Photography Tips: Use wide-angle lenses, tripods, and HDR techniques to balance lighting and capture room details effectively.
- Weather Considerations: Overcast days can offer soft, even lighting; avoid harsh midday sun without proper tools.
Professional services like HomeJab can simplify the process, providing polished photos with fast turnaround times. Whether you’re a homeowner or a real estate agent, these tips can help showcase properties in their best light.
Master Real Estate Photography Without a Flash
Best Times to Schedule Your Photo Shoot
When it comes to real estate photography, timing can make or break a shoot. Natural light transforms a space, and understanding how it shifts throughout the day is the secret to showcasing a property in its best light.
Golden Hour vs. Midday Light
The golden hour, typically between 6:00–8:00 AM and 5:00–7:00 PM (depending on the season), offers soft, warm light that creates a cozy and inviting atmosphere. This lighting minimizes harsh shadows and bathes interiors in a flattering glow.
On the other hand, midday light – from about 11:00 AM to 2:00 PM – provides the brightest illumination. While it can make spaces appear vibrant, it also introduces sharp contrasts and deep shadows, which might make rooms look smaller or inconsistently lit.
Property Orientation and Scheduling
A property’s orientation plays a significant role in lighting. East-facing rooms catch the morning light, while west-facing spaces shine in the late afternoon. North-facing rooms, especially during winter, may struggle to see direct sunlight until spring arrives.
Weather Considerations
Cloudy skies can be a photographer’s best friend. Overcast conditions diffuse sunlight, creating soft, even lighting that eliminates harsh shadows. On sunny days, while the bright light can highlight dramatic features, it may also cause overexposed areas if not carefully managed. Rainy or heavily overcast days may require extra post-processing – like HDR techniques – to balance exposure levels and bring out details.
Scheduling Tips for Professionals
For optimal results, plan shoots during broad daylight hours – usually between 8:00 AM and 4:00 PM. Before the shoot, consider visiting the property at different times to observe how the light interacts with each room. This can help you decide the best sequence for capturing spaces.
Allocate 3–4 hours per property to allow for flexibility. This gives you time to adjust for changing light, reshoot if needed, and take advantage of subtle shifts in natural lighting. Coordinate with homeowners to ensure blinds and curtains are open on the day of the shoot, keeping the lighting consistent with your earlier observations. Also, align the shoot with other preparations like decluttering and window cleaning to maximize the property’s appeal.
Preparing the Home to Maximize Natural Light
Bright, airy photos can make a world of difference, and a few simple tweaks can help you make the most of natural light.
Opening Blinds, Curtains, and Removing Screens
Letting in as much natural light as possible starts with the basics – fully opening blinds and curtains. If the windows have screens, consider removing them temporarily. This small step can make the light coming in appear crisper and more vibrant.
Cleaning Windows and Decluttering Window Areas
Clean windows are essential for showcasing a bright and inviting space. Dirt, smudges, or foggy glass can block light and dull the overall appearance of your photos.
Take the time to clean both the interior and exterior surfaces of the windows. Pay extra attention to grime or buildup on the outside, as this can significantly reduce the amount of light that enters. Additionally, keep the areas around windows free of clutter to ensure nothing blocks the light from spreading throughout the room.
Turning Off Artificial Lights
To maximize the effect of natural light, turn off all artificial lights. This allows the natural brightness to shine undistorted, creating a more authentic and appealing look for your photos.
Staging Interiors to Optimize Light Flow
After preparing the home’s physical features to welcome natural light, it’s time to focus on the interior layout. Thoughtful staging can significantly enhance how light moves through a space. By carefully arranging furniture and selecting the right pieces, you can ensure that natural light not only enters but also flows freely throughout the room.
Arranging Furniture and Creating Clear Pathways for Light
The way furniture is positioned can either amplify or block natural light. Place key furniture pieces, like sofas, chairs, or desks, near windows to take full advantage of sunlight streaming in. This approach not only brightens the room but also creates inviting spaces that encourage use.
Avoid placing tall or bulky furniture in front of windows or glass doors, as these can obstruct light from spreading. Instead, keep the area in front of windows clear or use low-profile furniture to allow sunlight to reach farther into the room. You can also angle furniture toward natural light sources for a more open and welcoming feel.
Clear pathways are just as important as furniture placement. Maintain at least 30–36 inches of clearance for main walkways and 18–24 inches between furniture pieces . This not only improves functionality but also helps light circulate more freely. Arranging furniture in conversational groupings, rather than pushing everything against the walls, creates a sense of openness and makes the room feel larger. To further enhance this effect, opt for low-profile furniture that doesn’t block sightlines and lets light flow unimpeded. Adding a slight diagonal angle to sofas or chairs can bring visual interest while maintaining an airy atmosphere.
Incorporating Transparent Furniture and Open-Back Seating
Choosing furniture that allows light to pass through is another effective way to keep spaces bright. Transparent pieces, such as glass or Lucite tables, are excellent options for maintaining an open, airy feel. Similarly, open-back seating helps preserve sightlines and ensures that light isn’t blocked, further enhancing the room’s brightness.
Selecting Open Storage and Multi-Functional Furniture
Storage solutions can also impact light flow. Opt for open shelving instead of closed cabinets in areas where you want to preserve brightness. Open shelving not only keeps the space feeling light but also adds a decorative element. Additionally, multi-functional furniture helps reduce clutter, which allows natural light to move more freely and makes the room feel less cramped. These thoughtful choices can maximize both the functionality and aesthetic appeal of the space.
sbb-itb-82c5f45
Using the Right Photography Techniques and Tools
Once you’ve staged your interiors to make the most of natural light, the next step is to focus on capturing that light effectively. Real estate photography thrives on the right techniques and tools, especially when you’re working exclusively with natural light to showcase a property.
Essential Equipment for Natural Light Photography
To get the best results, having the right gear is non-negotiable. Start with a sturdy tripod – it’s a must-have for avoiding camera shake, especially when using slower shutter speeds to capture more light.
For lenses, wide-angle options between 14mm and 24mm are ideal. They allow you to capture more of the room in one shot while letting in plenty of natural light. If possible, opt for lenses with a wide maximum aperture, like f/2.8 or f/4, as these perform better in lower light conditions by gathering more light.
Polarizing filters are another handy tool. They help reduce glare from windows and reflective surfaces, balancing the bright outdoor light with the interior. This is especially useful when photographing spaces with large windows during midday. A remote shutter release or intervalometer is also key for longer exposures, ensuring your shots stay sharp without any accidental movement.
With these tools in place, you’re ready to fine-tune your camera settings for the best results.
Camera Settings for Natural Light Photography
Getting the settings right can make all the difference in how your photos turn out. Start by setting your white balance to daylight mode (around 5,500K). This ensures accurate color representation and avoids any unwanted warm or cool tones that auto white balance might introduce.
Keep your ISO between 100 and 400 to minimize noise and maintain clear, crisp images. Since natural light photography relies on available light, it’s best to avoid cranking up the ISO too high. For aperture, stick to f/8 to f/11, as this range provides sharp focus throughout the room while maintaining a good depth of field.
For high-contrast scenes – like bright windows against darker walls – use exposure bracketing to capture multiple exposures of the same shot. And always shoot in RAW format. RAW files give you the flexibility to adjust exposure, highlights, and shadows during post-processing, ensuring you get the most out of your images.
Post-Processing and HDR Techniques
Once you’ve captured your shots, post-processing is where you can truly refine them. Tools like Adobe Lightroom and Photoshop are invaluable for enhancing natural light photos. Focus on tweaking highlights and shadows to balance the exposure between bright windows and darker interior areas. For example, you can recover details in overexposed windows or brighten up shadowy corners to make the space feel more inviting.
HDR (High Dynamic Range) photography is another technique worth mastering. By combining multiple exposures of the same scene, you can create a single image with balanced lighting throughout. Aim to capture at least three bracketed exposures – typically at -2, 0, and +2 stops – to ensure you capture all the details in both the highlights and shadows.
You can use software like Aurora HDR or Photomatix to merge these exposures automatically. However, many photographers prefer manually blending exposures in Photoshop for greater control over the final image. Just be careful not to overdo it – over-processed HDR images can look unnatural and detract from the home’s appeal.
Finally, pay attention to color correction. Natural light changes throughout the day – morning light is cooler, while afternoon light is warmer. Adjust the color temperature in your photos to maintain consistency across the entire property listing. This small detail can make a big difference in presenting a cohesive and realistic view of the home.
Working with HomeJab‘s Professional Services
Even experienced photographers can benefit from collaborating with specialists to save time and achieve exceptional results. HomeJab connects you with a network of vetted local photographers who excel at using natural light to enhance property photos. By leveraging these experts, you can ensure that every property is presented in its best light – literally and figuratively.
HomeJab’s Natural Light Photography Services
HomeJab’s photographers are well-versed in the natural light techniques we’ve discussed earlier. When you book their HDR photography services – priced between $229 and $379 for 15 to 50 photos – you’re hiring professionals skilled at balancing bright windows with darker interiors using advanced HDR and post-processing methods.
Their standard photo packages are available from $175 to $259, depending on the size of the property and the number of photos required. What makes HomeJab stand out is their use of specialized equipment like wide-angle lenses, tripods, and polarizing filters. Timing is also a priority for their photographers, who can work with you to schedule shoots during the most favorable natural light conditions.
For a broader perspective, HomeJab offers aerial photography services priced between $249 and $499. These drone shots capture exterior angles that highlight how sunlight interacts with the property throughout the day. This can be particularly appealing to buyers who value bright, naturally-lit interiors, as the orientation of the home is clearly showcased.
Fast Turnaround and Nationwide Coverage
In addition to their high-quality photography, HomeJab provides fast delivery and nationwide availability. One of their standout features is the 24-hour turnaround time, which allows you to schedule a shoot on Monday and have polished, professional photos ready for your listing by Tuesday. This quick service is a game-changer in competitive real estate markets, where speed can mean the difference between multiple offers and a property lingering unsold.
HomeJab operates across the United States, so whether you’re listing a sunlit ranch in California or a historic brownstone in Boston, they’ve got you covered. Their photographers adapt their approach to suit local conditions – for example, managing Seattle’s overcast skies differently than the intense midday sun in Phoenix.
The platform takes care of all scheduling and coordination, so you don’t have to spend time researching local photographers or worrying about whether they have the right gear. All you need to do is book the service, prepare the property using the staging tips we’ve outlined, and let the pros handle the rest.
Additional Services to Elevate Your Listings
HomeJab also offers a range of services to enhance your property listings. Their 3D virtual tours, priced between $315 and $869, are particularly effective when combined with natural light preparation. These tours allow prospective buyers to experience how sunlight moves through the home at different times of day, making the space feel more inviting and dynamic.
For empty properties, their virtual staging service – at $50 per photo – can illustrate how furniture placement impacts light flow. This is especially helpful for showcasing how natural light interacts with a fully furnished room, giving buyers a better sense of the home’s potential.
Homes with breathtaking sunrise or sunset views can benefit from HomeJab’s twilight photography. These dramatic shots capture the property during those golden hour moments we’ve mentioned earlier, often creating the eye-catching hero images that draw buyers to your listing.
For agents who frequently require professional photography, HomeJab offers bulk pricing options. With a $50 credit for every $1,000 spent, it’s easier to maintain consistent, high-quality visuals across multiple listings without breaking the bank.
Key Points for Natural Light Photography Success
Making the most of natural light can transform property photos, adding brightness and depth that truly stand out. Timing plays a big role – shooting during the golden hour or between 10:00 AM and 2:00 PM provides optimal lighting conditions for capturing stunning images.
Start with clean, unobstructed windows. A quick window prep can make a huge difference – removing screens, for instance, eliminates unwanted patterns that might show up in your photos.
Thoughtful staging also helps distribute natural light effectively. Incorporate light-colored decor, reflective surfaces, and maintain clear pathways to allow light to flow freely throughout the space.
Weather is another factor to keep in mind. Overcast skies can create soft, even lighting, while bright sunlight highlights architectural features. However, it’s best to avoid shooting during storms or heavy cloud cover, as unpredictable lighting can complicate the process.
For consistently professional results, use tools like HDR, wide-angle lenses, and a sturdy tripod. These tools help ensure balanced, sharp images that elevate your photos beyond amateur levels.
If you want to take things up a notch, consider professional photography services. HomeJab, for example, specializes in capturing natural light across various property types and conditions. With experienced photographers, quick 24-hour turnaround times, and pricing ranging from $175 to $379, they allow you to focus on other aspects of your listing while ensuring your photos are polished and professional.
FAQs
What’s the best way to prepare my home for natural light real estate photography?
To make the most of natural light in real estate photography, the first step is to switch off all artificial lights. This helps avoid any unwanted color inconsistencies in your photos. Plan your shoot for mid-day when natural light is at its peak and has a softer quality. Prioritize rooms with large windows or abundant natural light, and be sure to open curtains and blinds fully to let in as much brightness as possible. Remove any items that might block the windows to maximize the light flow.
When it comes to staging, keep the areas clean and free of clutter to draw attention to the home’s standout features. Observe how the light interacts with each room – soft, diffused light creates a warm and balanced look that feels inviting. With the right preparation, you can ensure every photo captures a bright, spacious, and welcoming atmosphere.
What makes golden hour better than midday for real estate photography?
Golden hour – right after sunrise or just before sunset – provides soft, warm, and diffused light that can elevate real estate photography. This gentle lighting reduces harsh shadows, accentuates textures, and adds a natural, inviting glow to your images, making properties feel more appealing.
On the other hand, shooting at midday often results in harsh light, deep shadows, and overexposed spots, which can diminish a property’s visual charm. By planning your photo sessions during golden hour, you can capture the home in its most flattering light, ensuring your listings grab the attention of potential buyers.
How does HomeJab improve real estate photography by leveraging natural light?
HomeJab takes real estate photography to the next level by connecting you with skilled photographers who know how to showcase properties in their best light – literally. They use techniques like HDR imaging, which balances light and shadow, making every room look bright, welcoming, and true to its actual appearance.
Timing is everything, and these professionals know it. Whether it’s capturing the soft glow of the golden hour or ensuring spaces are perfectly staged by opening blinds and removing clutter, they focus on the details that make a difference. The result? Stunning, high-quality photos that highlight your property’s most attractive features and grab the attention of potential buyers.

