
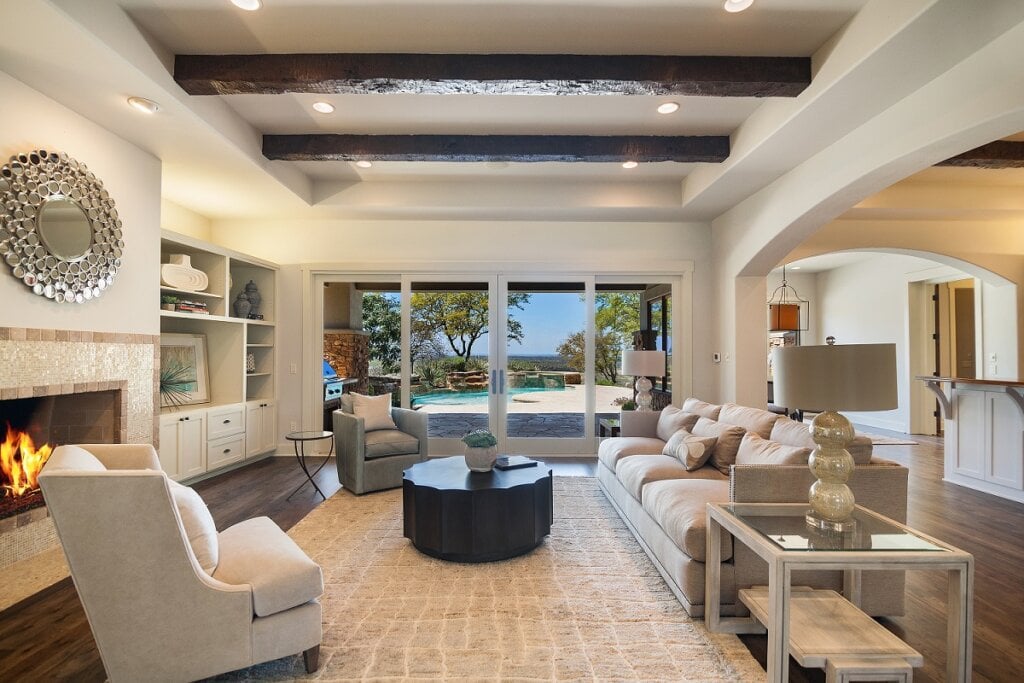
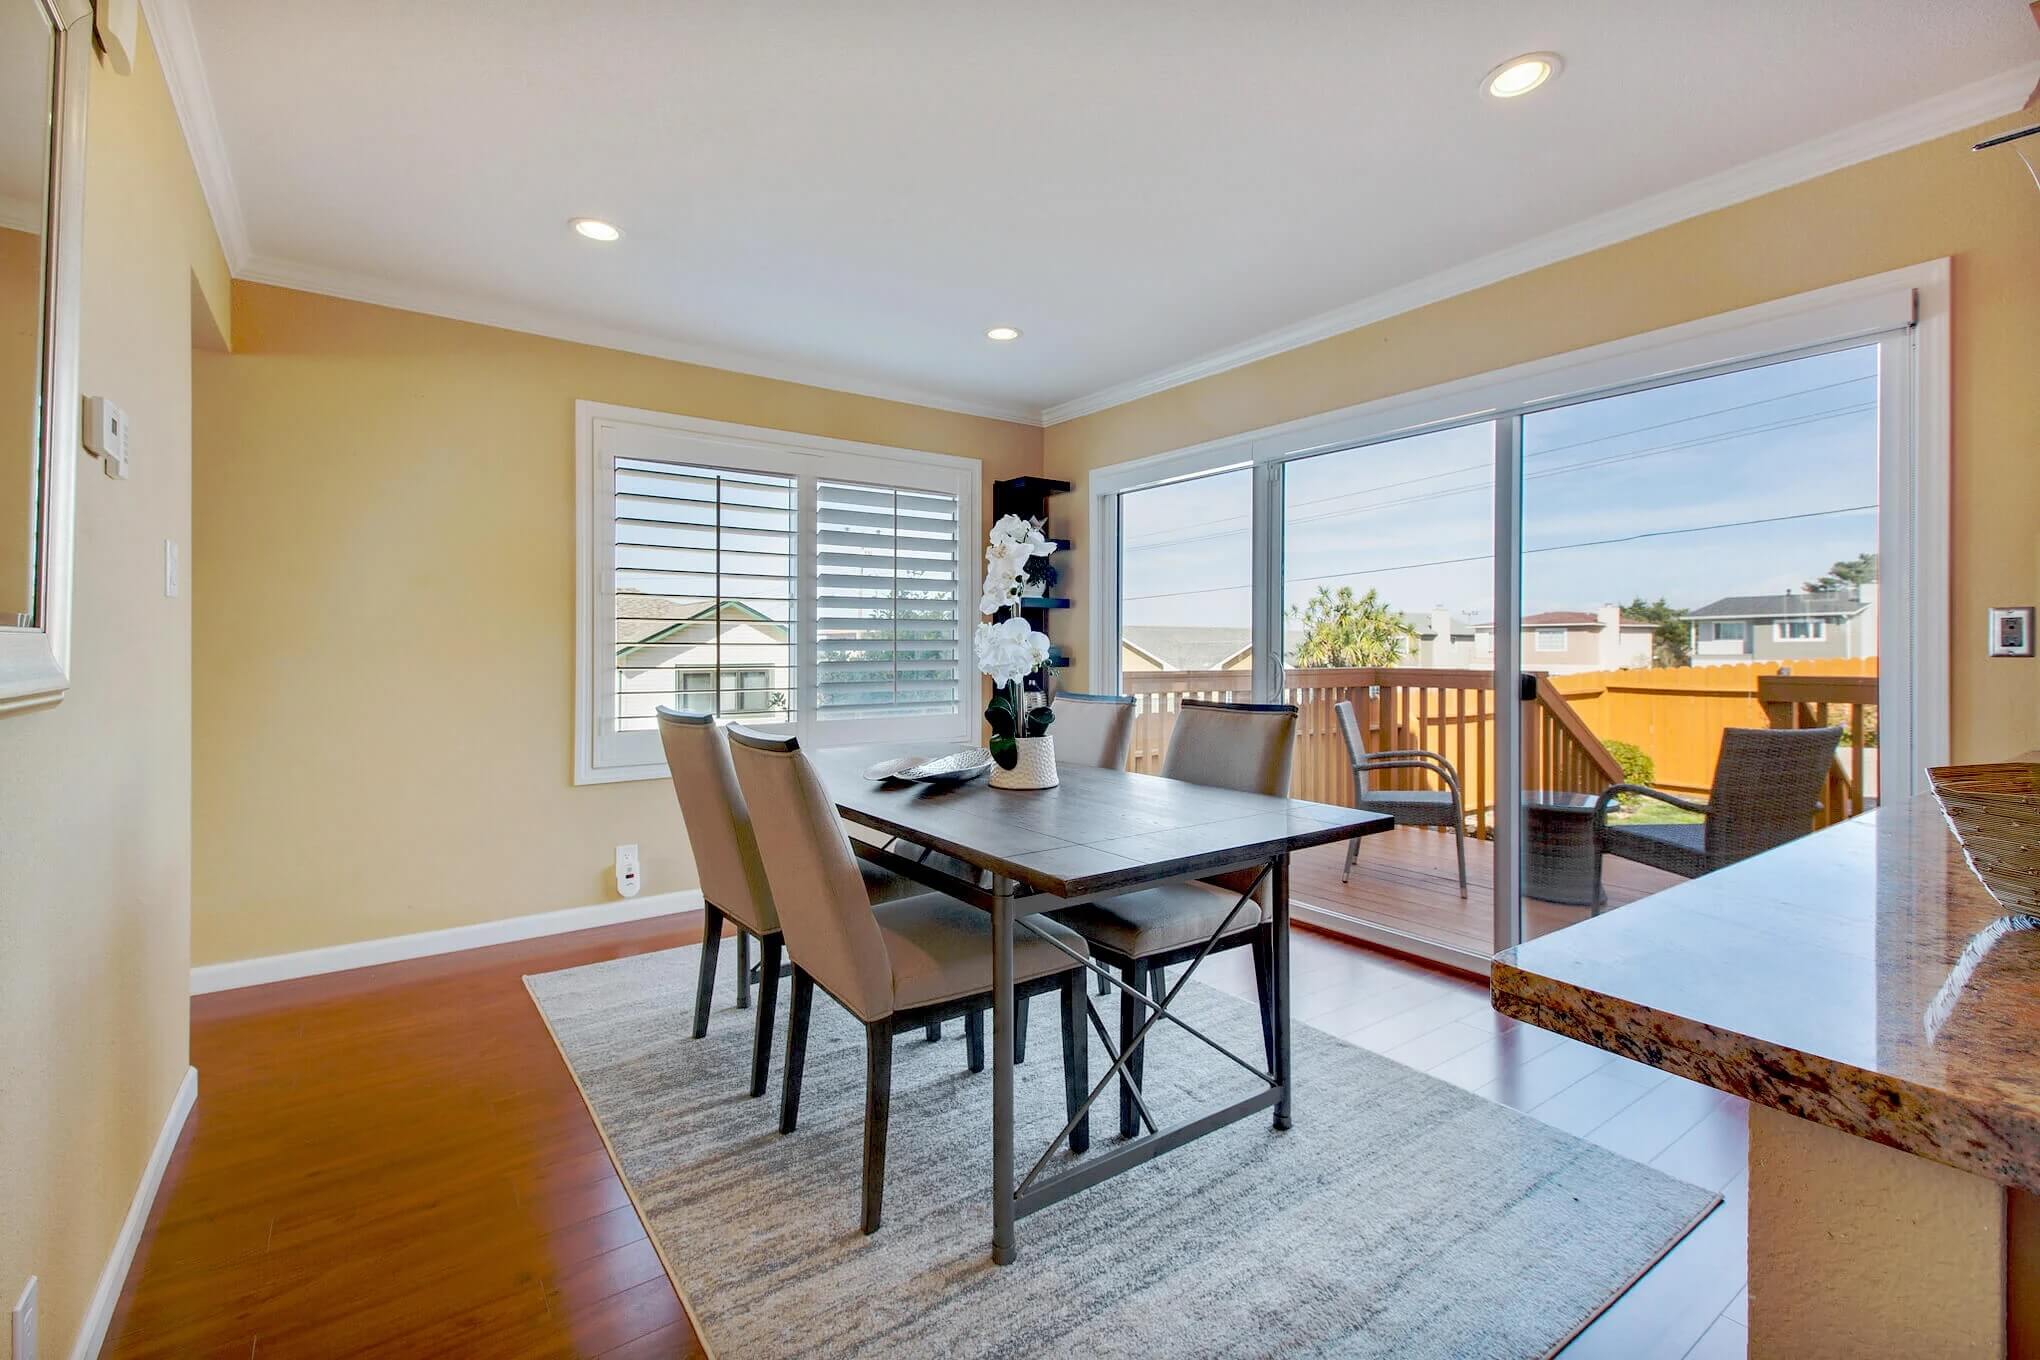
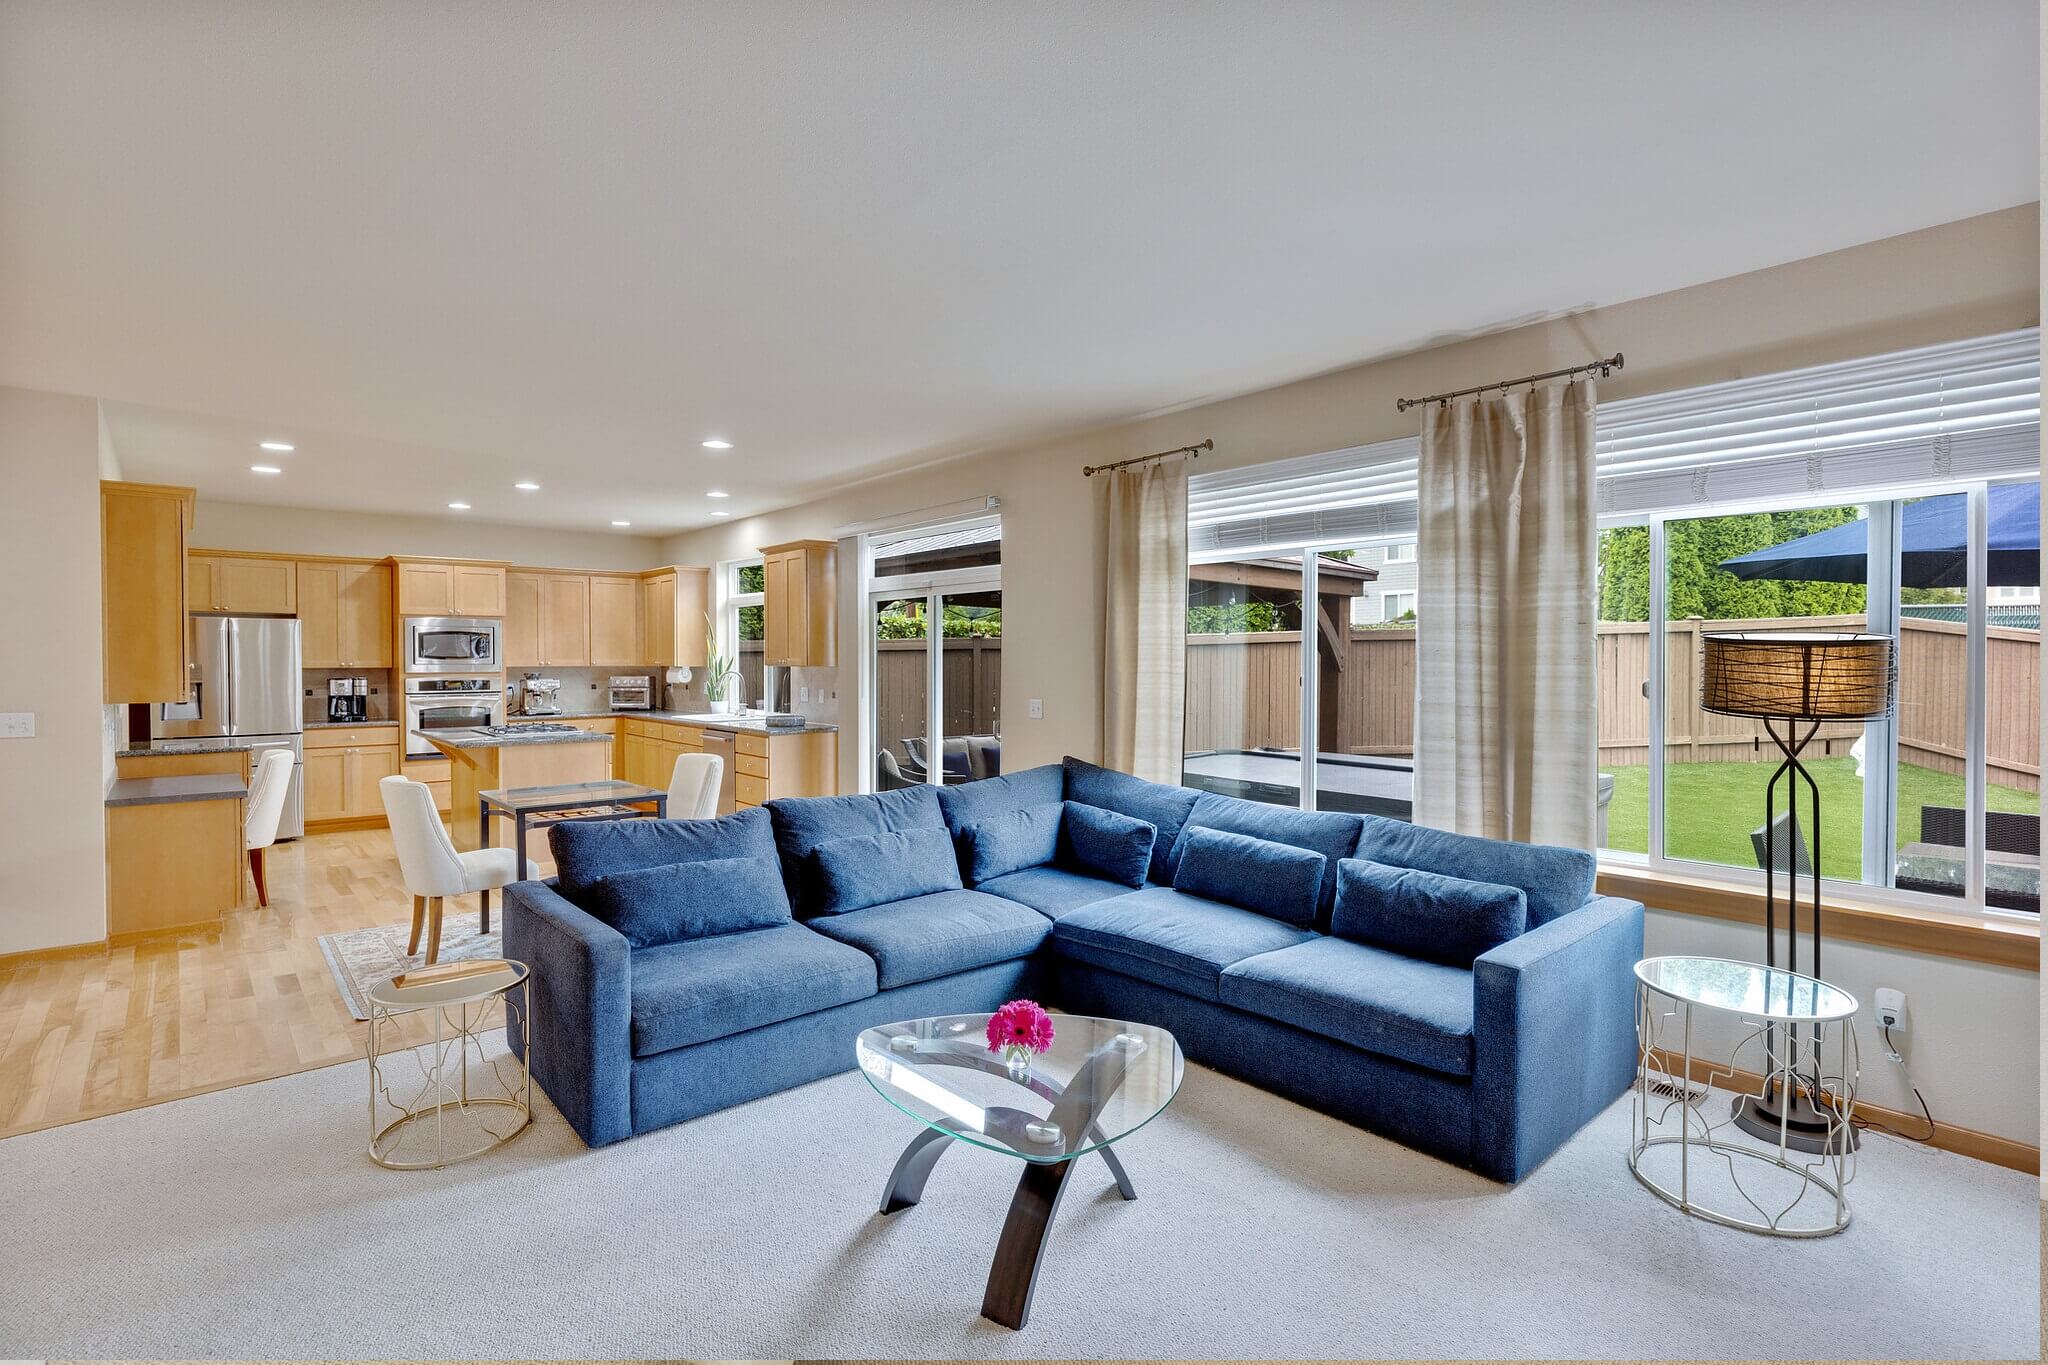
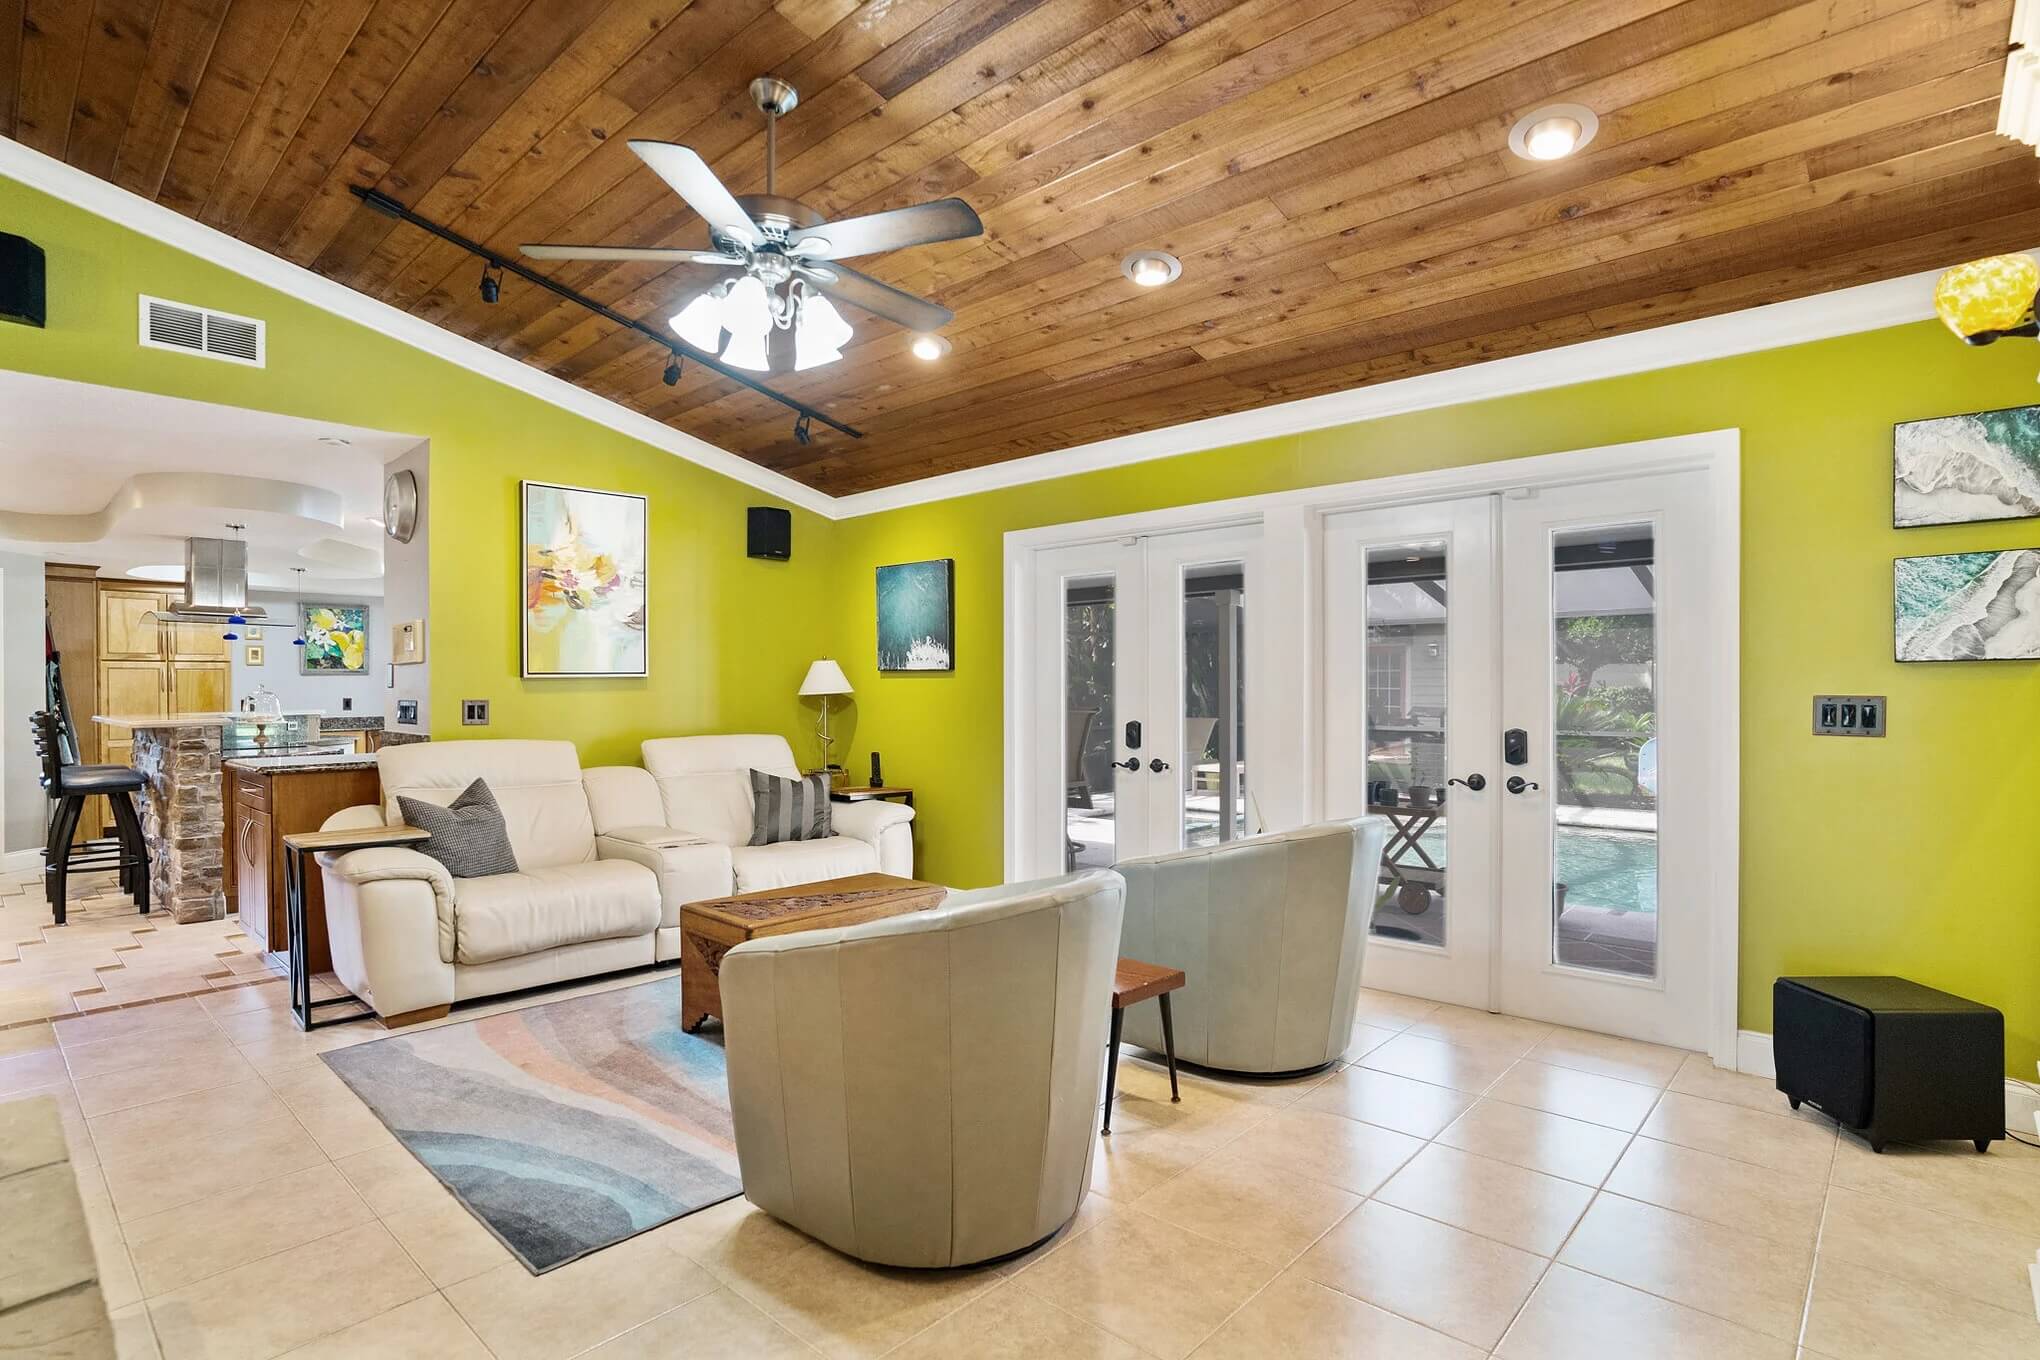
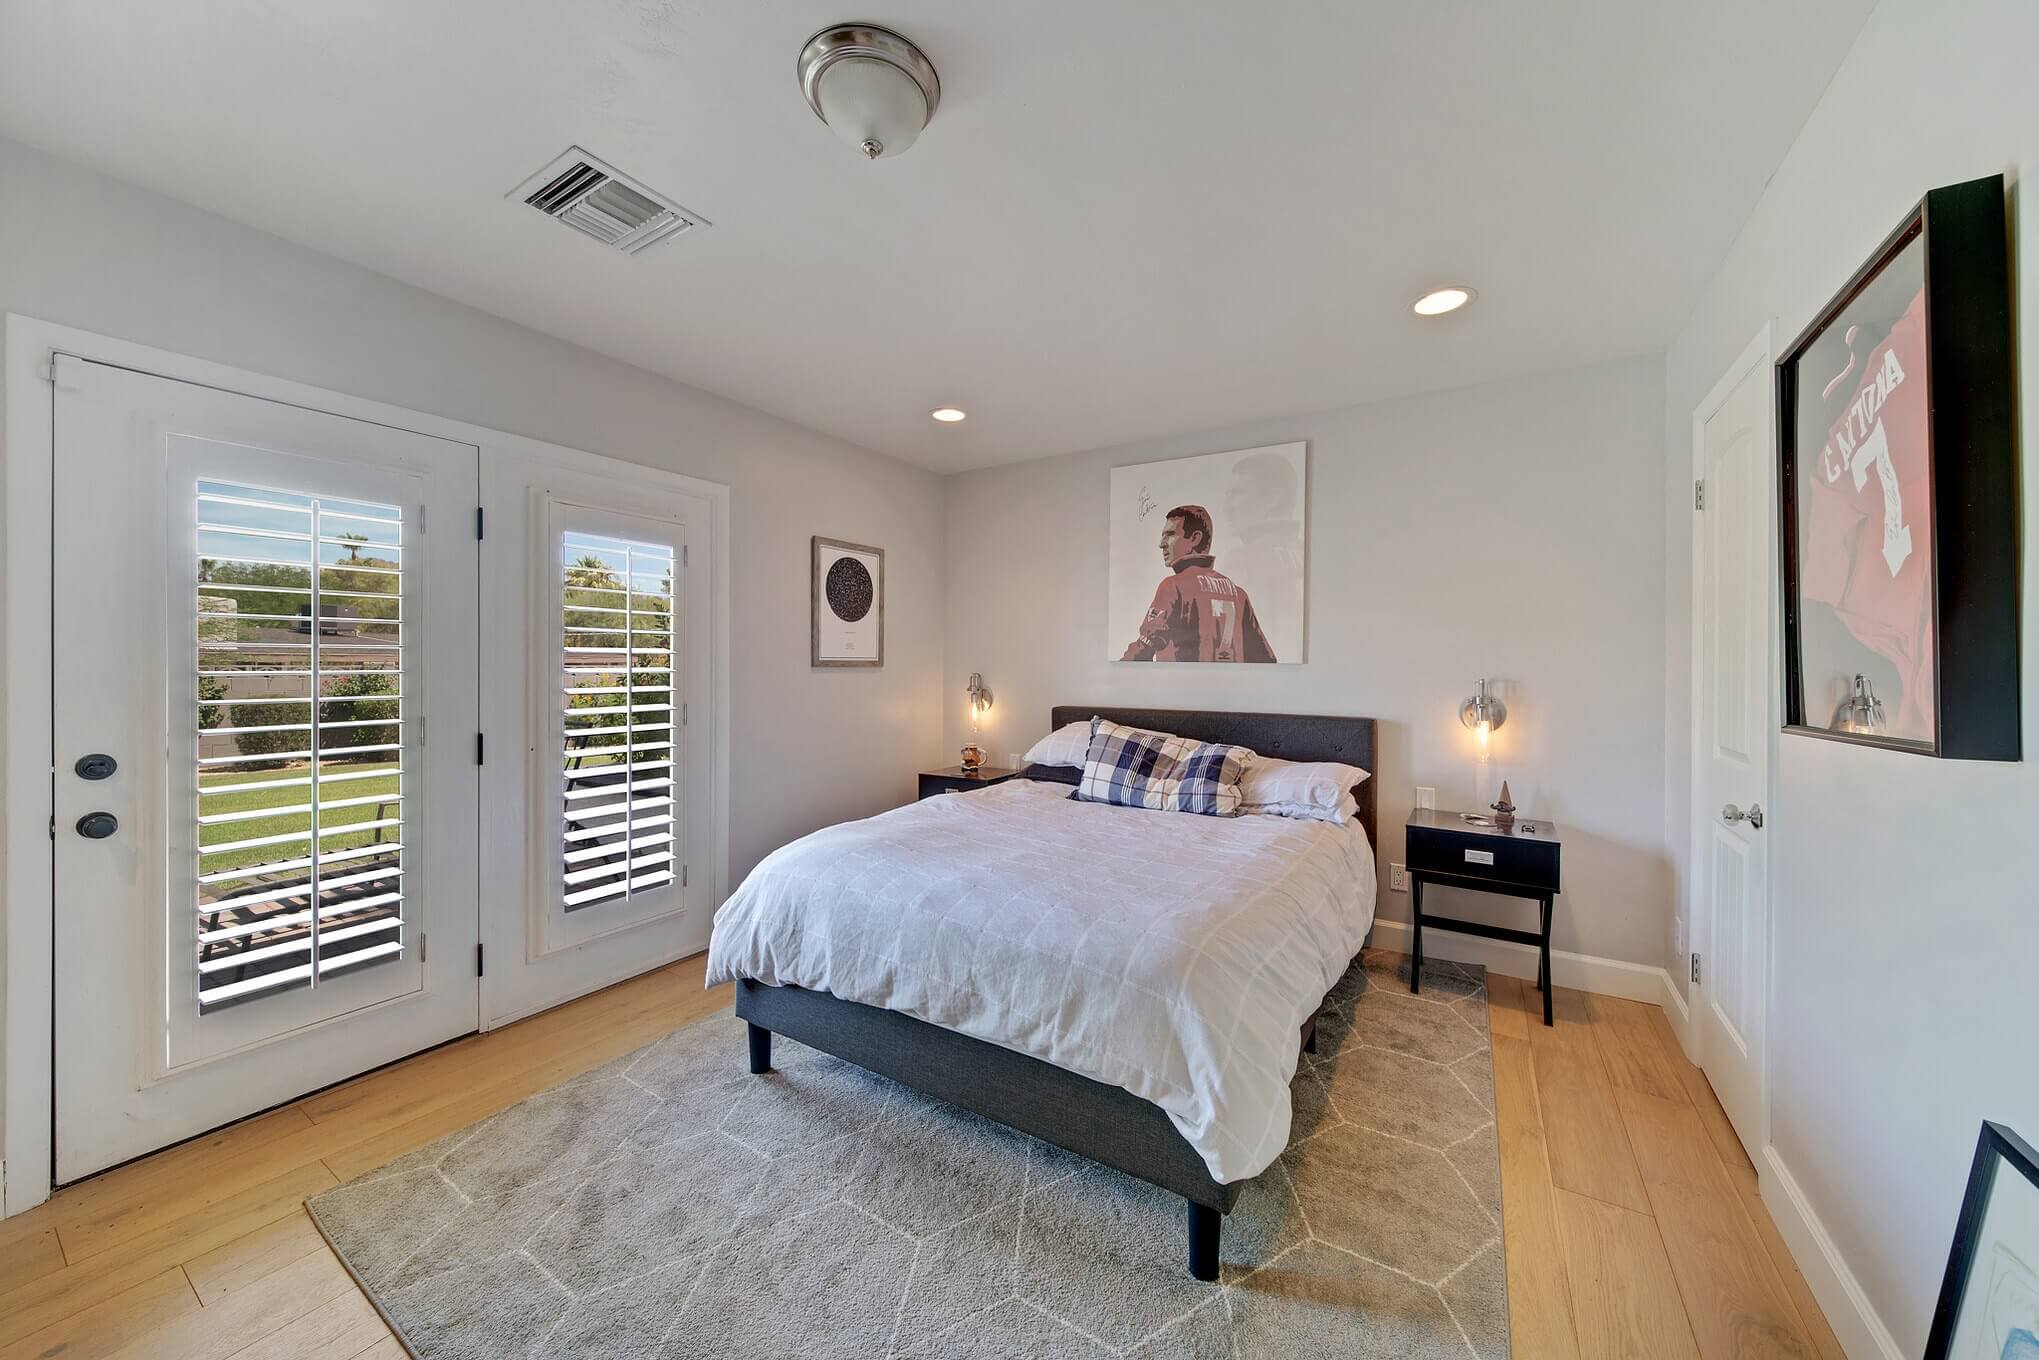
In real estate, first impressions are everything—HDR real estate photos play a major role in determining whether or not someone will schedule a showing. As such, it is essential that your photos are of the highest quality possible. One of the leading ways to ensure this is to use HDR real estate photography.
What Is HDR Real Estate Photography?
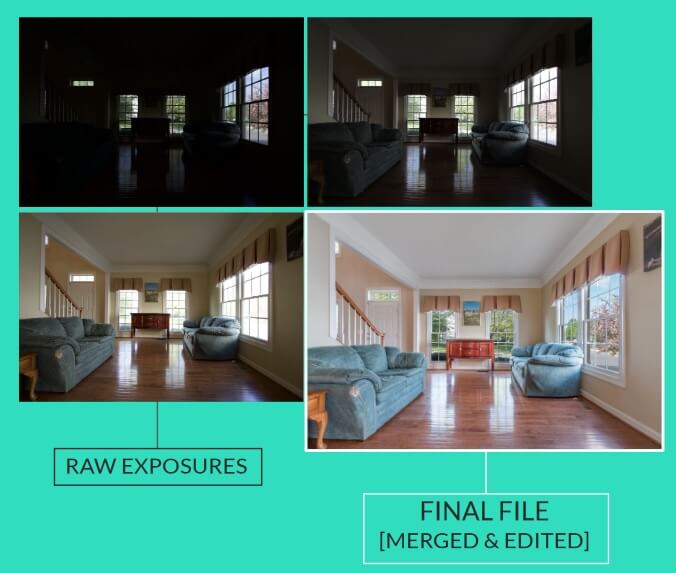
High Dynamic Range (HDR) photography is a technique that allows you to capture all the details in a scene, from the brightest highlights to the darkest shadows. By blending multiple images of different exposures together, you can create one stunning final image. HDR real estate photography can be especially helpful when photographing scenes with a lot of contrast—such as a property at sunset or sunrise.
By capturing multiple images at different exposures, you can ensure all the details in the scene are visible in the final image— creating dramatic effects by amplifying the difference between the light and dark areas of an image.
One advantage of HDR real estate photography is that it allows you to capture details that would otherwise be lost in shadows or highlights. This specialized photography can also add an increased sense of depth and dimensionality to your images.

Bracketing Real Estate Photography and Shooting HDR
When taking pictures of a property, architectural photographers typically use a technique called “bracketing.” This involves taking several shots of the same scene at different exposures in order to get the perfect photograph. In this blog post, we’ll explain what bracketing is and how you can use it to take better real estate photos.
What Is Bracketing Real Estate Photography?
Bracketing is the process of taking multiple photographs of the same scene at different exposures. Typically, three shots are taken: one underexposed, one properly exposed, and one overexposed. By doing this, the photographer increases the chances of getting at least one photo that is perfectly exposed.
Why Bracket?
There are many situations in which bracketing is useful, but it is especially helpful when photographing real estate. This is because properties can have a wide range of brightness levels, from dark interiors to bright exteriors. By taking multiple shots at different exposures, you can be sure that you’ll get a photo that captures all the details of the property without being too dark or too light.
How to Bracket and Capture HDR Real Estate Photos
If you’re using a DSLR camera, you can set it to take bracketed shots automatically. Most cameras have an exposure compensation feature that allows you to specify how much lighter or darker you want your photos to be.
For example, if you set the exposure compensation to -2, the camera will take underexposed photos; if you set it to +2, the camera will take overexposed photos.
To get started, set your camera up on a tripod and compose your shot. Once you’re pleased with the composition, it’s time to start taking pictures. For most scenes, you’ll want to take at least three photos: one underexposed, one properly exposed, and one overexposed.
To underexpose your image, use a lower shutter speed or wider aperture than you would for a properly exposed photo. For an overexposed image, do the opposite.
The Benefits of HDR Real Estate Photos
When it comes to real estate photography, quality is key. After all, first impressions matter, and potential buyers will often make up their mind about a property within seconds of seeing it. That’s why more and more real estate agents are turning to HDR real estate photography to make their listings stand out from the competition.
Increased Detail and Clarity
One of the biggest advantages of HDR photography is that it allows you to capture an incredible amount of detail and clarity in your images. By blending multiple images of different exposures together, you’re able to create final images that are packed with detail and look absolutely stunning.
This is especially beneficial for real estate photography—potential buyers will want to see all the details of a property before making their decision.
Wider Dynamic Range
This means that you’re able to capture both the bright highlights and the dark shadows in an image without sacrificing one for the other. This is essential for real estate photography because properties often have both bright and dark areas—and you need potential buyers to see all aspects of the property clearly.
More Vibrant Colors
HDR real estate photography also tends to have more vibrant colors than traditional photographs. This is because HDR images are made up of multiple images of different exposures, which allows for a greater range of colors in the final image. You guessed it, potential buyers are often drawn to listings with bright, vibrant colors.
The Final Touch: Real Estate HDR Photo Editing
When it comes to editing HDR photos for real estate listings, there are a few things you’ll want to keep in mind. First, make sure that you’re using a photo editing software that supports HDR images (Adobe Photoshop and Lightroom are two popular options).
Secondly, take your time when editing your photos and don’t be afraid to experiment with different settings until you find something that looks good. With that said, here are some specific tips for editing HDR real estate photos:
Increase the Contrast Slightly
One of the benefits of HDR real estate photography is that it captures a wider range of tones and colors than a traditional photograph. However, this can also lead to your photos looking flat and lifeless if not edited properly.
To combat this, increase the contrast slightly when editing your HDR real estate photos. This will help bring out the details in the shadows and highlights, giving your photos more pop.
Saturate the Colors Cautiously
Another benefit of HDR photography is that it can produce very vibrant colors. However, you’ll want to be careful not to go overboard with the saturation when editing your photos. If the colors are too saturated, they will appear unnatural and could turn potential buyers off. Instead, increase the saturation gradually until the colors look vivid but still realistic.

Straighten Crooked Horizons
Most photographers have a hard time taking perfectly level photographs, especially when shooting handheld. As a result, many HDR real estate photos end up with crooked horizons. Luckily, this is an easy fix in most photo editing software programs. Simply use the Straighten Tool (usually located under the transform options) to straighten out any crooked lines in your photo.
Dehaze
Many times, real estate properties shot in HDR can appear hazy or foggy due to the increased contrast between shades of color. To fix this, most photo editing software programs have a “Dehaze” tool which will automatically remove any unwanted haze from your photo with just a few clicks.
Play with Saturation and Vibrance
Saturation is the intensity of color in an image, while vibrance is the intensity of less saturated colors. Both saturation and vibrance can be adjusted in Adobe Photoshop and Lightroom; however, vibrance is generally considered a more subtle way to adjust colors since it affects less saturated colors first.
When editing saturation and vibrance, it’s important to find a balance so that your photo looks natural. If colors look too intense or oversaturated, it will look fake. On the other hand, if colors look desaturated or muted, your photo will appear dull. Again, small adjustments usually yield the best results.
As a general rule of thumb,increase saturation by 10-15% and vibrance by 20-30%. But every photo is different, so play around until you find a look that you like.
Corner Fixing
If you notice any dark corners or vignetting (a darkening of the edges of an image), you can easily fix this in Lightroom by going to the Develop module and adjusting the Lens Corrections settings. First check Enable Profile Correction; this will automatically fix any distortion caused by your camera lens. Then drag the Vignetting slider to the right until the dark corners disappear—usually around +30 works well.
The Key to Real Estate HDR Photo Editing
While HDR photography can produce some amazing results, there are a few things you should keep in mind if you decide to use this method for your real estate photos. First, it is important to have an experienced photographer who knows how to properly execute an HDR photo.
Implement HDR Real Estate Photography and Start Selling Fast!
If you’re looking to make your real estate listings stand out from the competition, then consider investing in HDR photography. With its increased detail and clarity, wider dynamic range, and more vibrant colors, HDR photography can help you capture stunning images that will wow potential buyers and help your listings sell fast!


